24
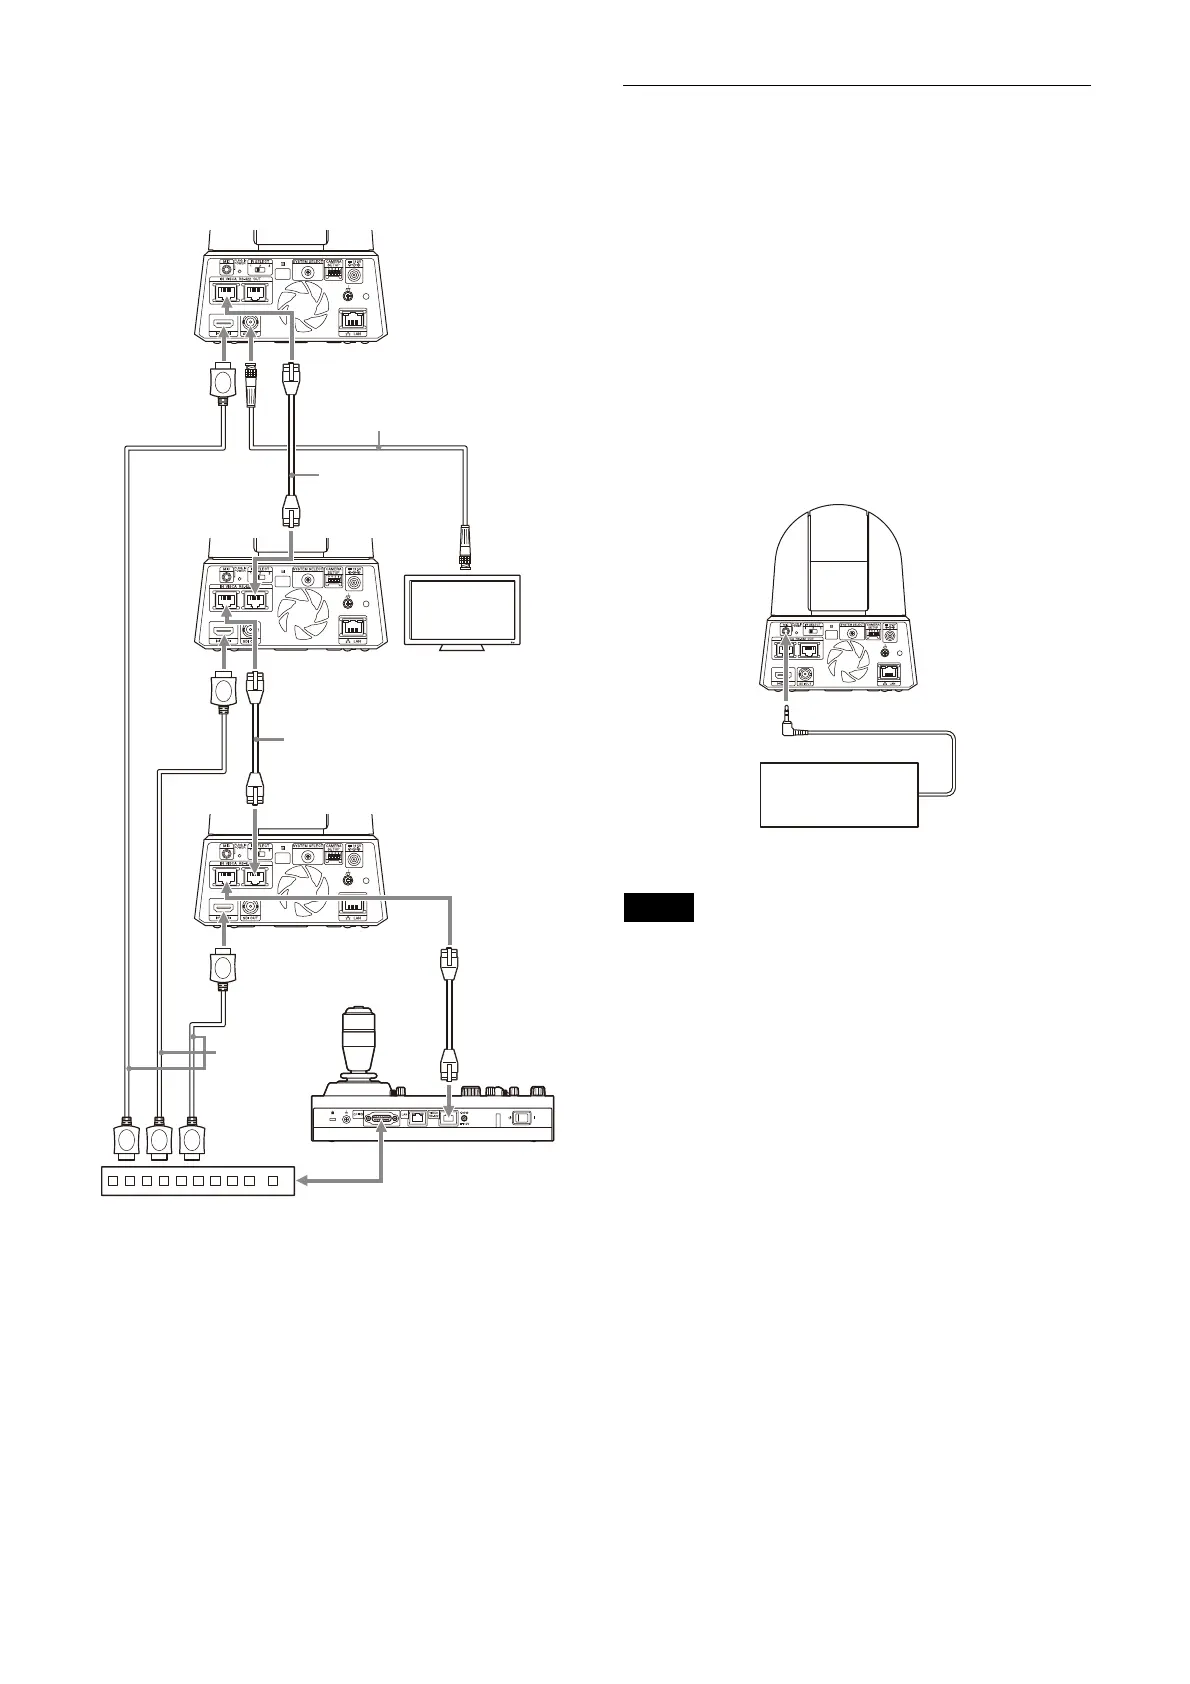
For HD output
When you want to switch cameras, connect a
c
ommercially available video switcher.
For the connection to the video switcher, refer to
the
operating instructions of the switcher.
* Use straight network cables.
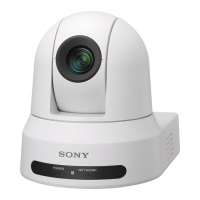
Connecting to commercially-
available microphones, etc.
Connect a commercially-available stereo
microphone, mixer, etc.
Input audio will be transmitted to the HDMI and
S
DI OUT output as well as IP network streaming
in stereo format.
Switch between the microphone input and line
i
nput from the Web App.
Connect a commercially-available stereo
m
icrophone when using the microphone input.
Connect using the stereo cable from a
c
ommercially-available mixer when using the
line input.
Notes
• Do not place the camera near devices that may
generate noise.
• If you place a microphone near this camera, it
ma
y pick up the sound from the camera.
Check the audio of the microphone input in
a
dvance when installing.
• When microphone input is selected, the
c
amera supplies 2.5 VDC Plug-in-power. Do not
connect a non-supported microphone when
the microphone input is selected.
Network cable
(commercially
available)*
Video monitor
Network cable
(commercially available)*
Network cable
(commercially
available)*
HDMI cable
(not supplied)
Video switcher
Connecting cable with
BNC connector
(commercially available)
Connecting control signals
This camera
Mixer, Microphone, etc.