36
GB
D:\NORM'S JOB\SONY HA\SO0071\STR-DN2010\GB\GB04GET_STR-DN2010-CEL.fm masterpage: Left
STR-DN2010
4-182-049-11(1)
6: Inserting the wireless
transmitter/transceiver
To use the S-AIR function, you need to insert
the wireless transmitter (not supplied) into the
S-AIR main unit (this receiver) and the
wireless transceiver (not supplied) into the
S-AIR sub unit.
Notes
• Before inserting the wireless transmitter/
transceiver, be sure to disconnect the AC power
cord (mains lead).
• Do not touch the terminals of the wireless
transmitter/transceiver.
To insert the wireless
transmitter into the S-AIR main
unit
1
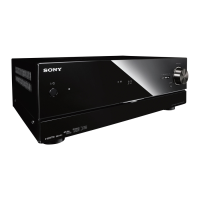
Remove the screws and detach the slot
cover.
Notes
• Remove the screws on the slot cover pointed
with g and G marks. Do not remove other
screws.
• The slot cover is no longer necessary.
However, keep it after detaching.
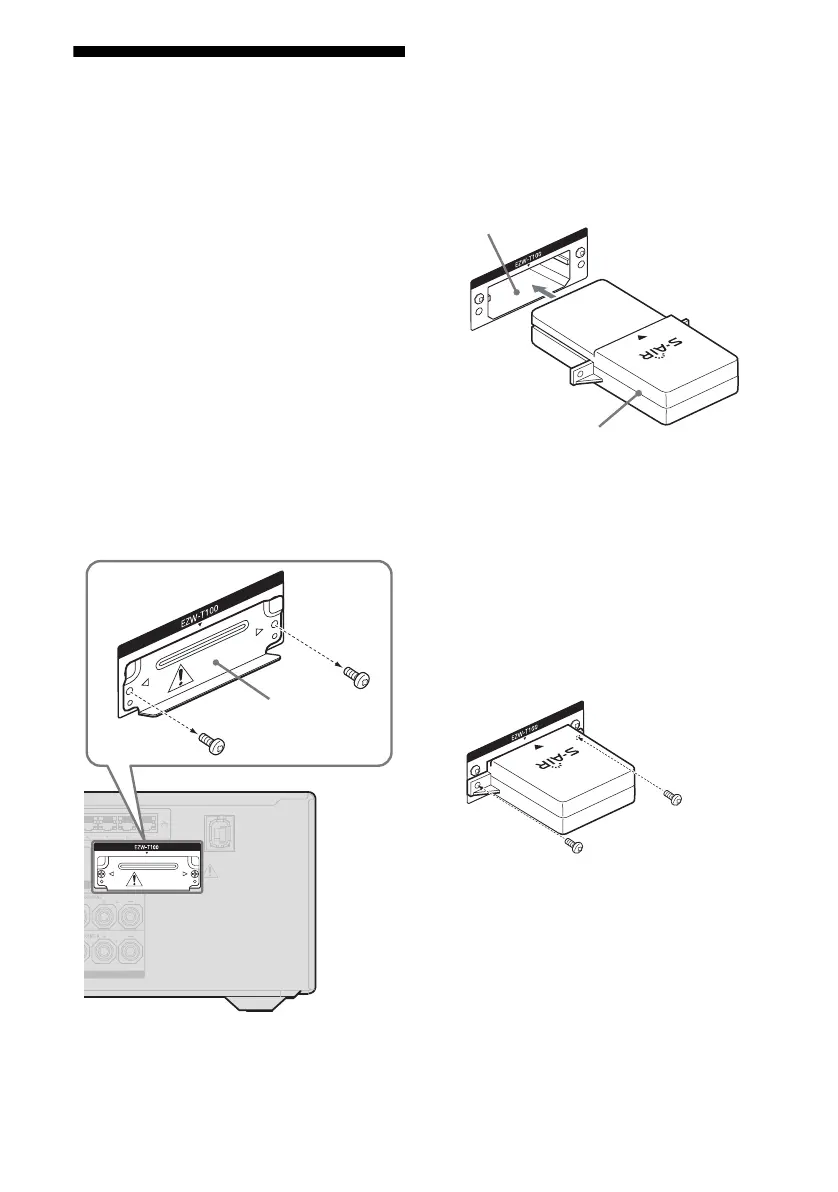
2 Insert the wireless transmitter.
Notes
• Insert the wireless transmitter with the S-AIR
logo facing up.
• Insert the wireless transmitter so that the V
marks are aligned.
• Do not insert other than the wireless
transmitter into the EZW-T100 slot.
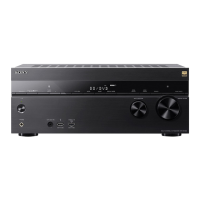
3 Use the screws that you removed from
step 1 to fasten the wireless
transmitter.
Note
Do not use other screws to fasten the wireless
transmitter.
To insert the wireless
transceiver into the S-AIR sub
unit
Refer to the operating instructions supplied
with the surround amplifier and S-AIR
receiver.
Slot cover
Wireless transmitter
EZW-T100 slot