45
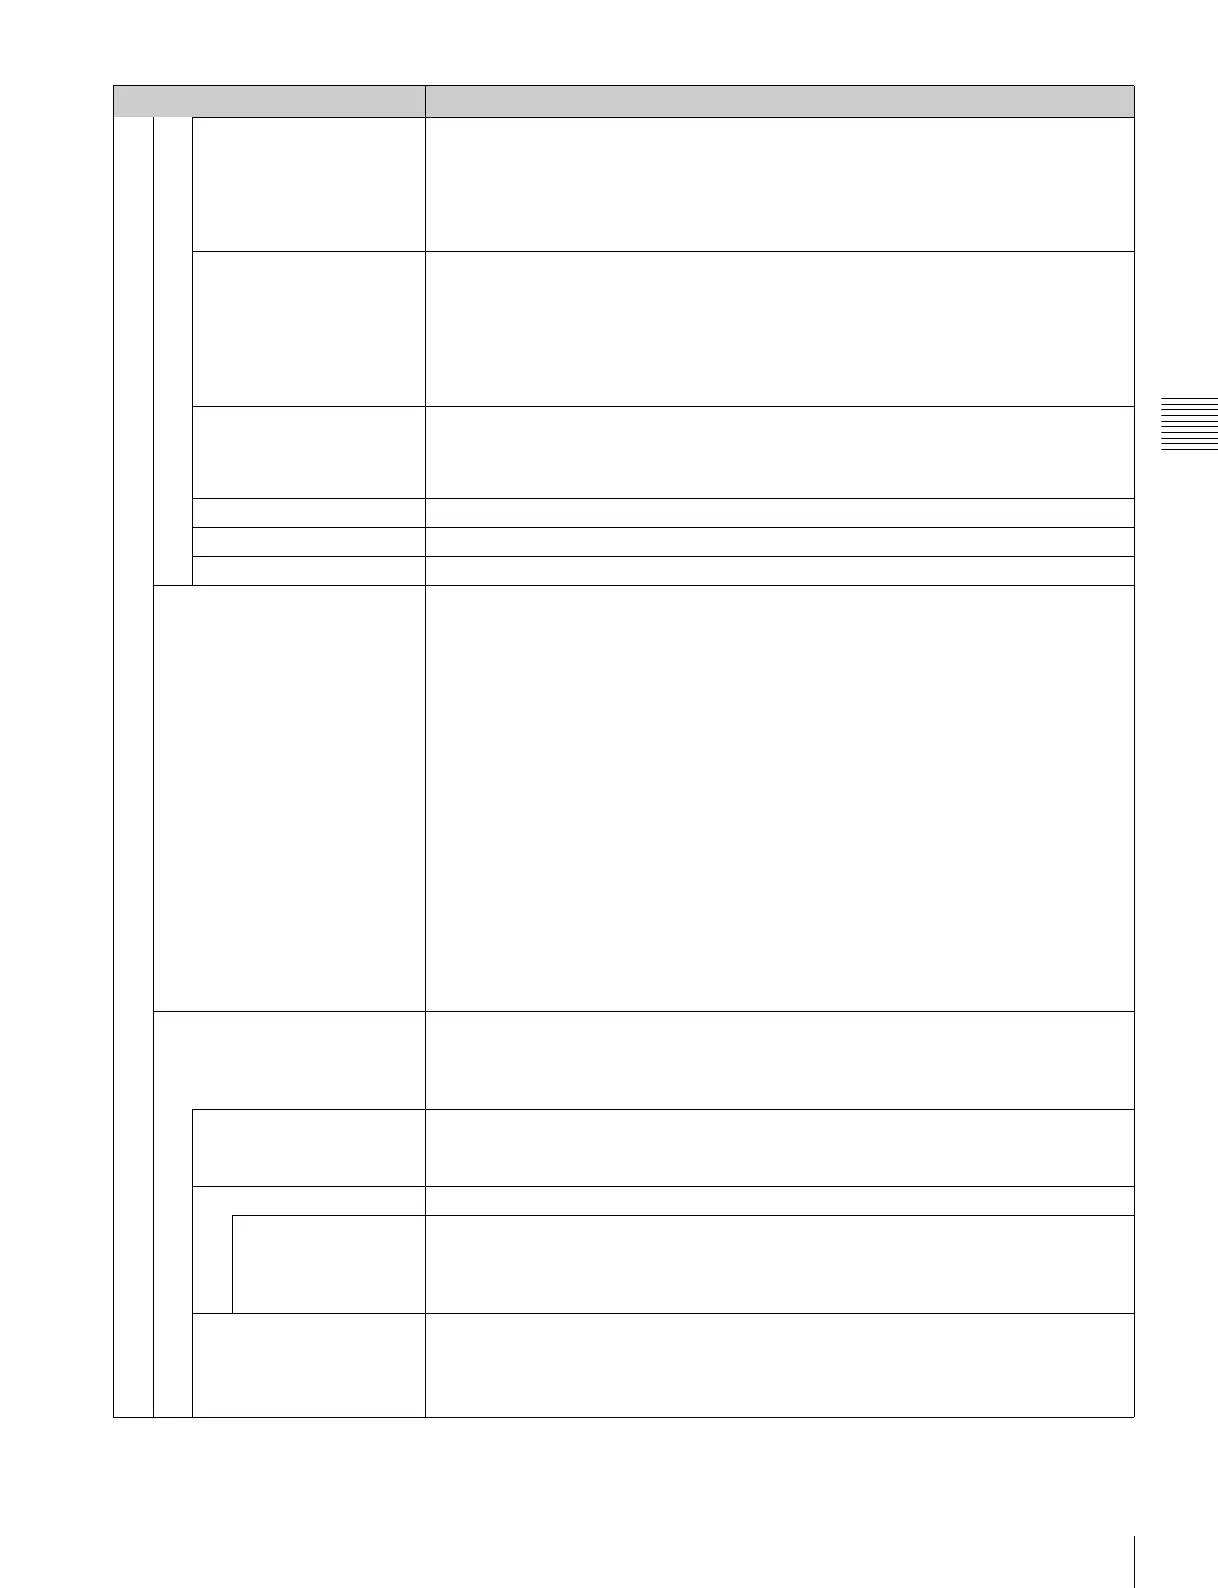
Adjustment Menu
Chapter 3 Menu
Picture Adj
Color Bar Sets the color-bar signal to input.
[Full Field 8]: 100% full-field 8-color bars (white, yellow, cyan, green, magenta, red, blue
and black)
SMPTE: SMPTE standard color bars
EIA: EIA standard color bars (effective for 480/60i and 575/50i signals only)
Multi Format: Color bars standardized by SMPTE RP219/ARIB STD-B28
Restore Factory Data Resets the automatic adjustment data of chroma, phase, matrix and signal level to the default
setting.
You cannot select this when the setting is the default value.
The following message appears.
Restore factory data?
OK: To reset the data, press the ENTER (Ent) button.
Cancel: To cancel, press the MENU button.
Status Displays the status of the automatic adjustment data of the chroma, phase, matrix and signal
level to be adjusted.
Not Adjusted: Displays when the data is not adjusted.
Adjusted: Displays when the data is adjusted.
Input Port Displays the input option port number of the automatic adjustment data to be adjusted.
Format Displays the signal format and signal system of the automatic adjustment data to be adjusted.
Matrix Displays the matrix of the automatic adjustment data to be adjusted.
Manual Adjust Adjusts values by turning the PHASE, CHROMA, BRIGHT, and/or CONTRAST knobs. After
adjustment, press the ENTER (Ent) button to confirm the adjusted values.
Phase: –150 to +150 [000]
Chroma: 0000 to 2000 [1000]
Bright: –500 to +500 [000]
Contrast: 0000 to 2500 [1000] (for Preset1 to Preset5), [0480] (for Preset (D-Cine))
To display no characters on the screen while adjusting manually
Set the CHAR OFF button to on. The characters disappear. To display characters, set the
CHAR OFF button to off.
To reset the setting to the default
Press the corresponding MANUAL button. The adjusted value is reset to the default.
To cancel adjustment
Press the MENU button. The adjustment data is cleared.
To confirm adjustment
Press the ENTER (Ent) button.
Note
During adjustment, the screen saver is activated automatically if the operating conditions are
met, regardless of the setting of the screen saver function.
Copy From Copies picture adjustment preset data.
Notes
• Automatic adjustment data is not copied.
• Use the controller with software version 1.6 or higher to use the Copy From function.
Preset Value Copies other data in this monitor.
When the item is selected, you can select from Preset1, Preset2, Preset3, Preset4, Preset5
or Preset (D-Cine).
Other Monitor Copies data from another monitor.
Monitor ID Enter the ID number of the source monitor.
When the NETWORK switch is set to PEER TO PEER, this is not selectable.
When the ID number is entered, you can select from Preset1, Preset2, Preset3, Preset4,
Preset5 or Preset (D-Cine).
Memory Stick Copies data in the “Memory Stick”.
When the item is selected, the file names in the source “Memory Stick” are displayed.
When the file is selected, you can select from Preset1, Preset2, Preset3,
Preset4, Preset5
or Preset (D-Cine).
Menu Function and operation ([ ]: factory setting)