– 38 –
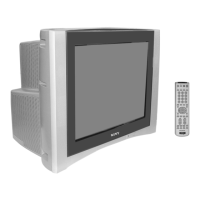
KV-DR29M39/DR29M63/
KV-DR29M69/DR29M89
RM-991
FOR WIDE MODE, DRC 1250 (60Hz)
15. Set to WIDE MODE : ON
16. Copy the DRC 1250 (60Hz) MODE and adjust the
following items to obtain optimum image.
Raise/lower the data with the [3] and [6] buttons.
GEO 00 VSZ V SIZE
01 VPS V POSITION
04 HSZ H SIZE
12 MPD MP PARA WAVE DC
BIAS CONTROL
14 PBP H CENT PARA WAVE SAW
LEVEL GAIN CONTROL
17. Adjust V Blanking for the following items.
GEO 1E VAS V ASPECT
1F VSC V SCROLL
18. Adjust the following items.
Service Item
GEO : 02 VLN V LINEARITY
03 SCO S CORRECTION
04 HSZ H SIZE
05 HPS H POSITION
06 PAP PIN AMP
07 UPN UPPER CORNER PIN
08 LPN LOWER CORNER PIN
09 UCG MOST UPPER CORNER
PIN ADJUSTMENT
0E PPH V TRAPEZOID ADJUSTMENT
0F AGL AFC ANGLE
10 BOW AFC BOW
11 HTR V SAWO WAVE SAW LEVEL
GAIN CONTROL
15 PBA H CENT PARA WAVE GAIN
CONTROL
19. Input a NTSC cross hatch/dot signal and repeat all above
steps.
6-6. A BOARD ADJUSTMENT AFTER IC003
(MEMORY) REPLACEMENT
1. Enter to Service Mode.
2. Press commander buttons 5 and - (Data Initialize), and
2 and - (Data Copy) to initialize the data.
3. Call each item number and check if the respective screen
shows the normal picture.
In cases where items are not well adjusted, rectify the items
with fine adjustment.
Write the data per each item number ([MUTING] +-).
4. Select item numbers “OPB00” (OP1), “OPB01” (OP2) and
respectively set the bit per model with command buttons 3
and 6.
5. Press commander buttons 8 and - (Test Normal) to return
to the data that was set on the shipment from the factory.
(This will also cancel Service Mode.)