Page 19
Step One: Grind cable square by placing the cable end against a grinding wheel. Care is to be
taken to assure the innercore is flush with outer cable. Grind outer cable and innercore down enough
to produce a flat contact surface between the cable and connector (splicer or coupling).
Step Two: Secure the cable into a vise, making sure innercore remains flush with outer cable.
Step Three: Clean connector and inside of cable from rust or dirt. (Care to be taken on cleaning
connector threads.) Also it may be necessary to deburr inside of cable.
Step Four: Insert connector into innercore in the manner of tightening a right hand threaded screw.
Tighten connector enough so that contact is made between outer cable and the connector face.
If required, step two through four should be repeated for the other cable end.
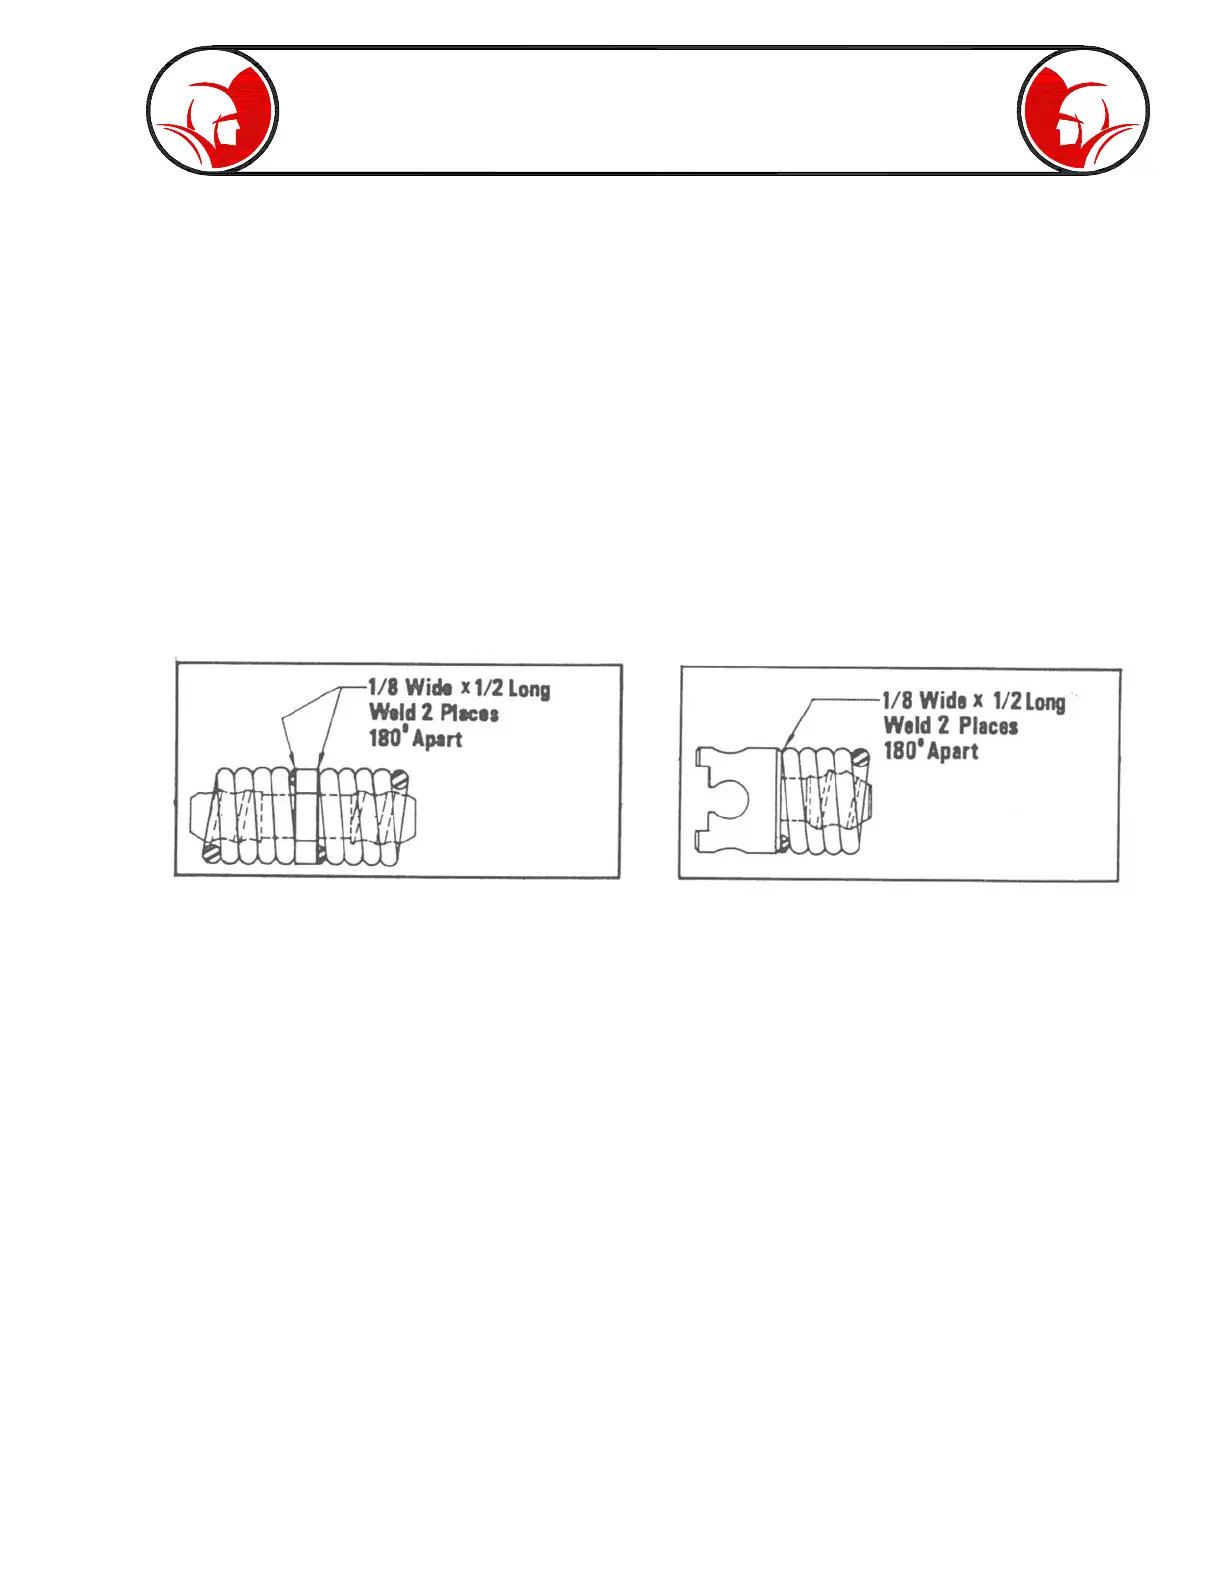
Step Five: Since the coupling and the wire in the cable are of high carbon steel, a special welding
process is required. Before welding, use a propane torch to preheat the area where the weld will be.
Hold the torch 4-5” away from the metal surface and heat for 2 minutes. Immediately, weld with an arc
welder, using 3/32” diameter unit rod #70 or equivalent chromium-stainless steel rod. Use a heat
range of 90-100 amps. Be sure weld bead is 1/8” wide and 1/2” long, where each wire end contacts
the coupling.
After welding, it will be necessary to stress relieve the welded area. Again, using a propane torch
holding 4-5” away from metal surface, heat up to approximately 5 minutes. Allow to cool and cable
will be ready for use.
NOTE: Never heat the cable to a cherry red color. This indicates too high a temperature and will
weaken the cable.
Figure 9
Figure 10
Maintenance
Instructions (cont.)
 Loading...