Page 30 MZC-66 Hardware Installation Instructions
ADDING A 12-CHANNEL AMPLIFIER TO A ZONE
In certain applications it may be desirable to expand a zone into multiple listening areas or ‘sub-zones’ that all play the same
source material for background music. This type of application might include an entry, hallways, guest bathrooms, etc. or a
mutiple-room suite such as a guest bedroom, bathroom and small patio. For this type of application, adding a twelve-chan-
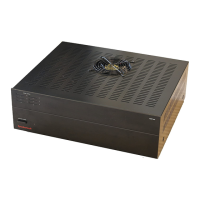
nel amplifi er such as the SpeakerCraft BB1235 is a simple way to distribute music to up to six additional rooms.
Adding a twelve-channel amp requires home runs of speaker wire from each sub-zone back to the head-end and one stereo
RCA-RCA patch cable needs to be connected between the MZC-66 Zone Pre-Out and the Amplifi er Main IN.
When using a SpeakerCraft BB1235, power management of the external amplifi er is automatic using the on-board audio
sensing circuitry. When the amplifi er receives an audio signal from the MZC-66 Zone Pre-Out, the external amplifi er will turn
on automatically. The BB1235 will shut off after three minutes of no audio signal. Other makes will vary in their specifi cations
and performance. Please refer to appropriate documentation for additional information.
Some amplifi ers use a 12 volt trigger input to turn on in this type of application (also an option on SpeakerCraft amplifi ers).
There are two methods of 12V control from a MZC-66. One method utilizes the Contact Closure pair as an ‘Event’ to turn the
amplifi er on and off with a specifi c zone. The other allows use of the MZC-66 Common Status Out. This second option will
have the amplifi er turn on when any zone is on and off when the last zone shuts off. When the amplifi er is driven from a
single zone, turning the external amplifi er on and off with that specifi c zone is recommended.
INSTALLATION
Additional space should be allocated for installation of a 12-channel amplifi er. Leave at least 3-4 inches above and below the
amp for proper air fl ow for cooling. If rack mounting, use cooling vents above and below the amp for increased air fl ow.
Mounting amplifi ers at the top of an equipment cabinet is recommended to reduce source components exposure to excess
heat. Use cooling fans (SpeakerCraft ESC-1) when necessary.
CONNECTIONS AND CONFIGURATION
AUDIO
1. Connect one, quality, RCA-RCA stereo audio patch cable from the appropriate MZC-66 Zone L&R PRE-OUT to the Bus
(or AUX Inputs on the 12-channel amplifi er. Refer to Figure 16
2. Set the VC/NVC Switch to NVC (fi xed). The Zone volume will be controlled via the sub-zone volume controls.
SPEAKERS
1. Connect the L+,L-/R-R+ Speaker-Level Outputs on the 12-channel amplifi er to the appropriate sub-zone volume con-
trols and speakers. Maintain proper polarity.
AUDIO SENSING
1. No additional connections required.
2. If using a SpeakerCraft BB1235, switch the Audio Sense/Trigger/Constant Switch to Audio Sense.
3. If using another brand of amplifi er with audio sensing, please refer to appropriate documentation for additional informa-
tion.
12V TRIGGER (ZONE SPECIFIC)
1. Connect a 12V DC Power Supply (such as the PS-1.0) in series with the MZC-66 Contact Closure pair as shown in
Figure 16. NOTE: To achieve a faster OFF time action, it may be necessary to place a 1K Ohm
1
⁄4 watt resister in shunt
with the black and white stripped leads of the power supply output.
2. If using a SpeakerCraft BB1235, terminate the control wire with a 3.5mm mini plug and plug it into the Trigger Input
jack. POLARITY: TIP=+12V; SLEEVE=GND. Switch the Audio Sense/Trigger/Constant Switch to Trigger Input.
3. If using another brand of amplifi er, terminate the control wire as appropriate. Be sure to maintain proper polarity.
4. Confi gure the Contact Closure as an Event for that zone in EZ-Tools. Set the Contact Closure to Close when turning
the zone ON and Open when turning the zone OFF.
12V TRIGGER (SYSTEM ACTIVITY)
1. Connect a 3.5mm mini-mini plug wire (SpeakerCraft PTP-1) to the MZC-66 Common Status OUT.
2. If using a SpeakerCraft BB1235, plug the other end into the Trigger Input jack. Switch the Audio Sense/Trigger/Con-
stant Switch to Trigger Input.
3. If using another brand of amplifi er, terminate the 12-channel amplifi er end as appropriate. Be sure to maintain proper
polarity.

 Loading...