17
ASSEMBLY
Insert the flip chip halves (A) into the rear shock eyelet (B) in the either
high or low orientation.
Slide the shock eyelet and flip chip assembly into the extension.
Grease and thread the rear shock mounting bolt (C) with washer (D) into
the extension.
Using a 6mm hex key, loosely tighten the bolt.
ADJUSTING THE FLIP CHIPS
The bicycle geometry can be adjusted by rotating the flip chips in the rear
shock eyelet. Depending on terrain or rider preference, the bicycle can be
set up to be short and playful (high) or long and slack for stability (low).
Remove the flip chips (A) from the rear shock eyelet (B).
Rotate both flip chips 180 degrees, then insert them back into the rear
shock eyelet in either the high or low position.
All models are assembled with the flip chip in the low position.
Switching from the low position to the high position raises the
bottom bracket height by 5 mm, and steepens the head tube angle
by 0.5 degrees.
WARNING! Changing the frame configuration (flip chip position,
tire size, fork length) can alter the bottom bracket height and/
or the head tube angle, which can have negative effects on the
bicycle’s handling characteristics and ride quality. Please refer
to your Authorized Specialized Retailer before making any
modifications.
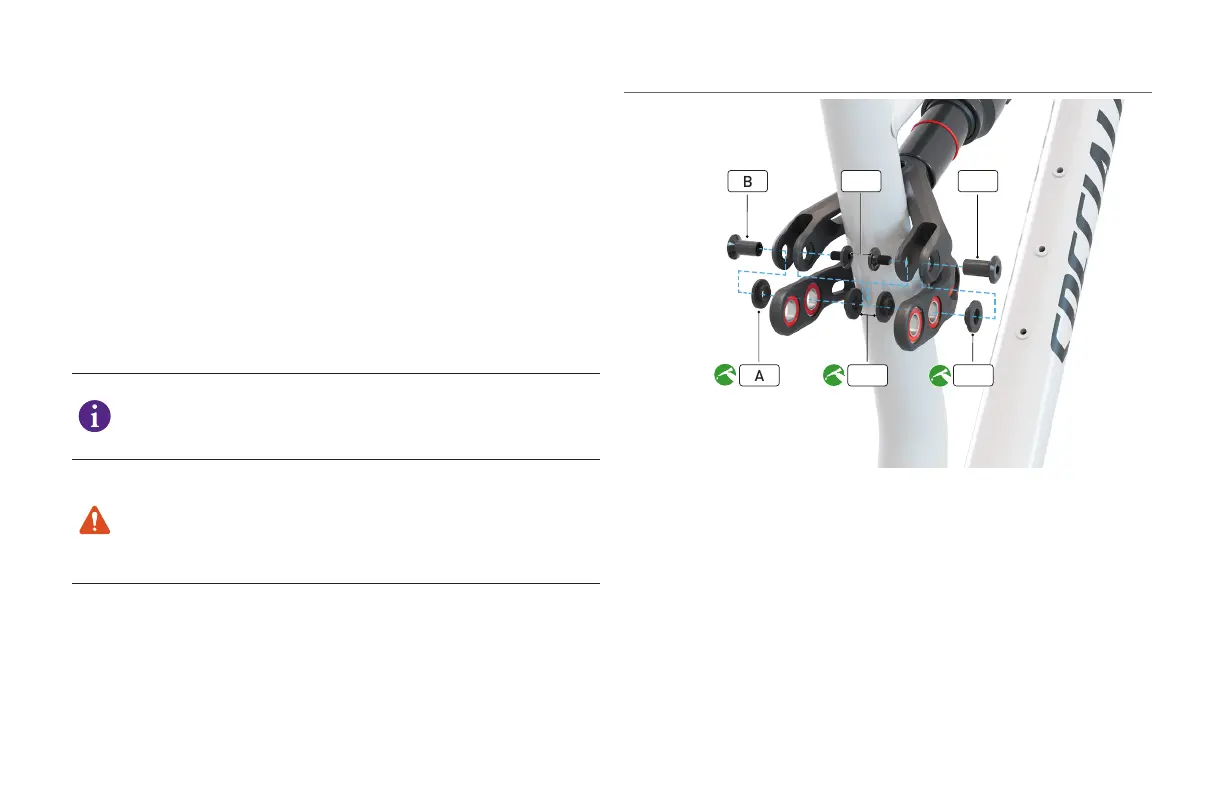
5.1.6 LINK AT EXTENSION
B
A A A
C B
Grease, then place the extension spacers (x4) (A) into the link bearings.
Align the extension with the extension bearings.
Grease, then insert the extension axles (x2) (B) from the outside of the
extension.
Grease, then thread the extension bolts (x2) (C) into the extension axles.
Using two 4mm hex keys, loosely tighten the bolts.