3
2 Web Access and Login
The IP camera settings can be accessed via a web browser through the LAN.
Available web browser: IE (plug-in required)/ Firefox/Edge/Safari/Google Chrome
It is recommended to use the latest version of these web browsers.
The menu display and operation of the camera may be slightly different by using the browser with plug-in or without plug-in.
Installing plug-in will display more functions of the camera.
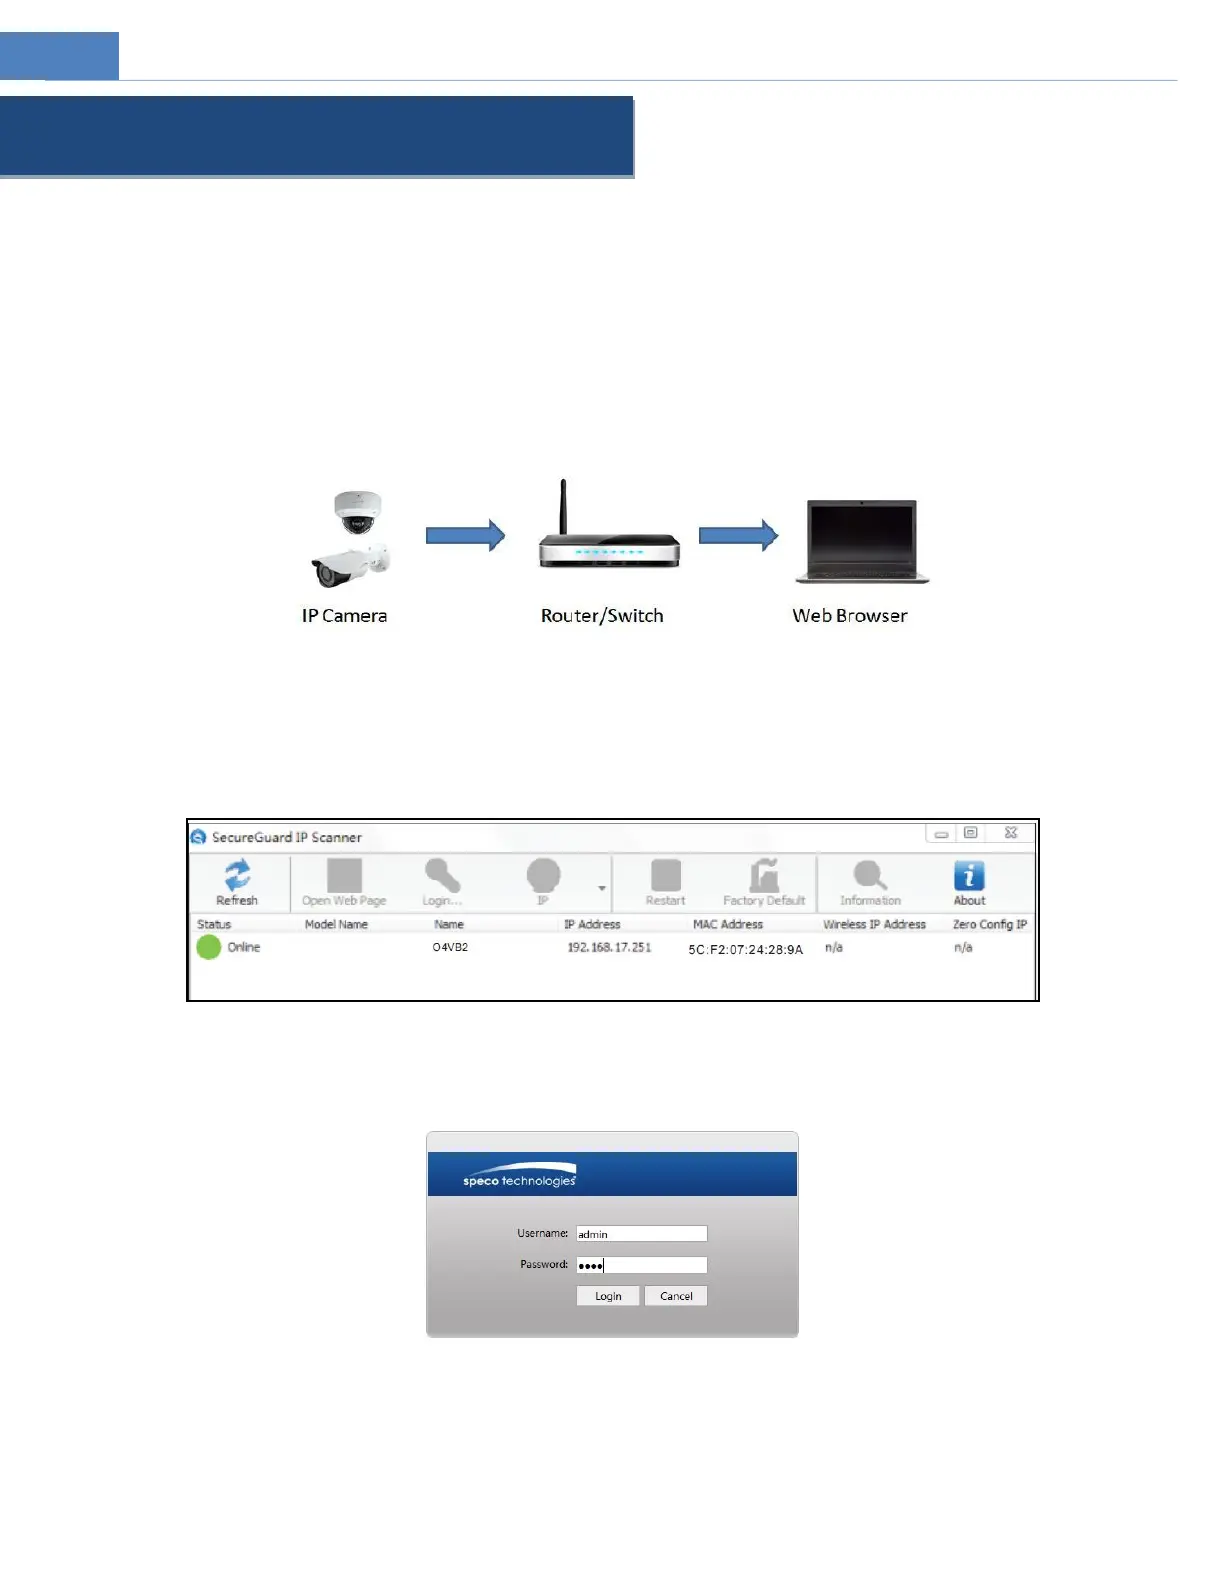
Connect IP-Cam via LAN or WAN. Here only take IE browser for example. The details are as follows:
Access through IP Scanner
Network connection:
①Make sure the PC and IP-Cam are connected on the same local network. The camera is set to DHCP by default and will be
assigned an IP address by the DHCP server. Make sure that the local network has a DHCP server. Routers typically have a DHCP server
built in.
② Install IP Scanner from the CD and run it after installation. IP Scanner is the tool for discovering the IP cameras on the local
network.
③ In the device list, the IP address, model number, and MAC address of each device will be listed. Select the applicable device and
double click to open up the web viewer. You can also manually enter the IP address in the address bar of the web browser. Read the
privacy statement and then check and click “Already Read” to enter the login interface.
The login interface is shown above. Default username is admin and password is 1234. After logging in, follow directions to install
applicable plug-ins for viewing video if prompted.