For Complete Warranty Information, contact Spectracom NetClock Wireless Clock System Instructions
www.spectracomcorp.com / US +1.585.321.5800 1168-5001-0050 Rev. H, Copyright June, 2011
Spectracom Corporation: 1565 Jefferson Road, Rochester, NY 14623 4 of 19
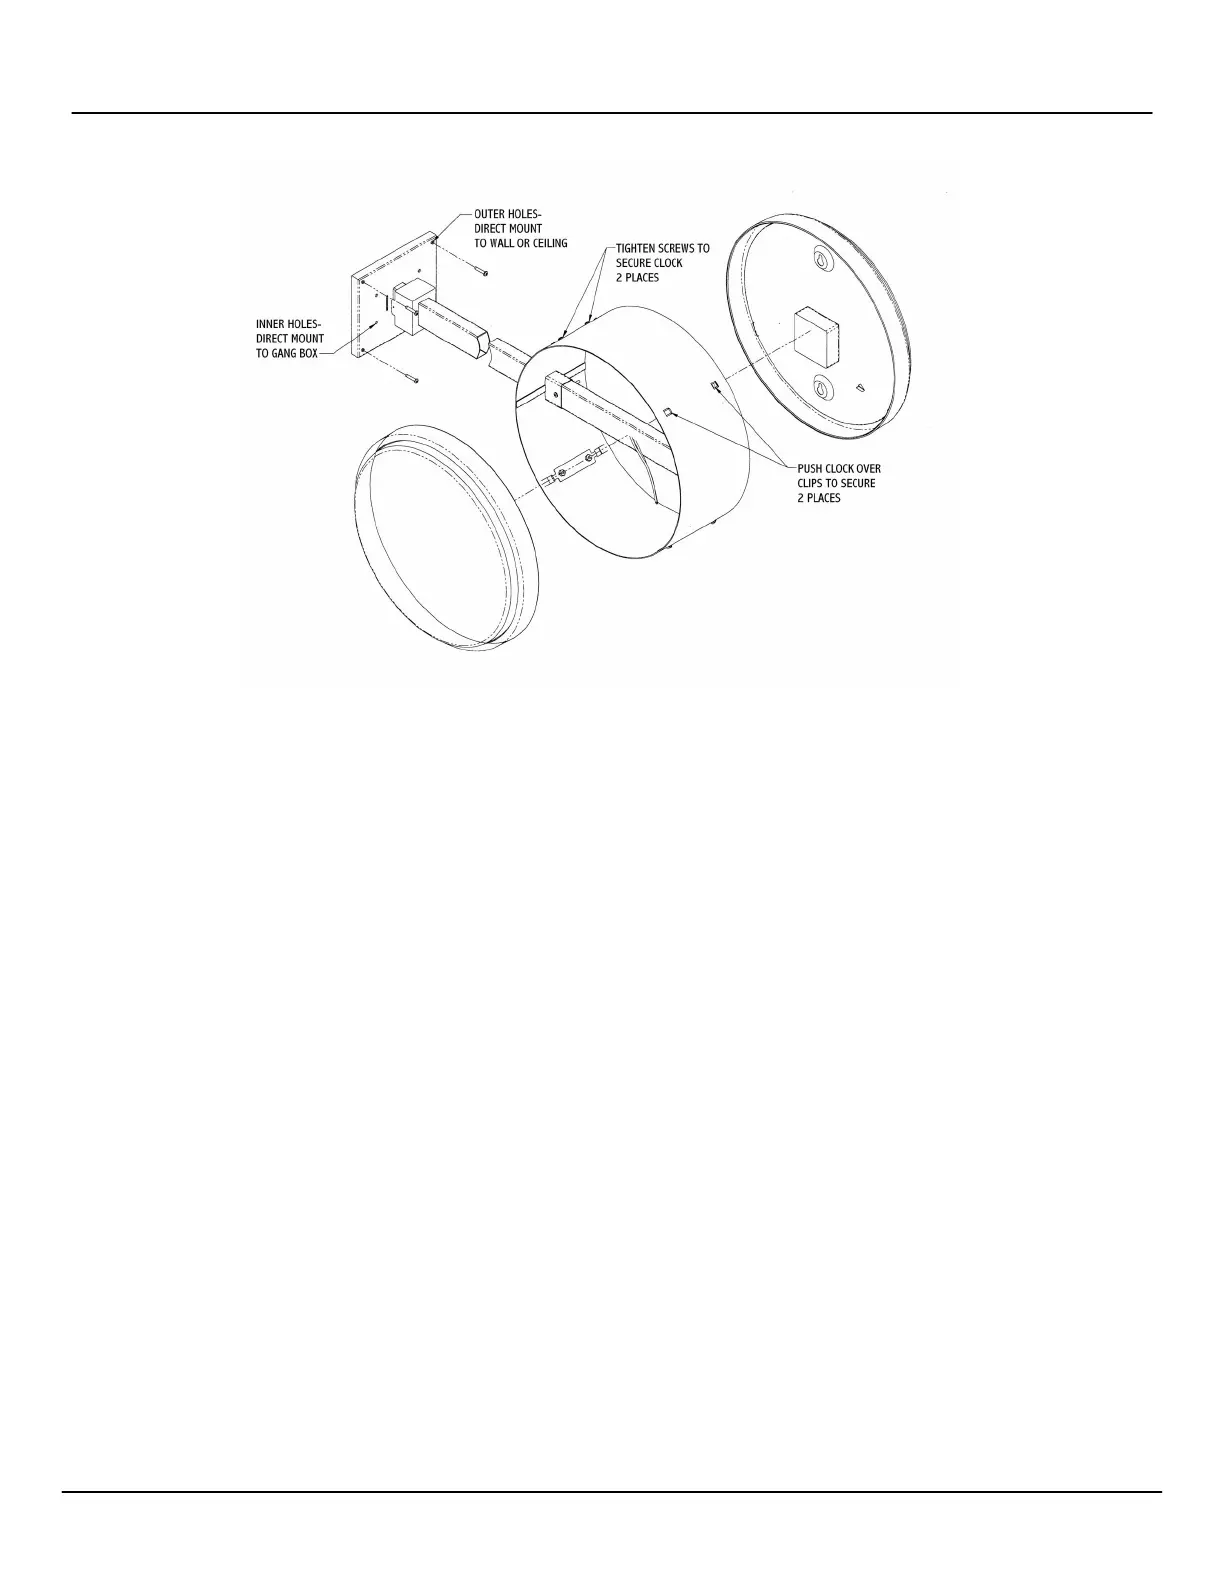
To double-mount display clocks (Figure 2-15), Spectracom recommends the following procedure:
1. Wireless Clocks can be powered using two D-cell batteries, from a 24 VAC source, from a 110 VAC source, or from a 220
VAC source. Install the batteries before mounting the display clock(s).
2. Screw the mounting bracket to the double gang box using the four inner holes on the mounting bracket, or mount the
mounting bracket directly to the wall or ceiling using the four outer holes.
3. Insert the wires through the mounting bracket (220V, 110V, and 24V installations only)
4. Fish the wires through the clock hanging rod.
5. Secure the hanging rod to the mounting bracket with the appropriate screws. Place the cover over the connection.
6. Connect the wiring as shown in Figure 2-14 (220V, 110V, and 24V installations only).
7. Plug the connectors into the movements (220V, 110V, and 24V installations only).
8. Place the clocks on the double mount housing and tighten the screws to secure the clocks as shown above.
Figure 2-15: Double-mounting Analog Display Clocks