For Complete Warranty Information, contact Spectracom NetClock Wireless Clock System Instructions
www.spectracomcorp.com / US +1.585.321.5800 1168-5001-0050 Rev. H, Copyright June, 2011
Spectracom Corporation: 1565 Jefferson Road, Rochester, NY 14623 4 of 19
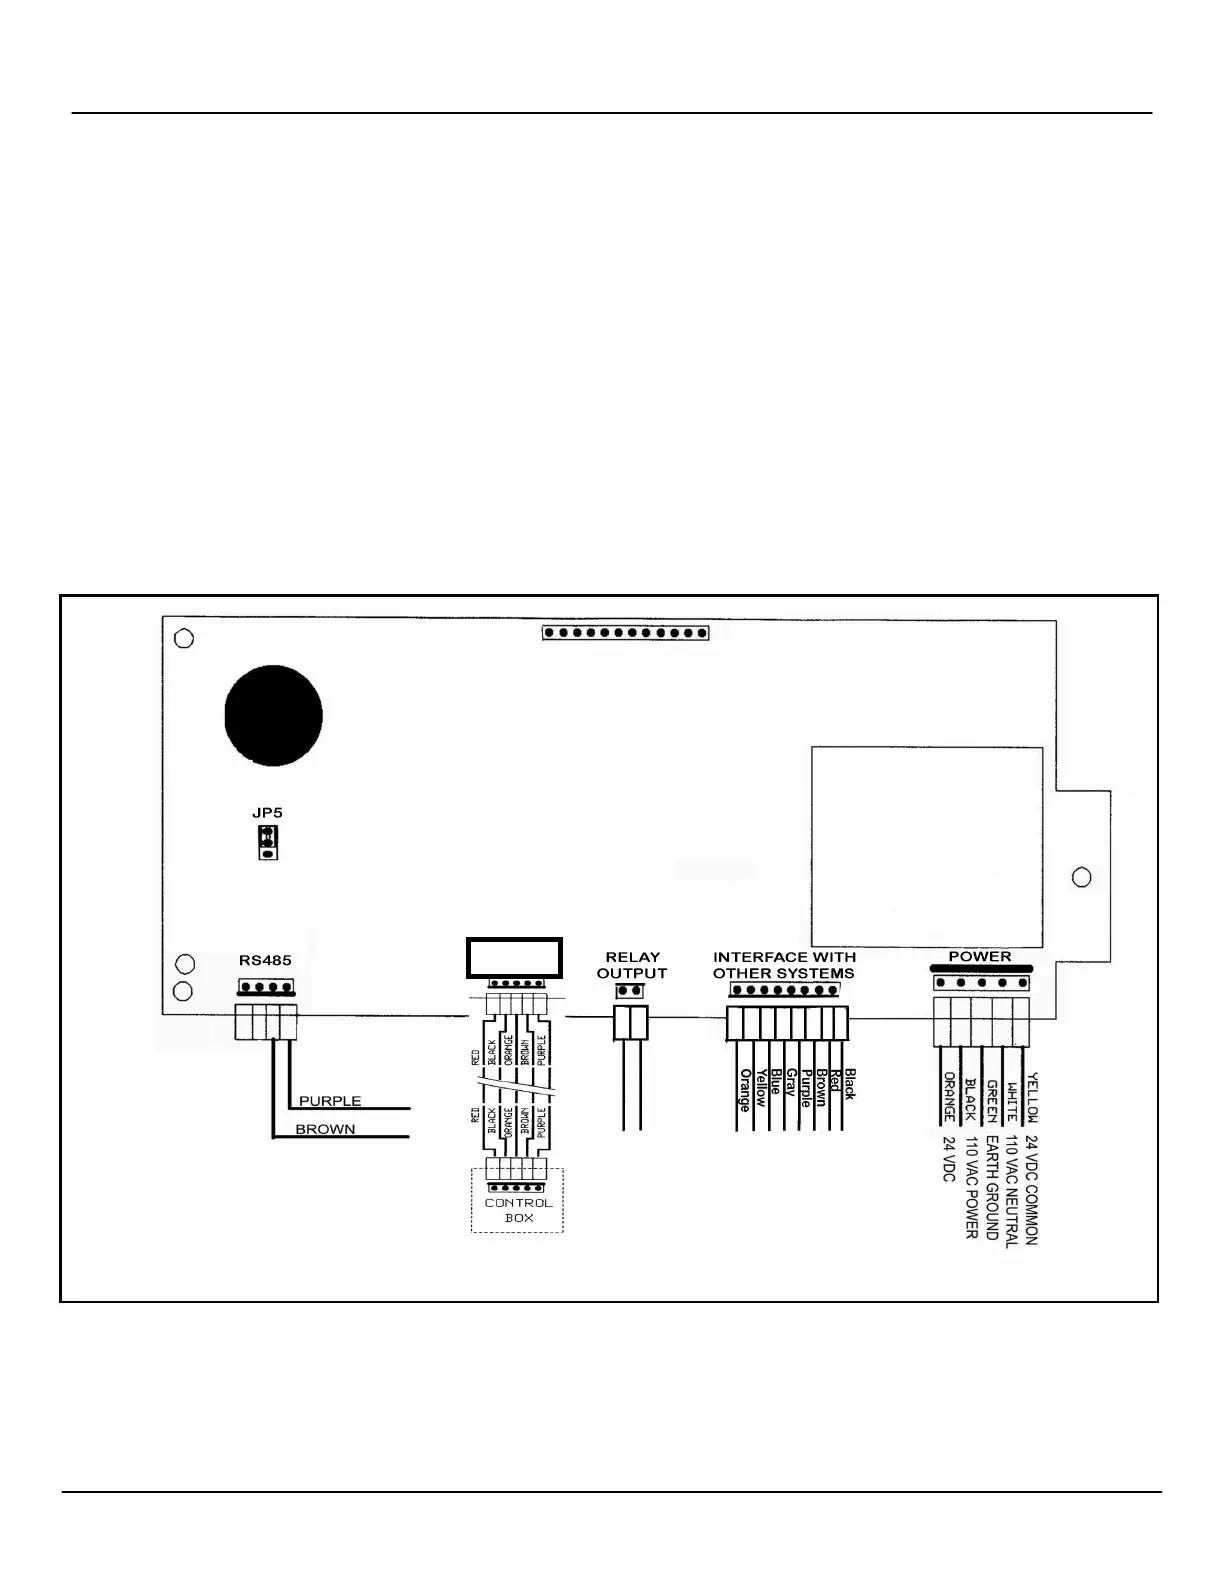
Figure 3-1: Detailed Wiring for 6-Digit Digital Clocks
3
Configuring 6-Digit Digital Clocks
Spectracom Wireless Clock Systems incorporating six-digit display clocks offer certain features not found on four-digit display clocks.
Configuration of these clocks therefore differs from four-digit models.
Unlike four-digit display clocks, six-digit display clocks do not have jumpers. All feature programming and configuration is performed at the
clock. If your six-digit display clocks will be used with other systems and infrastructure, refer to the detailed wiring specifications in Figure 3-1.
NOTE: These wiring details include specifications for the Digital Timer System control box. For more information, refer to the Digital Timer
System Instructions, which are provided with your Digital Timer System.
3.1
Configuring Six-Digit Clocks Individually
After your six digit clocks are installed, configure their display options at the individual clocks themselves. There are two buttons on the right
side of the clock that are used for this purpose. (The top button, pressed by itself, sets the hours, while the bottom button, pressed by itself,
sets the minutes. You will not need to set the clock time because your wireless system governs this.)
Press both buttons together to put the clock in programming mode. Press the top button to advance the option and press the bottom button to
change the option. To exit programming mode, continue to press the top button until the time is displayed (after option 40).
NOTE: When the LED in the top left corner of the unit is illuminated, the time is displayed in PM hours.
CONTROL