For Complete Warranty Information, contact Spectracom NetClock Wireless Clock System Instructions
www.spectracomcorp.com / US +1.585.321.5800 1168-5001-0050 Rev. H, Copyright June, 2011
Spectracom Corporation: 1565 Jefferson Road, Rochester, NY 14623 5 of 19
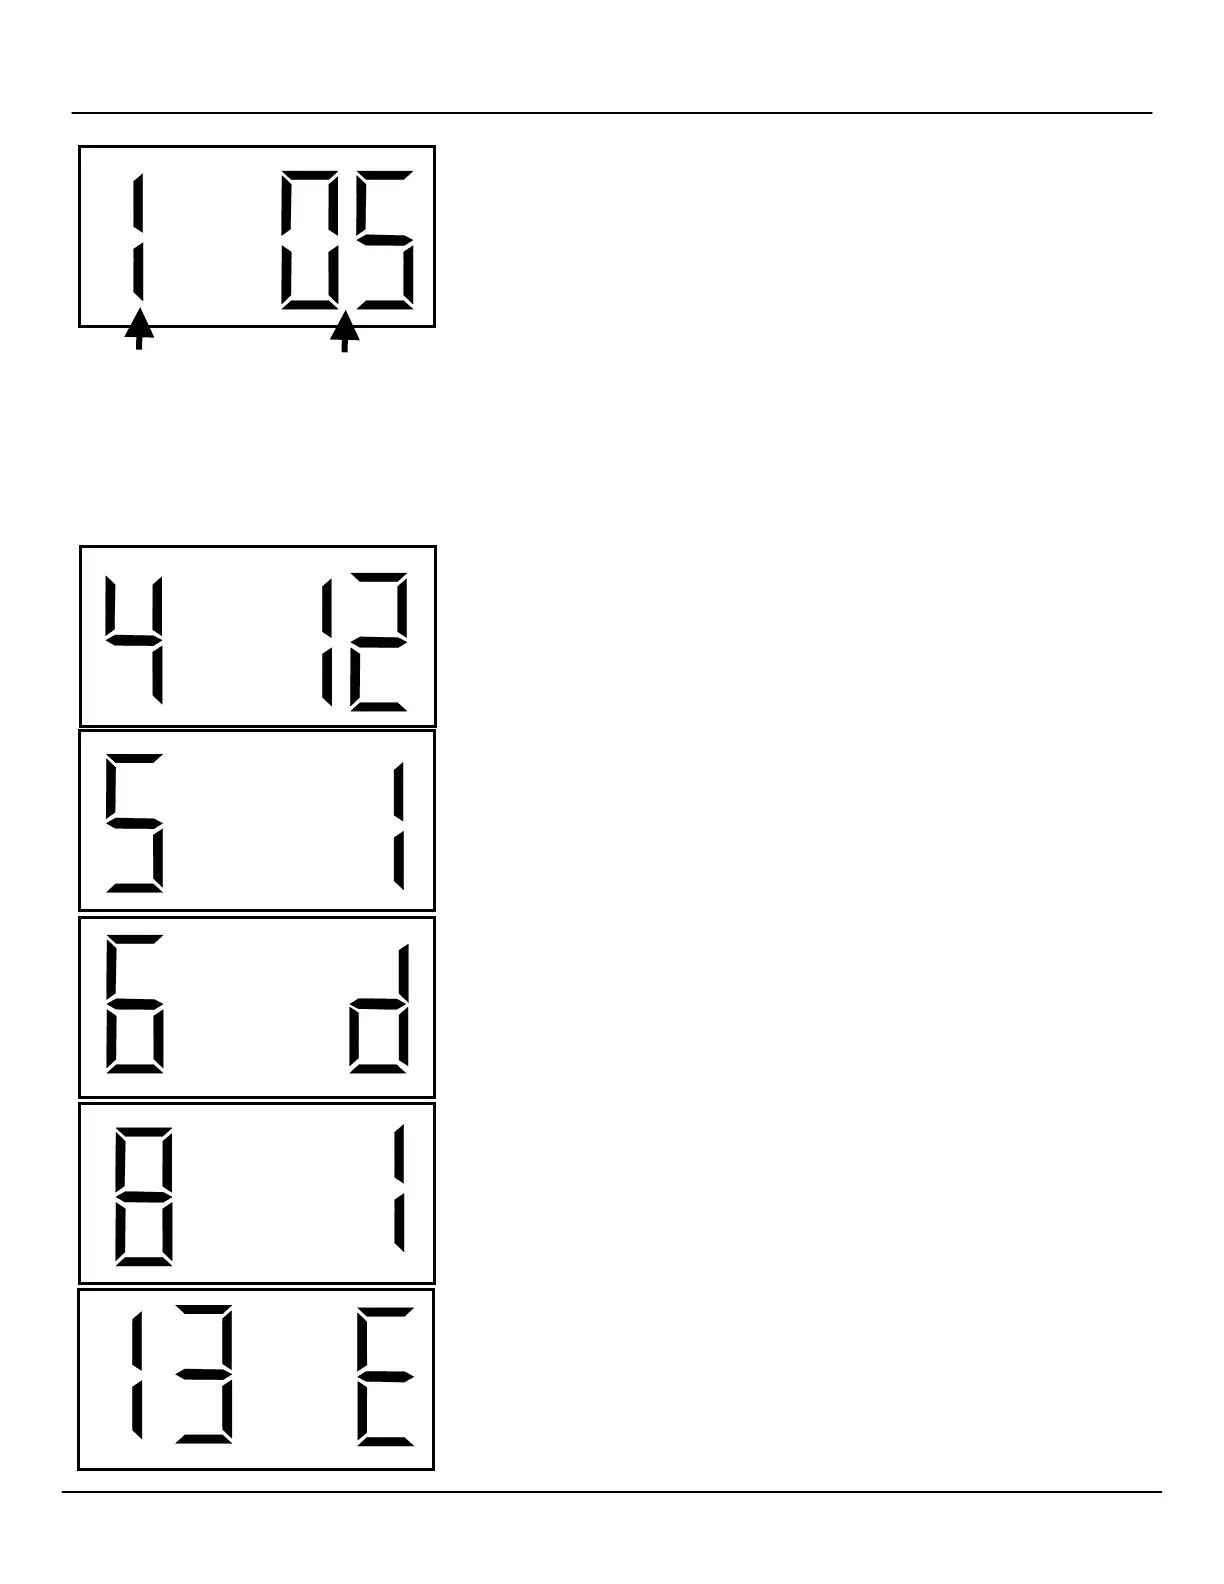
Once programming mode has been entered, the number "1" will appear in the far left
position. Option 1, for example, sets the year, while options 2 and 3 set the month and
day. It is not necessary to change the year, month, or day manually because system time
is driven by the wireless clock system.
Press the top button (the “Set Hour” button) to advance the option until the number
displayed matches the numbers described herein (the left-hand numbers). Press the
bottom button (the “Set Minute” button to change the option as described, configuring your
clocks as required.
NOTE: Do NOT change options that are not listed in these instructions. Changing
options unnecessarily may alter the configuration of your clock. Scroll through
options not described herein and change only those options listed (and
necessary).
After each option is set as desired, use the top button (the “Set Hour” button) to scroll to
the next option you wish to configure.
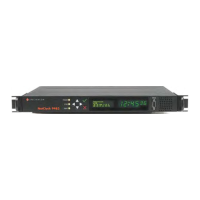
Option 4: Set 12 or 24-Hour Mode
Use the bottom button (the “Set Minute” button) to change the option from 12 to 24 as
desired for your time display.
Option 5: Set Daylight Saving Time
Use the bottom button (the “Set Minute” button) to change the option to 1, 2, or “d.”
1: Pre-2007 DST Rule
2: Post-2007 DST Rule
d: Disable DST Rule
Option 6: Set Alternating Time/Date Display
Use the bottom button (the “Set Minute” button) to change the option to “E” or “d.”
E: Enable alternating time display (switches from time to date and back automatically)
d: Disable alternating time display
Option 8: Set Brightness
Use the bottom button (the “Set Minute” button) to change the option to 0 or 1.
0: Normal Brightness
1: Brightest Setting
Option 13: Activate or Deactivate Loss of Communication Alert
Use the bottom button (the “Set Minute” button) to change the option to “E” or “d”.
E: Enables the option, allowing the user to scroll to Option 14 to set the alert.
d: Disables the option. Use this option when the clock is used independently.
Scroll through this
using the top, or
“Set Hour,” button.
Use the bottom or “Set
Minute” button to change
this to the desired option.