8 Repair Thermo E 200 / 320
802
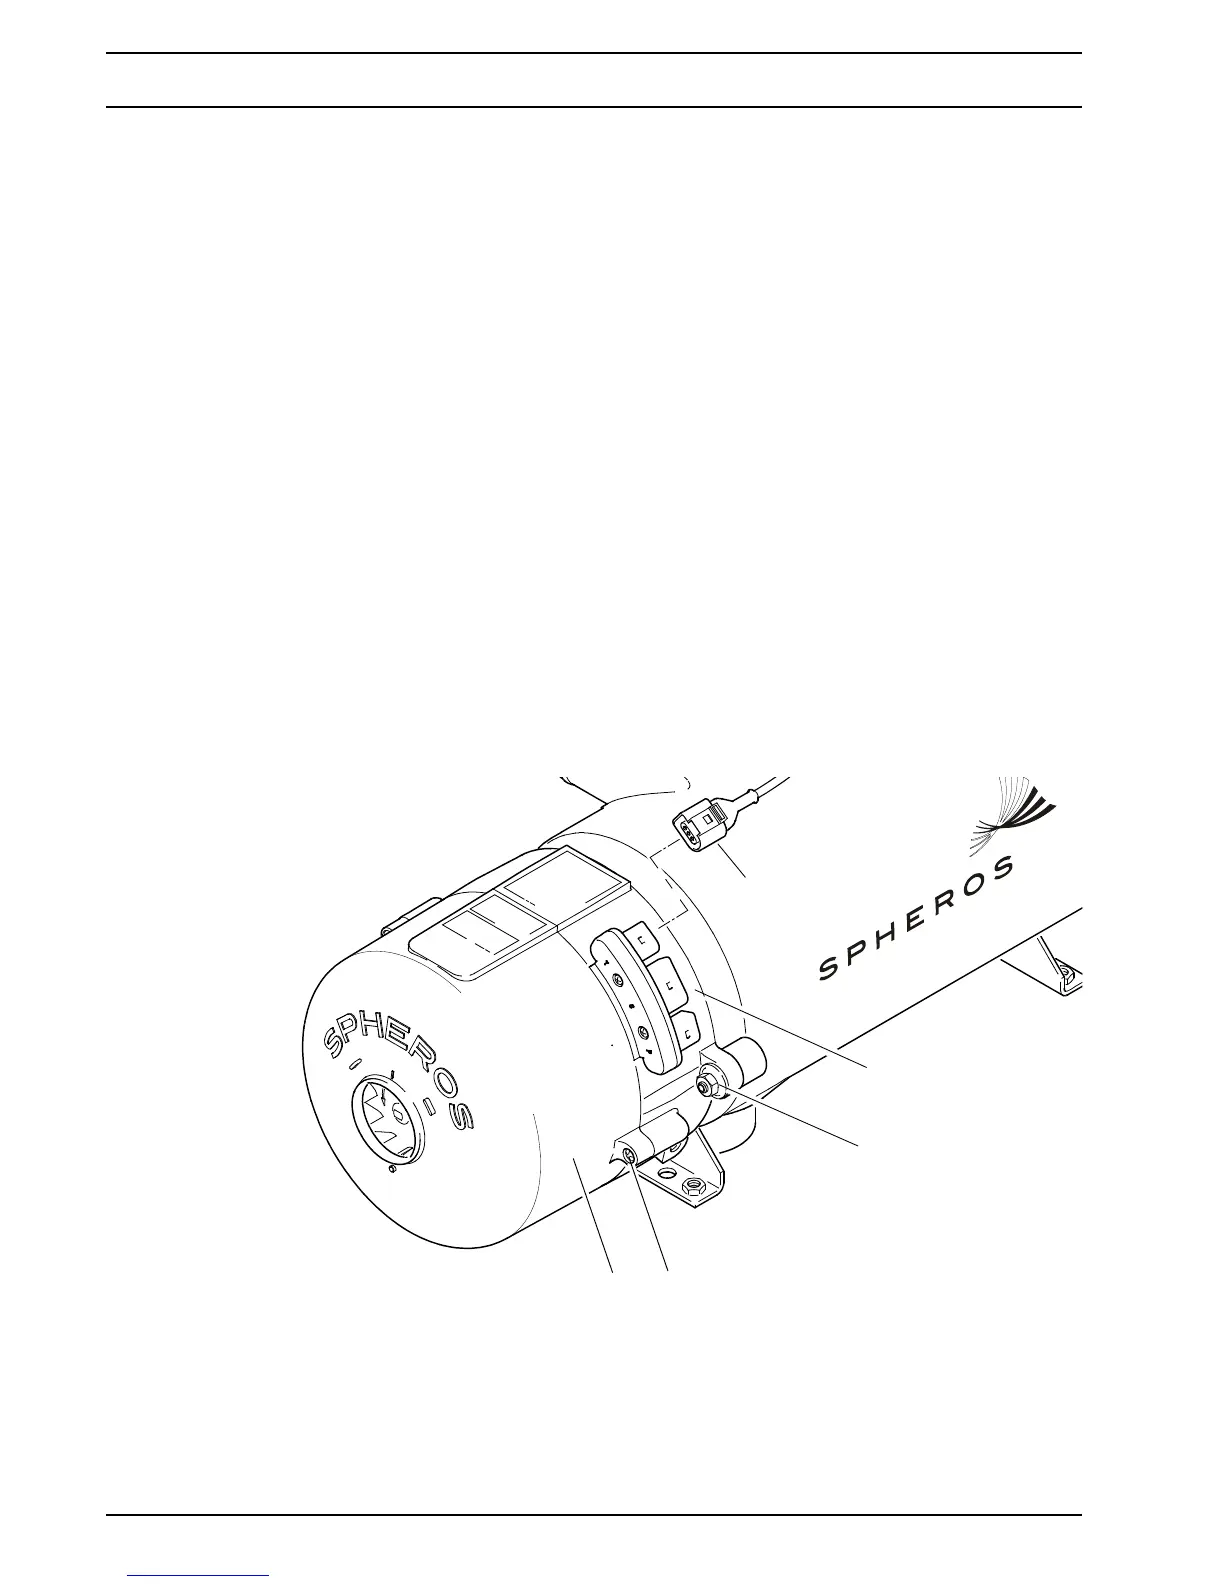
8.2 Burner removal and installation
Burner removal
1. Disconnect the heater from the vehicle electrical
system and from the circulating pump as needed.
2. Disconnect the temperature sensor plug (5, Fig. 801).
3. If necessary, disconnect the combustion air intake line
from the heater.
NOTE
Make sure that any fuel leaking during the following work
step is immediately bound and professionally disposed of.
4. Unscrew fuel lines and seal with blank plugs.
5. Unscrew nuts (2).
6. Remove burner (1).
NOTE
Do not bent any lines when placing the burner down.
Burner installation
1. Bring burner (1, Fig. 801) in assembly position and
ensure centre alignment and correct fit.
2. Place nuts (2) and alternately tighten them slightly.
3. Tighten nuts (2) with 7.5 Nm + 1 Nm and apply screw
locking paint.
4. If applicable, bolt fuel lines down with 16 ± 1 Nm using
a banjo bolt and new gaskets, or slide on fuel lines and
secure with hose clamps.
5. If applicable, secure the combustion air intake line to
the heater.
6. Connect the temperature sensor plug (5).
7. Connect heater with the vehicle electrical system and
the circulating pump as needed.
Fig. 801 Burner head / hood removal and installation
1
2
1 Burner
2 Nuts (2)
3 Screws (2)
4Hood
5 Temperature-
sensor plug
3
4
5