Pubn No: 30000H0K
9.4. REPLACING THE LID/SHUTTER ASSEMBLY
1) Disconnect the silicone rubber tubing that connects the gas canister to the lid/shutter assembly at
the lid/shutter assembly.
2) Remove the flash detector;
a) Disconnect the flash detector probe lead from the socket on the back of the instrument.
b) Loosen the flash detector retaining nut and clip.
c) Slide the flash detector from the cup/heating block assembly.
3) Unlock the lid.
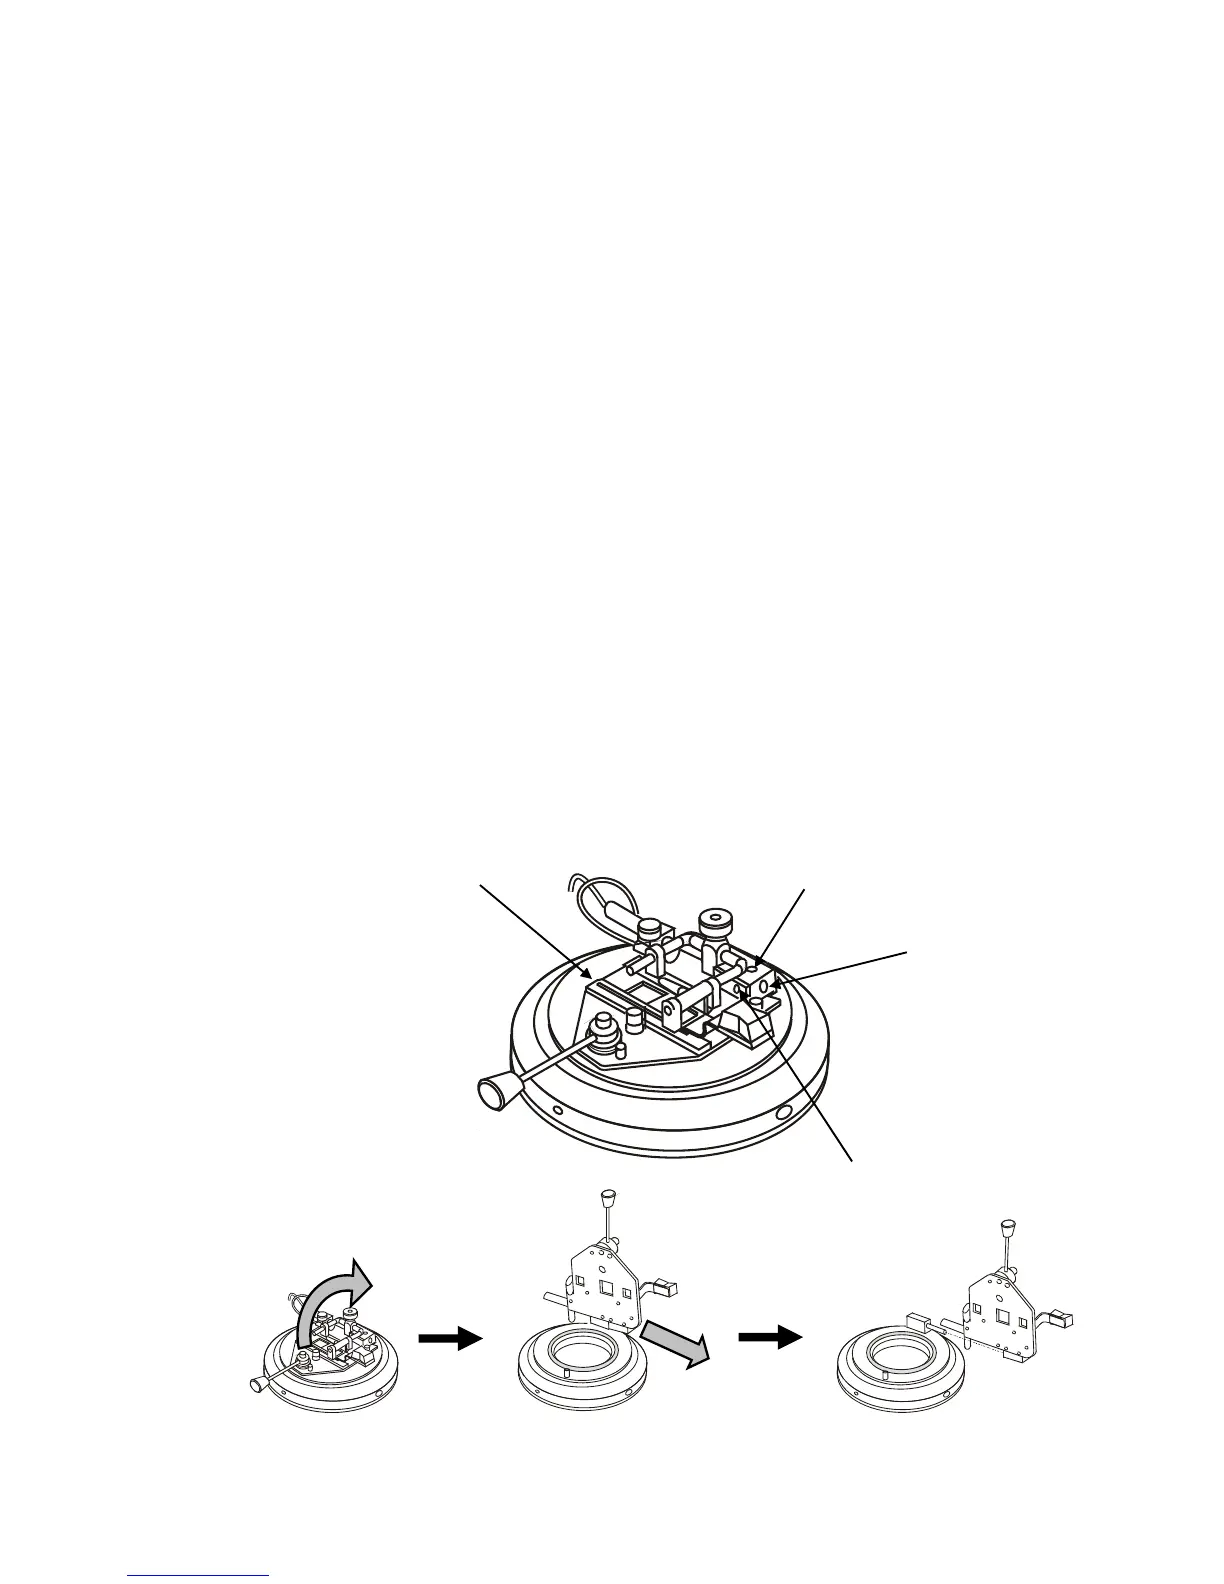
4) Loosen the hexagon socket head screw that attaches the lid/shutter assembly to the hinge pin
(2mm hex head key supplied).
5) Open the lid/shutter assembly and slide it to the left, off the hinge pin.
6) Slide the new lid/shutter assembly onto the hinge pin.
7) Close the lid/shutter assembly.
8) Tighten the hexagon socket head screw to secure the lid/shutter assembly to the hinge pin.
9) Check that the lid/shutter assembly compresses the ‘O’ Ring Seal all round. If necessary loosen the
two lid screws and adjust the lid/shutter assembly position, then re-tighten the lid screws.
10) Check that the lid opens, closes, and latches smoothly.
11) Re-fit the flash detector;
a) Insert the flash detector probe in the top of the cup/heating block assembly.
b) Position the retaining clip over the flash detector and tighten the retaining nut firmly.
c) Connect the lead into the socket at the rear of the Tester.
12) Connect the silicone rubber tubing to the lid/shutter assembly (push fit).
Lid/Shutter Assembly
Hinge Pin
Hexagonal Socket Head Screw
Lid Screws
Figure 7 Lid/Shutter Assembly Replacement
Issue K
10 Jun 2007
33