11
TÜRKÇE
STANLEY Engneered Fastenng poltkası, sürekl ürün gelştrme ve yleştrme çalışmalarından brdr ve
herhang br bldrmde bulunmaksızın herhang br ürün özellklern değştrme hakkımızı saklı tutarız.
3. ALET KULLANIMI VE AYARI
3.1 KULLANIM ALANI
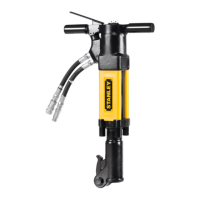
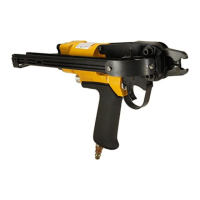
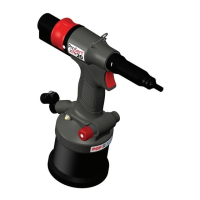
PB2500N aletler SADECE STANLEY Engneered Fastenng perçnl bağlama kurulumu çn tasarlanmıştır. Bu alet
profesyonel br elektrkl alettr. Çocukların alete dokunmasına İZİN VERMEYİN. Bu alet deneymsz kullanıcılar tarafından
kullanılırken nezaret edlmeldr.
ALETİ ÇALIŞTIRMADAN ÖNCE TÜM GÜVENLİK UYARILARINI VE TALİMATLARI OKUYUN.
Kurulum ekpmanı kullanırken DAİMA onaylı br kulak ve göz koruması takın
UYARI: Hçbr zaman elektrkl alet veya herhang br parçasını değştrmeyn. Hasarla veya
yaralanmayla sonuçlanablr.
Islak koşullarda veya yanıcı sıvı ya da gazların mevcut olduğu ortamlarda KULLANMAYIN.
Elektrk Emnyet
Elektrk motoru sadece tek br voltaj çn tasarlanmıştır. Her zaman batarya voltajının, alet etketndek voltajla aynı olup
olmadığını kontrol edn. Ayrıca, şarj chazınızın voltajının şebeke voltajı le aynı olmasına dkkat edn.
UYARI: Aletn ayarını değştrmeden önce dama bataryayı çıkarın.
3.2 BURUN GÖVDESİ
11
ENGLISH
WARNING: To reduce the risk of serious personal injury, disconnect battery pack before making
any adjustments or removing/installing attachments or accessories.
STANLEY Engineered Fastening policy is one of continuous product development and improvement
and we reserve the right to change the speci cation of any product without prior notice.
3. TOOL USE & SETUP
3.1 INTENDED USE
PB2500N tools are designed for installation of STANLEY Engineered Fastening Neobolt fasteners ONLY.
This tool is a professional power tool. Do NOT let children come into contact with the tool. Supervision is
required when inexperienced operators use this tool.
READ ALL SAFETY WARNINGS AND INSTRUCTIONS BEFORE PUTTING TOOL INTO
SERVICE.
ALWAYS wear approved hearing and eye protection at all times when using installation
equipment
WARNING: Never modify the power tool or any part of it. Damage or personal injury could
result.
DO NOT use under wet conditions or in presence of ammable liquids or gases.
Electrical Safety
The electric motor has been designed for one voltage only. Always check that the battery pack voltage
corresponds to the voltage on the rating plate. Also make sure that the voltage of your charger corresponds
to that of your mains.
WARNING: Before adjusting tool, always remove the battery pack.
Before Use
•Install relevant size nose equipment •
• Ensure that the battery is fully charged
• Insert Battery Pack into the tool
• Quickly pull and release the trigger to set the tool to the home position.
Removing the anvil (Fig. 1a)
• Loosen and remove retaining nut (D) and
remove anvil/nose housing from tool
• Using 24mm wrenches, unthread anvil (B)
from nose housing
• Reverse these steps to install anvil
Removing the Collet from tool (Fig. 2)
• Depress front clutch retaining tabs
• Fully unthread collet from pulling head adapter.
• To install collet, depress clutch retaining tabs and
thread collet all the way
NOTE: DO NOT USE WRENCHES TO TIGHTEN COLLET
D
B
C
A
EQUIPMENT
NEW CONTENT BELOW THIS LINE
Örsün çıkartılması (Şekl 1a)
• Tespt somununu (D) gevşetn ve çıkarın ve örs/
burun muhafazasını aletten çıkarın
• 24 mm anahtarlar kullanarak, örs (B) uç yuvasından
çıkarın
• Örs takmak çn bu adımları ters sırayla uygulayın
Kovanın aletten çıkartılması (Şekl 2)
• Ön kapln tutma tırnaklarına basın
• Kovanı çekme başlığı adaptöründen tamamen
çevrerek açın.
• Kovanı takmak çn kapln tutma tırnaklarına basın
ve kovanı sonuna kadar çevrerek sokun
NOT: KOVANI SIKMAK İÇİN ANAHTAR KULLANMAYIN
Kullanmadan Önce
• İlgl boyuttak burun ekpmanını takın
• Bataryanın tamamen şarj edldğnden emn olun
• Bataryayı alete yerleştrn
• Alet lk ayarlarına ger getrmek çn tetğ hızlıca çekp bırakın.
 Loading...