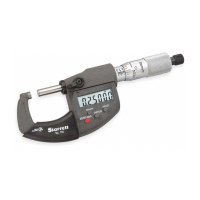
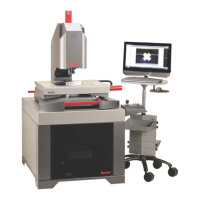
6.5 Zoom Optics Alignment Verification
The system’s zoom optics (if ordered) should be verified regularly to ensure accurate measure-
ment. Parfocality, parcentricity and squareness verifications are straightforward and may be
performed as often as desired. Focus is adjusted as needed by changing the distance between
the lens and the surface being viewed.
NOTE:
Optical alignment verification may be performed by any qualified operator.
However, optical alignment correction should only be performed by an authorized
technician
.
Report any observed alignment discrepancies and contact the factory or
your local Starrett representative to schedule authorized service.
Zoom Optics Parfocality & Focus
Parfocality
is the condition in which the video image will remain in focus as the magnification
is adjusted from highest to lowest. Starrett zoom optics are designed to maintain parfocality
throughout their magnification range.
To check parfocality, always reference a flat, sharp edge. Do not select a rough or sloping feature.
The MAG checker provided with the system is an ideal part to check parfocality.
Steps to check parfocality:
1.
Place the MAG checker or other suitable inspection part on the stage and secure properly.
2.
Backlight the image as necessary. Set light levels as needed to avoid blooming.
3.
At low magnification, select a flat, sharp edge in the center of the field of view (FOV).
4.
Select highest magnification, and carefully refocus the image by physically changing the
viewing distance.
5.
While observing the feature, slowly adjust the magnification lower. Verify that the feature
remains focused as the magnification is lowered.
6.
Report any observed discrepancy. If the error is verified, contact your Starrett representative
for authorized service.
Zoom Optics Parcentricity
Parcentricity
describes the condition wherein a feature will remain at the optical center of the
video image throughout the magnification range. Like parfocality, parcentricity requires that the
feature be first located at highest magnification.
Steps to check parcentricity:
1.
Place the MAG checker or other suitable inspection part on the stage and secure properly.
2.
Select the crosshair image tool in M3 software and place it at its defined center position
.
The crosshair is to remain at this position during the parcentricity test.
3.
Zoom to low magnification, and adjust the stage position so that the crosshair is centered
on the X-Y axis of the calibration standard (or another suitable feature if the standard is not
used).
4.
Change to high magnification and refocus the image.
5.
Adjust the stage position as needed to recenter the crosshair on the feature.
6.
While observing the feature, slowly adjust the magnification lower
.
Verify that the feature
remains at the center of the crosshair as the magnification is lowered.
7.
Report any observed discrepancy. If the error is verified, contact your Starrett representative
for authorized service.