54
Editing
Editing Layers
Graphical Envelope Editing in the LFO View
You can adjust the times of the envelope with the graphical editor:
• The first node adjusts the delay time. Drag the node to the left to decrease and to
the right to increase the delay.
• The second node adjusts the Fade In time. Drag the node to the left to decrease
and to the right to increase the time.
• The third node adjusts the Hold time. Drag the node to the left to decrease and to
the right to increase the time.
• The fourth node adjusts the Fade Out time. Drag the node to the left to decrease
and to the right to increase the time.
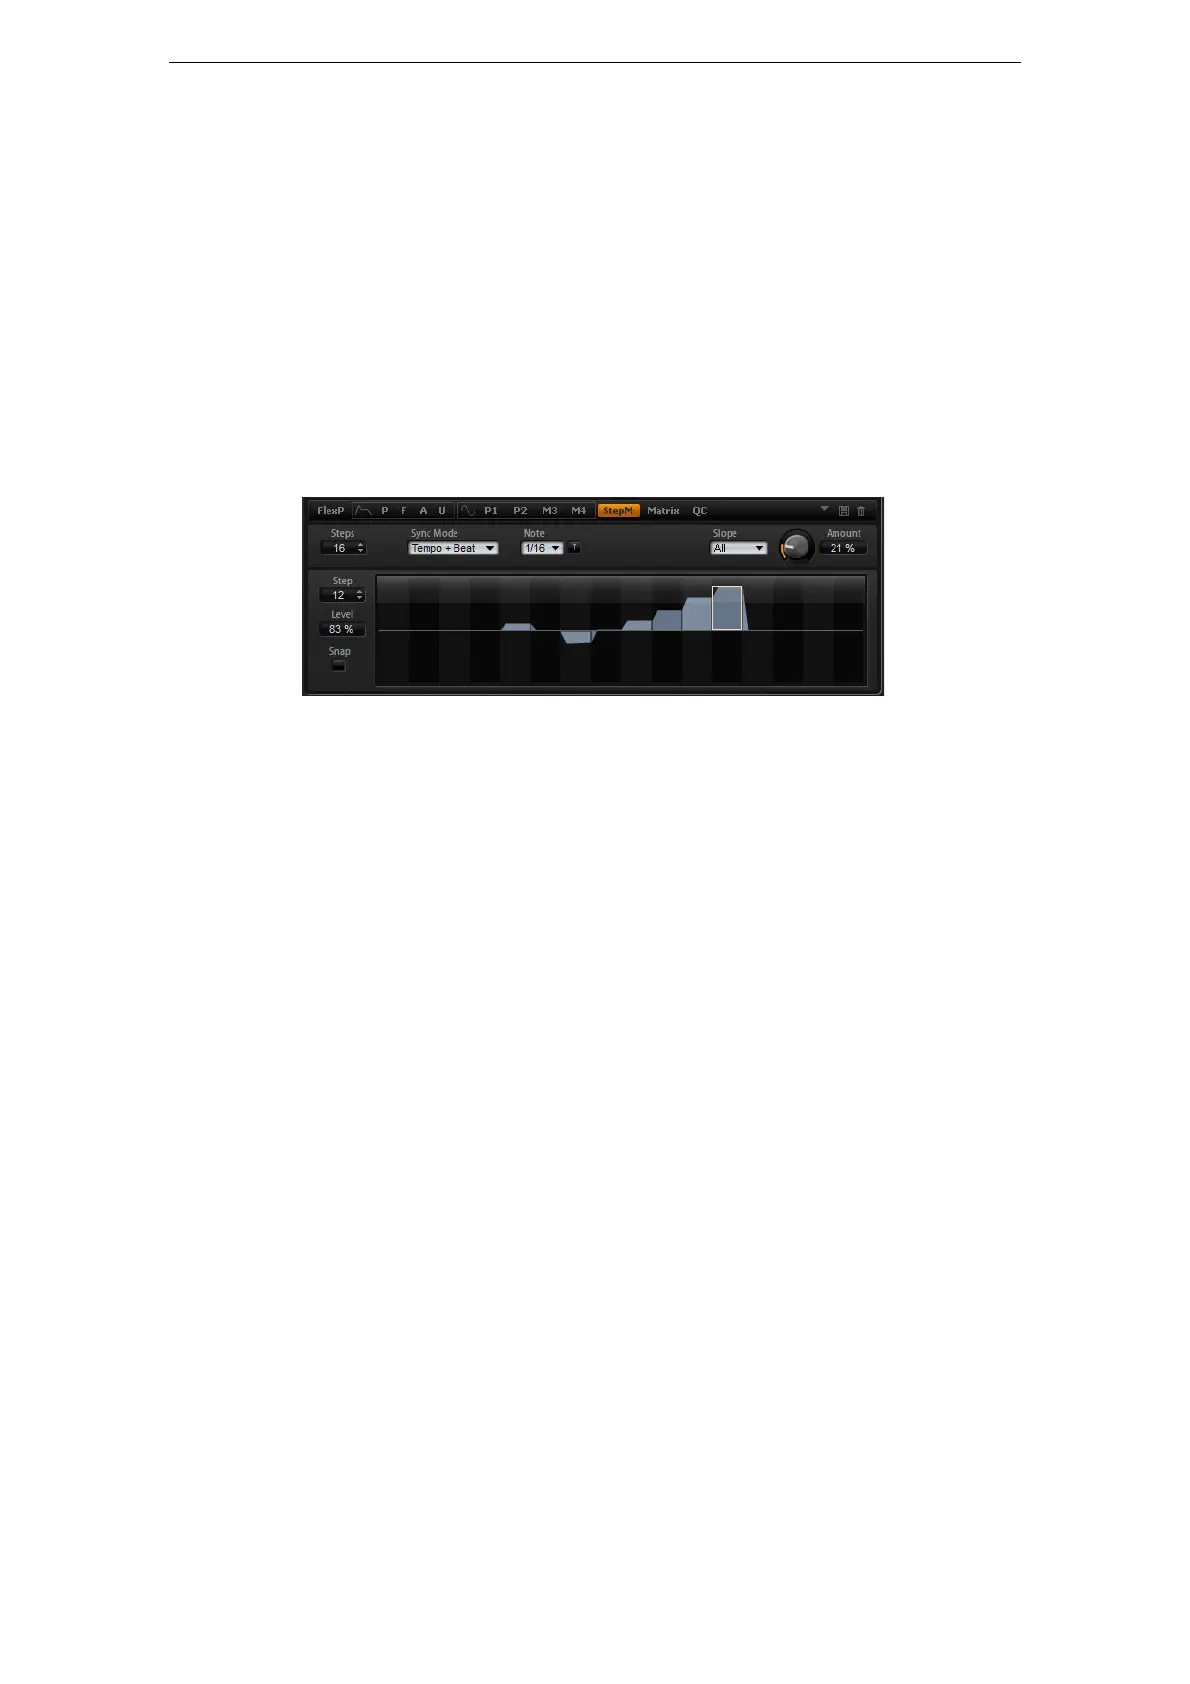
The Step Modulator (StepM) Subpage
Synth and sample layers feature a polyphonic step modulator for creating rhythmic
control sequences. The step modulator can be freely assigned in the modulation
matrix. The sequence can have up to 32 steps. By selecting a note value, the steps
can be synchronized to the tempo of the host application or you can specify a
frequency at which the sequence repeats. The Retrigger mode allows you to restart
the sequence either with the First Note or Each Note. The sequence continues when
this parameter is set to Off. You can define a slope for rising, falling or both edges of
the steps. This way, you can use the step modulator as an LFO with freely definable
shape.
To access the step modulator, proceed as follows:
1. Go to the Edit page and select the synth or sample layer you want to adjust.
2. Click the StepM page button.
The Step Modulator subpage opens.
Step Modulator Presets
At the top right of the StepM subpage, you can load and save presets for the step
modulator.
• To load a preset, click in the Select Preset field and select the preset from the
pop-up menu.
• To delete a preset from your system, click the trash bin button.
You will be asked to confirm the deletion.
• To save a new preset, click the floppy disk button.
A file dialog opens where you can name and save your preset file.
Editing Steps
To adjust the steps using the mouse, proceed as follows:
• To set the level of a step, click at the corresponding position in the graphical
editor.
• To set the exact value, drag the step up and down like a fader.