Tech Support: www.steppir.com/support Tel: 425.891.6134 support@steppir.com
Page 23
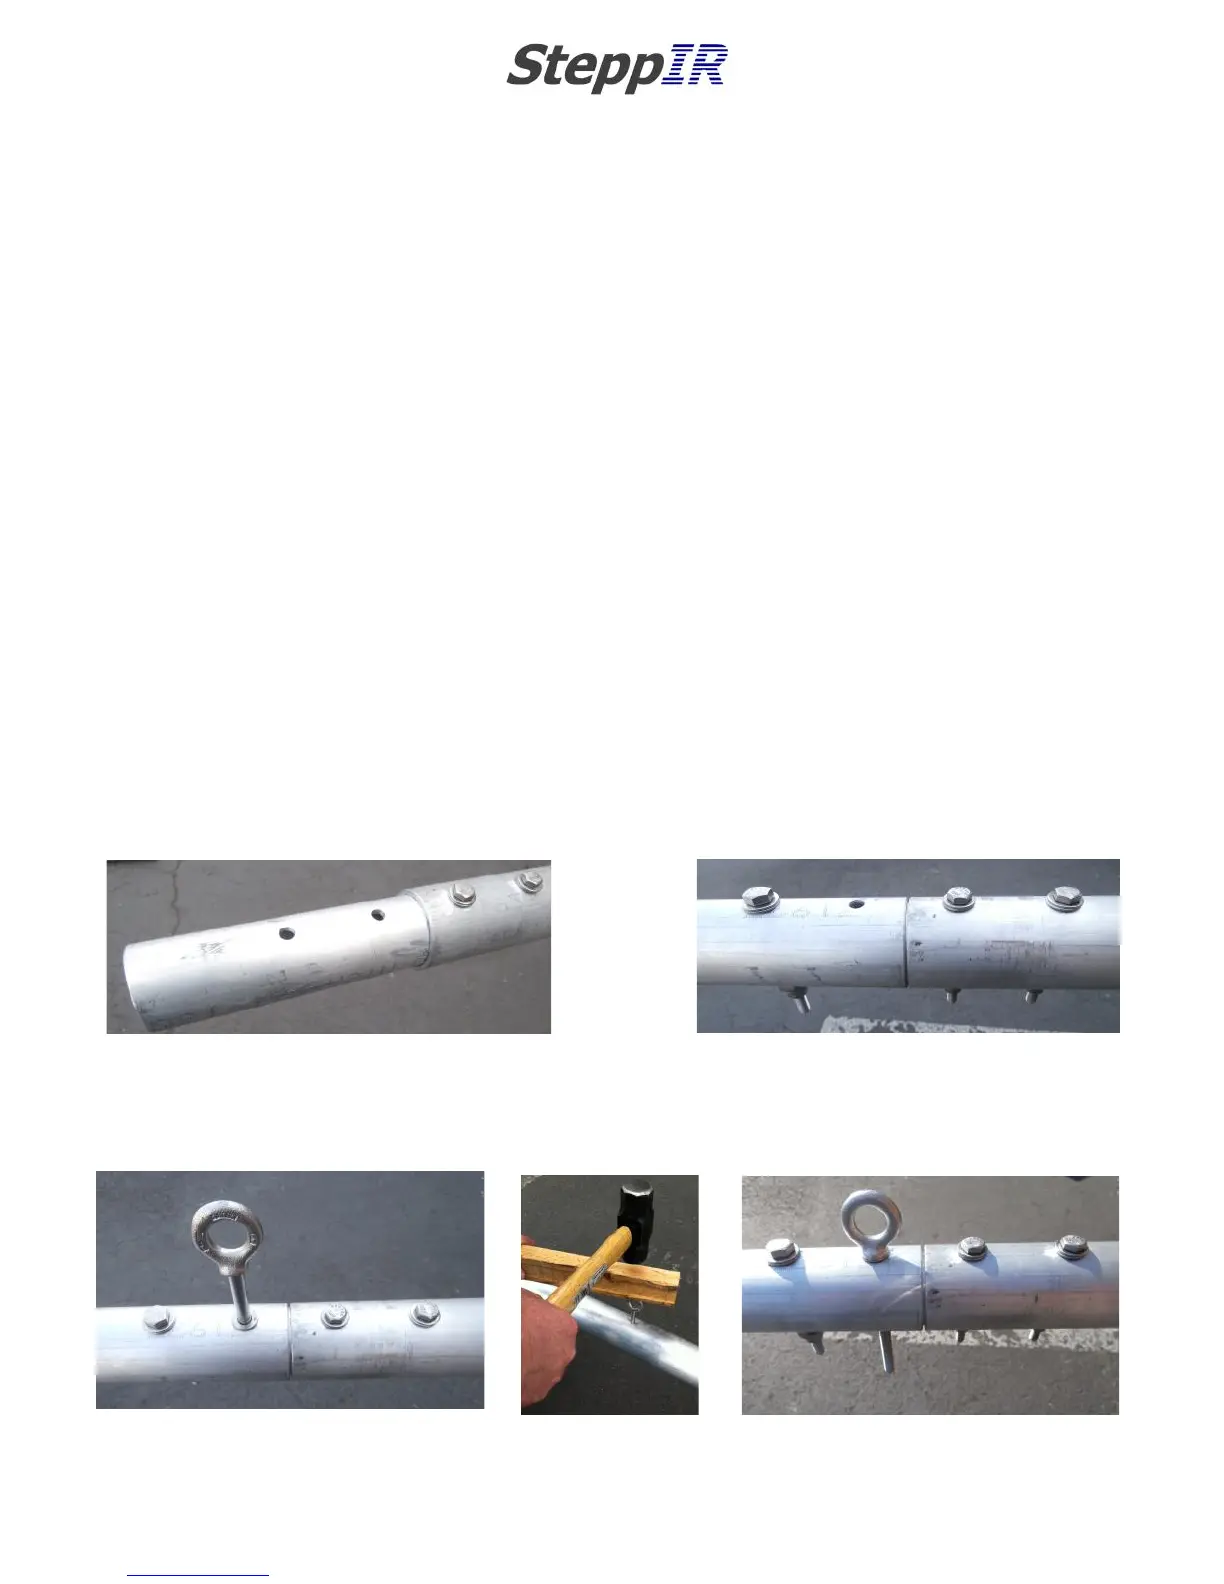
Apply some anti-seize or Noalox to each side of the boom center-splice and insert the end with the two
1/4” drilled holes into the section of boom that matches. Carefully align the holes and insert the 1/4”
hex head bolts (PN 60-0029), flat washers (PN 60-0041) and Nylock nuts (PN 60-0030) as shown in
figure 1.11. Be sure that your washer configuration for each bolt matches figure 1.02 , covered earlier
in the chapter.
Slide the other section of 2” boom over the center-splice, align the holes and insert the 5/16” hex head
bolt (PN 60-0103), 5/16” washers (PN 60-0033) and 5/16” Nylock nut (PN 60-0046) as shown in figure
1.12.
When inserting the EZ-Eyebolt onto the boom as shown in figure 1.13, use a mallet and a piece of
wood as shown in figure 1.14. Using the mallet directly on they eyebolt can damage it. There is a
5/16” washer and nut on the eyebolt when you receive it—remove the regular nut and replace it with a
5/16” Nylock nut but keep the washer on the eyebolt so that it is flush with the shoulder portion of the
eyebolt. Align the eyebolt so that it is centered on the boom and tighten. Be sure that all the bolts are
now tightened.
Figure 1.15 shows the completed 2” boom piece with center-splice.
CHAPTER ONE
SECTION 1.1
BOOM ASSEMBLY (continued)
CONNECTING THE EZ-EYEBOLT TO THE BOOM (continued)
FIG. 1.11
FIG. 1.12
FIG. 1.15
FIG. 1.13
FIG. 1.14