34
2.12 Initial start-up
Only approved contractors may commission
this equipment and instruct the owner in its
use.
Commission this equipment in accordance
with these operating and installation
instructions. Our customer service can be
asked to assist in the commissioning, which is
chargeable.
After commissioning, the installer should
complete the commissioning report on pages
43.
Check the following prior to commissioning:
z Heating system
Was the heating system filled up to the
correct pressure, and was the quick acting
air vent valve opened?
z Temperature sensor
Were the outside temperature and the
return temperature sensor (in conjunction
with a buffer cylinder) correctly positioned
and connected?
z Power supply
Was the mains power supply properly
connected?
If, when voltage is applied to the heat
pump power supply (mains), fault message
appears in the display, then the compressor
turns in the right direction. If the fault
message No power appears, reverse the
rotational direction of the compressor.
Observe the maximum system
temperature in underfloor heating
systems.
Equipment handover
Explain the equipment function to the user
and familiarise him/her with its operation.
Important information:
z Hand over these operating and installation
instructions to the user for safe-keeping.
Always carefully observe all information in
these instructions. They contain information
concerning safety, operation, installation
and maintenance of this equipment.
COOLING MODE
WPF 5 - 16
This equipment is designed for DHW and
central heating. In the delivered condition,
parameter 6 is set to OFF. The cooling mode
is only possible with the WPAC-1 cooling
module.
On a WPF 5-13 without cooling
module, this parameter must not be
enabled.
WPF 5 - 16 with cooling module WPAC 1
Set this parameter to ENABLE.
Note: This parameter will only be shown,
if a FEK or FE 7 remote control unit is
connected. The cooling mode is only
possible in summer.
The WPF with the WPAC 1 cools in
2 stages:
Stage 1 (source pump)
Heat is extracted from the heating circuit and
is transferred to the heat source system.
Stage 2 (source pump + compressor)
In addition, the cooling circuit extracts heat
from the heating circuit and transfers it to the
heat source system.
DHW heating
DHW heating always has priority. As long as
the actual temperature has not dropped below
the set flow and return temperature, active
cooling continues even during DHW heating,
and any extracted heat is transferred to the
DHW. If there is no cooling demand, DHW
is conventionally heated via the heat source
system.
Cooling operation with the FE 7
The FE 7 is not equipped with dew point
monitoring. It can therefore only be used
in conjunction with fan convectors with
condensate drain. Set the cooling mode to
FAN.
Cooling operation with the FEK
The FEK remote control unit is equipped with
dew point monitoring, and can therefore be
used with area heating systems
(e.g. underfloor/wall heating systems, etc.).
Set parameter 6 to AREA.
The set flow temperature is compared with the
detected dew point temperature, so the actual
temperature never drops below the dew point.
When using fan convectors with the FEK
remote control, set parameter 6 to FAN.
1
2
3
4
5
6
2.13 Commissioning in detail
Not only the adjustments at control level 2 but
also the system-specific parameters must be
determined as part of commissioning the heat
pump system. These parameters are adjusted
at control level 3, access to which is protected
by code.
Check all parameters in sequence. Enter all
set values into the column (system value) of
the commissioning checklist in section 2.15 on
page 40.
Note: Not all adjustments take immediate
effect. Some adjustments only become
effective in certain situations or after a delay.
CODE 1 0 0 0
Enter the correct four-digit code to change
parameters at control level 3. The factory-set
code is 1 0 0 0.
After pressing the PRG key (indicator
illuminates), the first digit can be selected by
turning the rotary selector. Pressing the PRG
key again confirms the value, then the second
digit of the code begins to flash. Turning the
rotary selector enables the second digit to
be entered. When all four digits have been
entered correctly, four lines appear in the
display. This enables access to control level 3,
and the display shows CODE OK. Closing and
re-opening the flap requires that the code
is entered again. Settings can be checked
without entering the code.
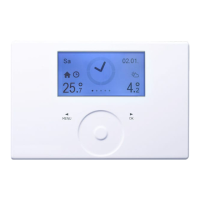
LANGUAGE
Press the PRG key and select the language
with the rotary selector. Then confirm your
selection by pressing PRG again.
CONTRAST
DISPLAY
Select, what will be displayed when the
programming unit flap is closed. You can
select between outside temperature, return
temperature, day and time, DHW temperature
or mixer temperature.
EMERGENCY MODE
Characteristics in case of Fatal Error conditions
in conjunction with the emergency operation:
The "Emergency mode" parameter can be set
to ON or OFF.
Emergency mode set ON:
The program selector automatically changes
over to emergency operation as soon as faults
occur and the heat pump fails.
Emergency mode set OFF:
The backup heat source takes over the frost
protection of the central heating system, as
soon as faults occur and the heat pump fails.
Users can then themselves select emergency
operation.
 Loading...