Series 4180 Powerhead14
6.8 Removing the Fuel Tank
N Drain the fuel tank (12).
N Dispose of fuel properly in accordance with
environmental requirements.
N Remove the shroud, @ 4.2.
N Remove the rewind starter, @ 5.2.
N Pull hoses (1, 2) off the carburetor, @ 10.2
N Pull hose (5) off the tank vent (6).
N Remove and inspect the fuel tank (12), replace if
necessary
N Install new bushings (13) if necessary.
6.9 Installing the Fuel Tank
N Coat bushings (13) with OH 723 press fluid and push
them onto the fuel tank (12).
N Fit the fuel tank (12) in the engine pan.
N Install the rewind starter, @ 5.7.
N Push the hoses (1, 2) onto the carburetor’s
connectors, @ 10.2.
N Push the hose (5) onto the tank vent (6).
N Assemble the intake system, @ 10.2.
N Install the shroud, @ 4.5.
6.10 Removing the Fuel Hoses
N Drain the fuel tank (12).
N Remove the shroud, @ 4.2.
N Remove filter and filter housing, @ 10.2.
N Pull hoses (1, 2) off the carburetor, @ 10.2
N Pull hoses (1, 2) with connectors (3) out of the fuel
tank (12).
N Pull connectors (3) off the hoses (1, 2).
N Remove the pickup body, @ 6.6
N Pull hose (4) out of the fuel tank (12).
6.11 Installing the Fuel Hoses
N Coat grommets of hose (4) with STIHL press fluid.
N Push hose (4) into the fuel tank.
N Press grommets of hose (4) into the fuel tank.
N Install the pickup body, @ 6.6.
N Coat both ends of hoses (1, 2) with STIHL press fluid.
N Push the hoses (1, 2) onto the connectors (3).
N Push connectors (3) of both hoses (1, 2) into
grommets of hose (4).
N Push the hoses (1, 2) onto the carburetor’s
connectors, @ 10.2.
N Install the filter housing and filter, @ 10.2.
N Install the shroud, @ 4.5.
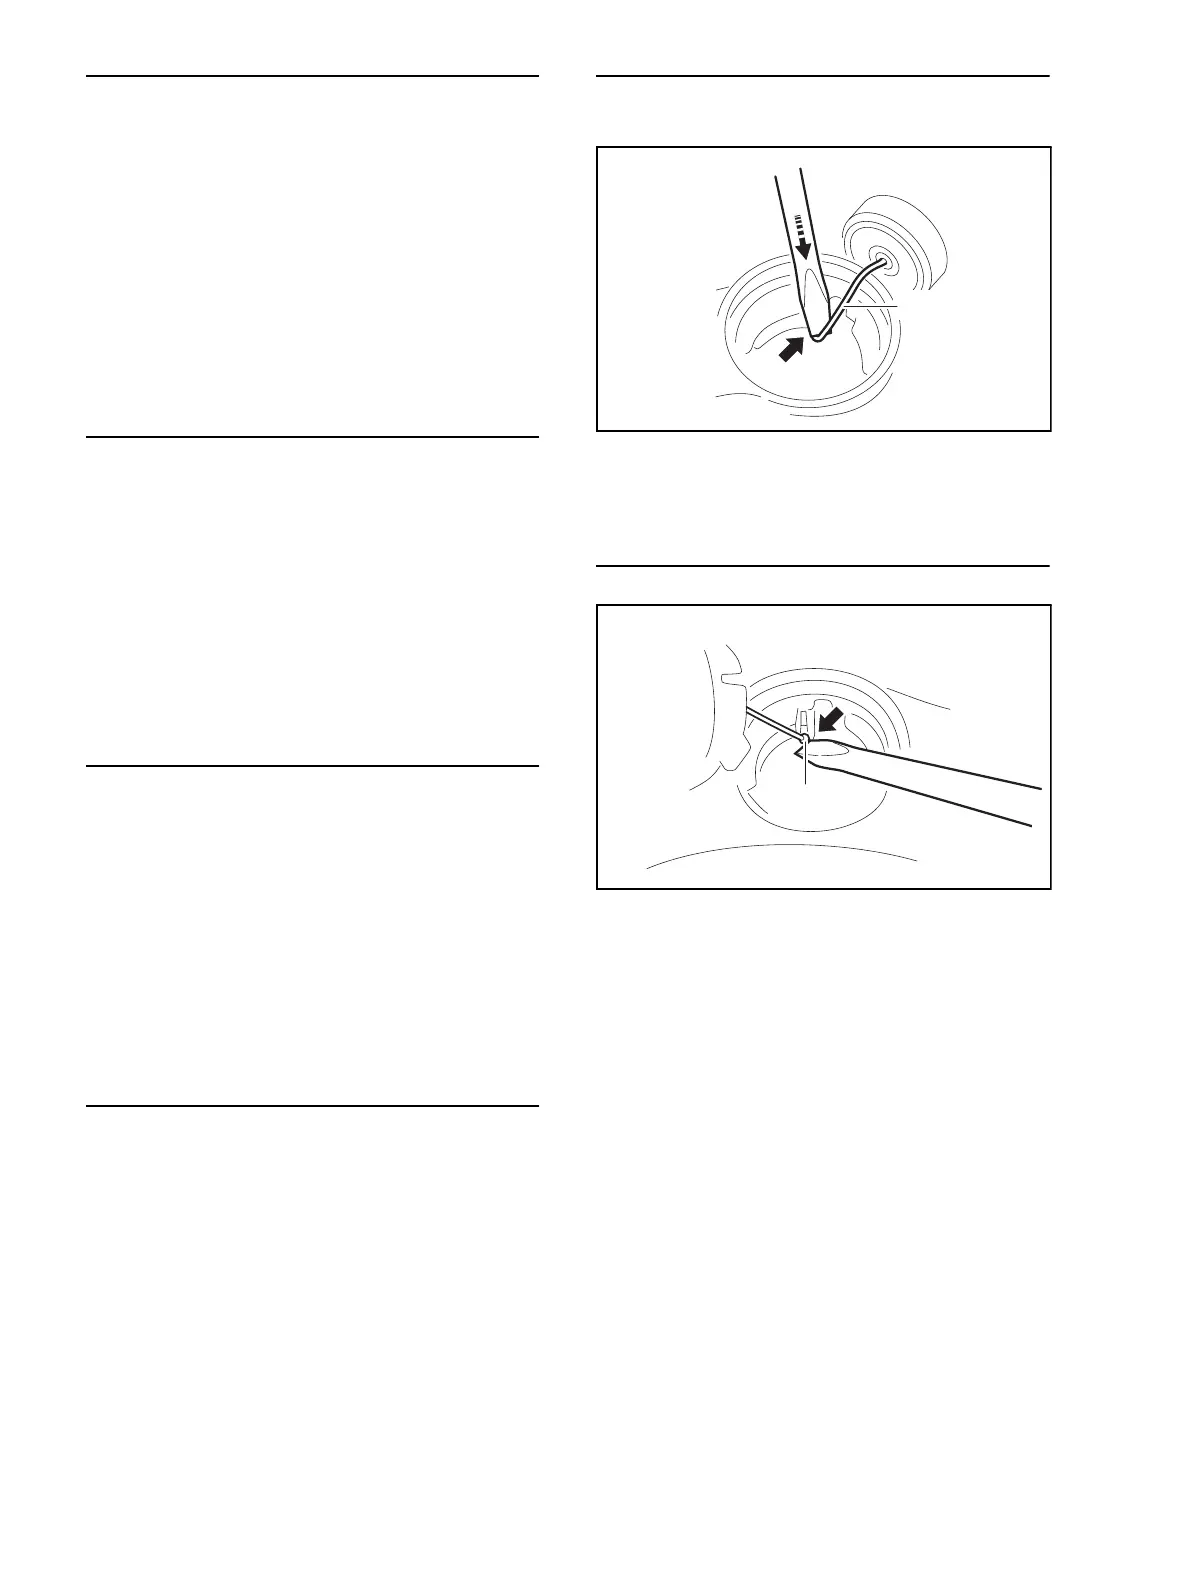
6.12 Removing the Tank Cap
N Open the tank cap (8).
N Ease the cord (10) out of its seat (arrow).
N Inspect tank cap (8), O-ring (9) and cord (10), replace
if necessary.
6.13 Installing the Tank Cap
N Use a suitable tool to push nipple (15) of cord (10) into
its seat (arrow).
N Close the tank cap (8).
N Test fuel tank for leaks.
10
0000-GXX-2790 A0
15
0000-GXX-1706 A0

 Loading...