8
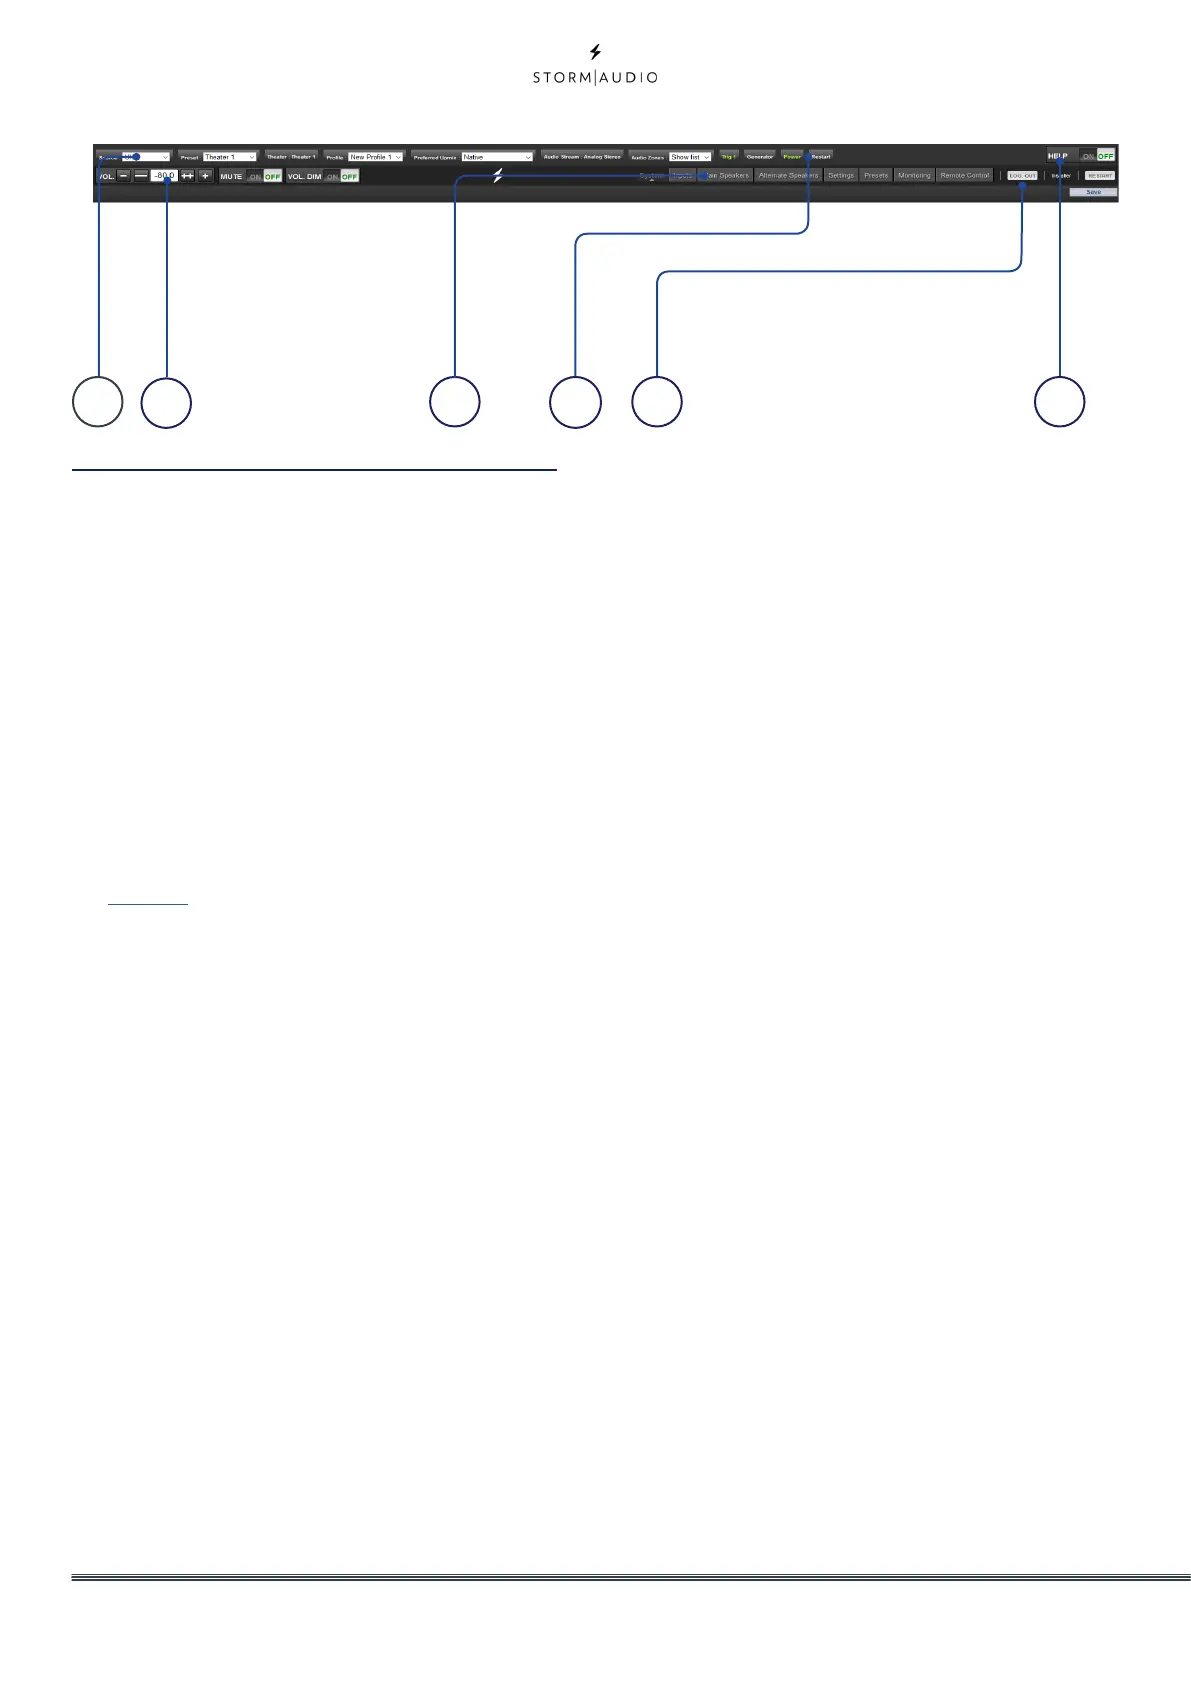
Web UI Header Diagram
1. Persistent Remote Control Bar
This area provides access to change some
settings without having to access the remote
control page. Change Source, Preset, Theater,
Profiles within each theater, and Surround
modes.
2. Volume Control
Volume control is provided without having
to access the Remote Control page. The + / -
buttons adjust volume in 1dB increments. The
++/-- adjust volume in 3dB increments. Mute
cuts all sound. Dim attenuates the volume
by the amount specified in “Parameters” on
page 30.
3. Configuration Section
• System: indicates information about the system
such as firmware version, any installed licenses,
network parameters. System configuration
backups and firmware updates are also done
here.
• Inputs: Configure input names, map physical
inputs to source components, and make input
dependent settings.
• Main Speakers: Configure primary theater, child
theaters, audio/video and audio only zones. This
is where you map analog outputs to physical
channels.
• Settings: Configure trigger behavior, HDMI, IR, and
other system wide parameters.
• Presets: Build presets that easily recall
combinations of Theaters, downmix zones, EQ
profiles, triggers and surround upmix behavior.
Presets offer customers the easiest way to place
their system into modes for different types of
listening.
• Monitoring: This StormMonitoring page gives
real time and logged statistics on the health and
performance of the ISP which can be accessed via
the local network or via remote network access
which makes system diagnostic endeavors less
speculative and much more concrete.
• Remote Control: A copy of the page available to
anyone logging into the web UI regardless of their
credentials level. The only difference between this
page and the one available without logging in is
that the Persistent Remote Control Bar remains at
the top.
4. Trigger / Generator / Power / Restart
• Trigger: Any triggers configured in Settings
(Configuration Section) for Manual Switching
appear here giving you easy access to activate
or deactivate these triggers with a click. Green
indicates that the trigger is in the active state.
White indicates that it is not.
• Generator: When white, the ISP built in noise
generator is not active. When green, it is active.
This is an indicator. The generator cannot be
switched on from here.
• Power: Switch the unit from standby to on
status from here. Green indicates that the unit is
powered on. White indicates standby.
• Restart: Should you need to restart the ISP, you
can do so from this switch.
5. Log Out
Pressing Log Out will return you to the web UI
home page. To access the installer menu or
expert user menu, you must log in with the
appropriate password again. Otherwise, you
only have access to the remote control.
1
2
3
4
5 6