22 MA_VEB100-2-4-5_A5-3_230123_en.doc
3.1.2 Installing the stitch plate (Fig. 6)
Remount the stitch plate in reversed order but make sure that the stitch plate opening
is mounted centrically to the presser foot and that the stitch plate is mounted
horizontally. Push the stitch plate bow completely upwards until threaded pin (3) fits
closely to the needle shaft bush.
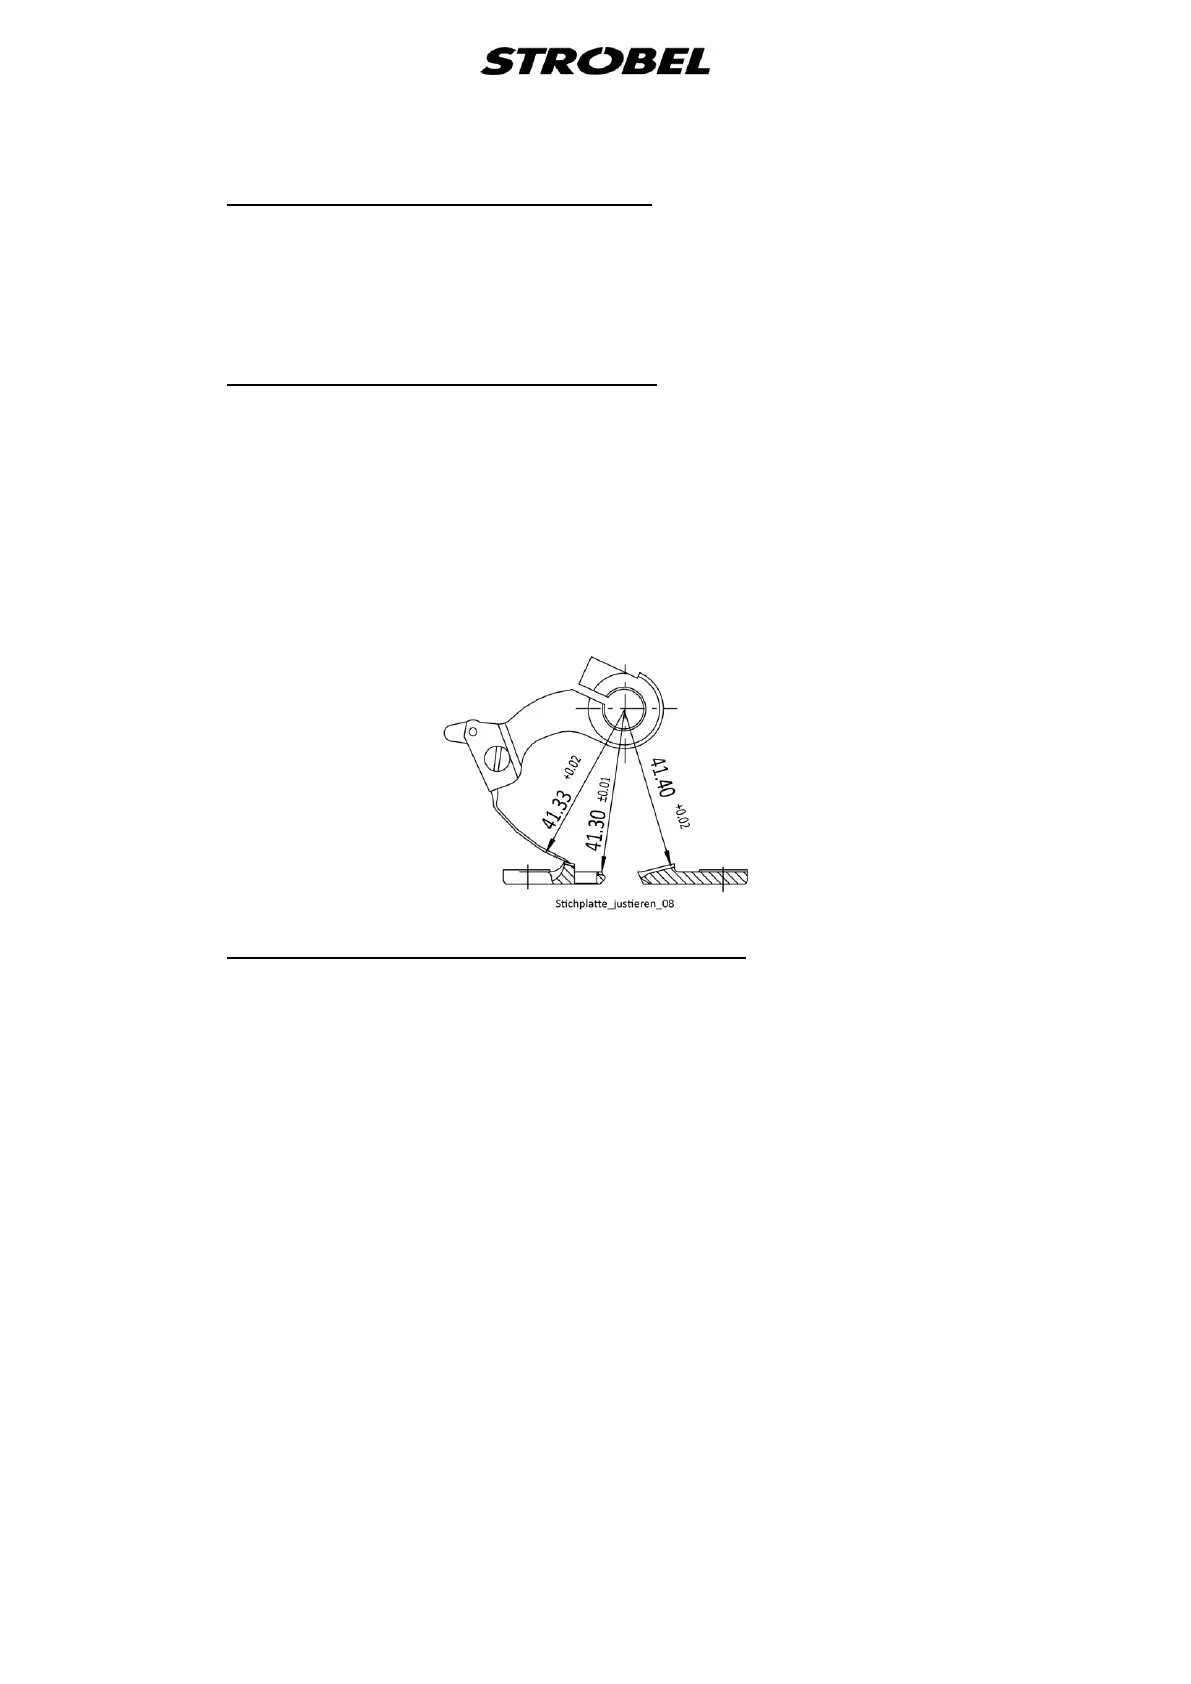
3.1.3 Adjusting the stitch plate (Fig. 7)
At the left needle guide, the theoretical needle radius of 41.3 mm should be 0.03 to
0.05 mm larger. At the needle slide plate, it should be 0.01 mm smaller to 0.01 mm
larger and at the right needle guide it should be 0.10 to 0.12 mm larger.
The adjustment must be made using a dial indicator. Deviations lead to significantly
poorer sewing results and may even cause preliminary damage or wear to the sewing
tools.
Fig. 7
3.1.4 Replacing the needle slide plate (Fig. 8)
The needle slide plate on the central base of the stitch plate can be removed after
loosening the screw (5).
When assembling, ensure that the needle slide plate lies firmly against the base.