39 MA_VEB100-2-4-5_A5-3_230123_en.doc
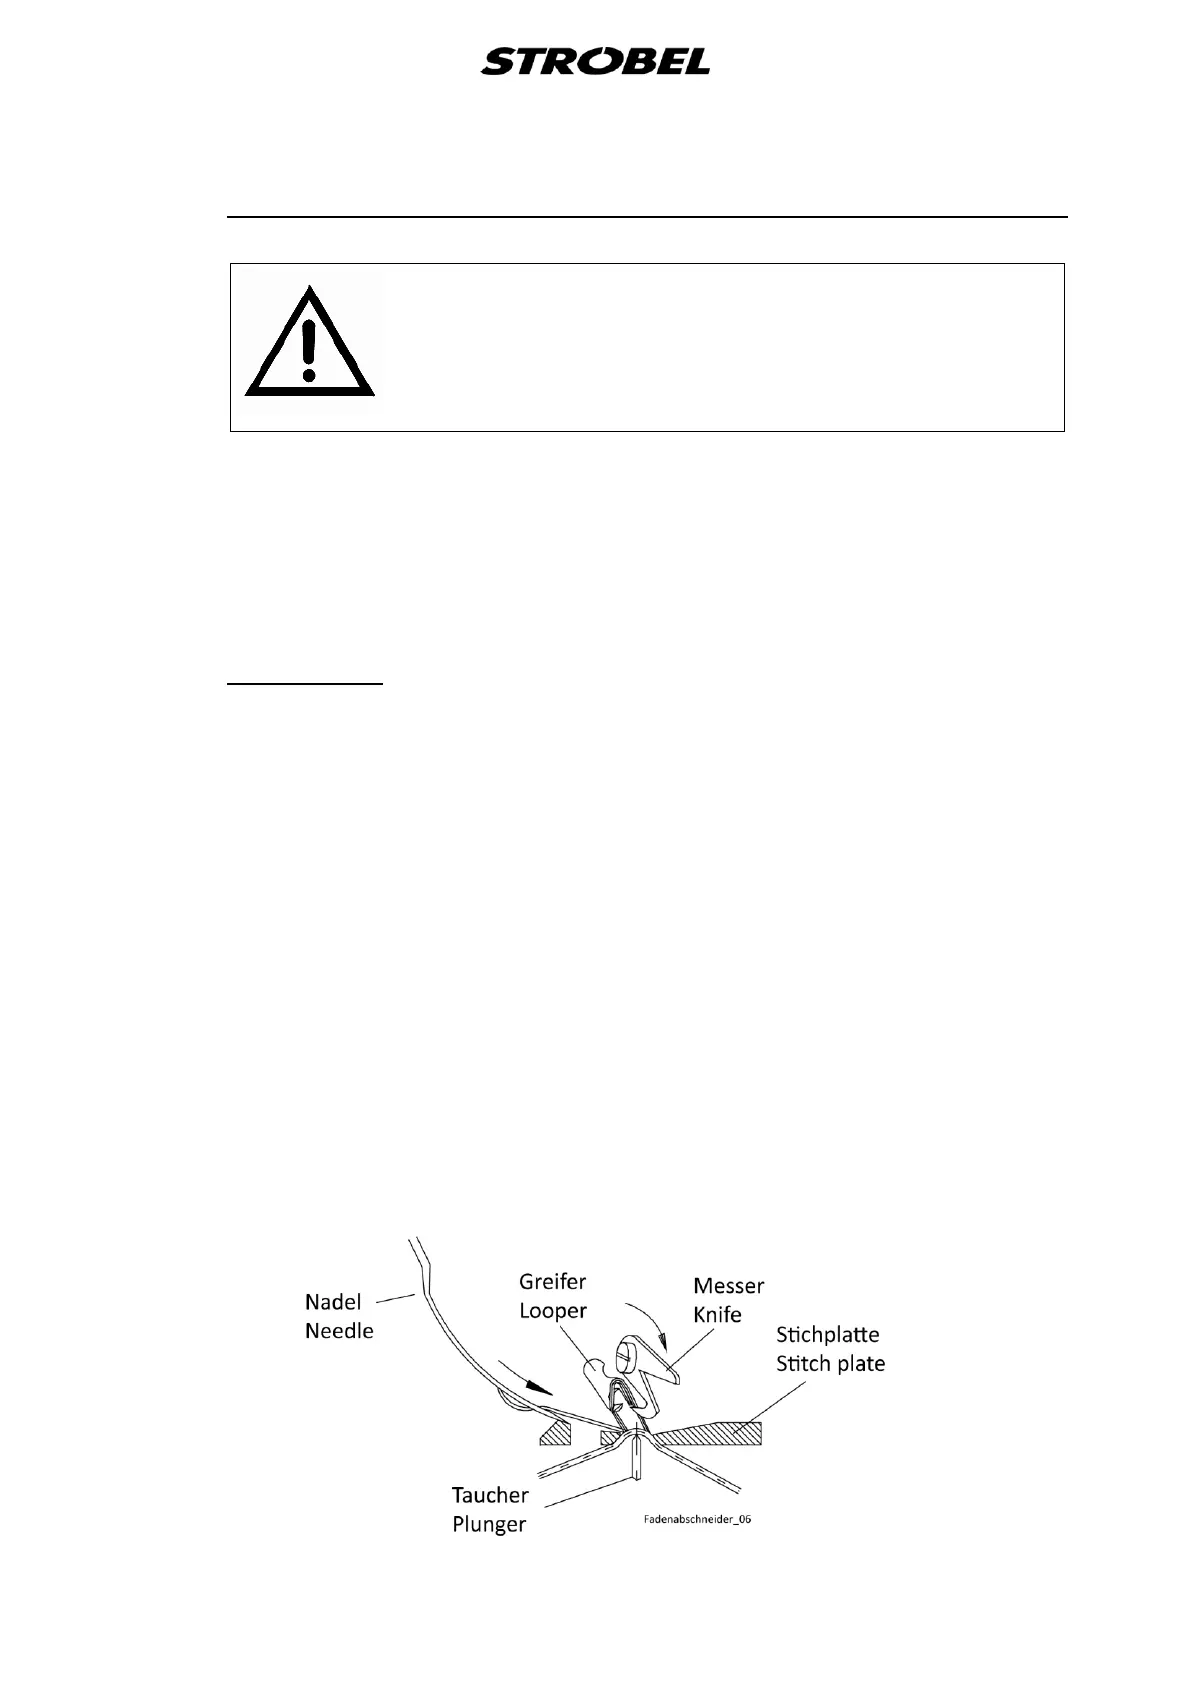
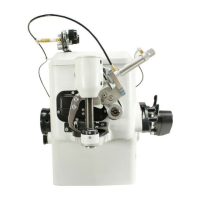
3.9.1 Removing and remounting of the thread trimmer drive (Fig. 22)
A T T E N T I O N !
Switch off machine electrically!
- Remove plug (1).
- Loosen the screw (2) and remove from blade (3), spring (4) and disc (5).
- Loosen the screw (6) on the stitch plate clamp (7) and remove the thread
trimmer drive.
- Installation in reverse order.
Ensure the blade is in correct position on the shaft!
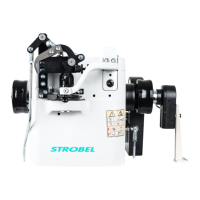
3.9.2 Adjustment
- The thread trimmer drive must be inserted as far as it will go into the stitch plate
clamp.
Swivel the drive backwards so that there is a gap of about 1 mm between the
drive and the sewing head.
- The blade of the knife has until about 2 - 3 mm from needle lever, stand forward,
readjust if necessary.
Remove clamp (8).
Loosen the screws (9) and (10) on the small gearwheel (11) and adjust by turning
the blade shaft.
Push together gearwheel and blade shaft to the limit and tighten.
Make sure that the blade (3) is in contact with the blade (16) to ensure the
shearing action. Observe dimension 0.5 mm on gearwheel (11)!
- Setting the microswitch (12) and gearwheel (11).
- When replacing the rotary magnet (13), ensure that the tooth gap between the
gearwheels is approx. 0.1 mm.
Ensure free movement of parts!
Fig. 23