14
Service Information
HYDRAULIC CHECK VALVE REPLACEMENT
Required Tools:
3/8 Open End Wrench Stiff Wire (with bent, pointed end) Small Needle Nose Pliers
3/4 Open End Wrench Torque Wrench (with Ft. Lbs. adjust.)
7/32 Hex Allen Wrench 1/2 Inch Diameter Rod
Replacement of Valve #1
WARNING
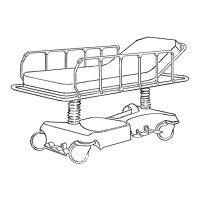
To avoid personal injury or damage to the stretcher, remove the litter and the base hood before beginning
service on the stretcher.
1. Using a 3/8 open end wrench, remove square head set screws from both head and foot end jack support
tubes. Remove litter top and set aside.
2. Lift base hood off base frame and set aside.
3. Lower the jack to full down position. The actuator must be manually lowered while depressing the appropri-
ate release pedal.
4. Remove the pin body assembly (4) with a 3/4 open end wrench and discard the housing gasket (5).
NOTE
Although the hydraulic fluid is not under pressure, some fluid loss will occur. The fluid loss should be minimal
but covering the floor is advisable.
5. Using a 7/32 hex Allen wrench, remove the valve plug (6).
6. Using a stiff wire with a bent, pointed end, remove and discard the valve (1) and the seal (7).
7. Install the new seal (7) flat to the bottom of its hole with a 1/2 inch diameter rod and install the new valve
(1) with the beveled end out (as shown in the illustration).
8. Install the valve plug (6) with the countersunk end first and the beveled end out. Tighten to 10 foot pounds
torque.
9. Install the pin body assembly (4) with the new housing gasket (5) and tighten to 10 foot pounds torque.
10. Pump up the jack to the maximum height. Apply weight to be sure the jack holds its position and there
are no hydraulic leaks before replacing the base hood and the litter.
ITEM PART NO. PART NAME
1 926–20–153 Check Valve
2 926–20–153 Check Valve
3 715–1–341 Poppet
4 715–100–312 Pin Housing Assembly
*
715–270–100 Valve Assembly**
5 715–1–330 Housing Gasket
6 715–1–309 Valve Plug
7 926–20–154 Seal
8 715–1–101 Base Plug
9 926–20–156 Seal
10 715–1–309 Valve Plug
11 926–20–154 Seal
12 715–1–301 Base Plug
13 926–20–156 Seal
14 390–2–134 Conical Comp. Spring
* Used on jack part number 715–100–310.
**Used on jack part number 715–270–10.
(see label on side of jack reservoir for jack part number)
FILLER PLUG
3
14
12
13