5
Service Information
PNEUMATIC FOWLER ADJUSTMENT
Required Tools:
1/8” Hex Allen Wrench 1/2” Socket w/Ratchet
3/32” Hex Allen Wrench Channel Lock Pliers
5/32” Hex Allen Wrench Towel or Cloth
7/16” Open End Wrench Thread ”Locktite”
Adjustment Procedure:
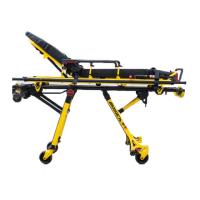
1. Refer to drawing 1000–144 (Pneumatic Fowler Assembly, page 56).
2. For easier access, move Fowler to 75 degrees or higher.
3. Using a 3/32” hex Allen wrench, remove set screws (AH), located in center of yokes (AC).
4. Wrap a towel or cloth around the gas cylinder actuator shaft(s) so as not to mark the shaft. Using channel
lock pliers, turn actuator shaft(s) into yoke(s) (AC) until tight.
5. Using thread locktite, reinstall set screws (AH).
6. While holding the jam nuts (AF) with a 1/2” socket, turn the adjustment screws (CA) using a 5/32” hex Allen
wrench until they JUST touch the cylinder pins.
7. Verify that the distance between the handle (AR) and the end of the Fowler tube (F) is 1 1/4”. If it is not,
while holding jam nut (BR) with a 7/16” open end wrench turn adjustment screw (AD) with a 1/8” hex Allen
wrench until the 1 1/4” measurement is achieved. Retighten jam nut (BR).
8. Be sure the Fowler will travel from flat to at least 90 degrees. If it doesn’t, turn each adjustment screw (CA)
clockwise 1/2 turn. Repeat until at least 90 degrees of travel is achieved.
9. Lower the Fowler to a 5–10 degree angle and release the handle. Apply approximately 50 pounds down-
ward to the end of the Fowler. If either side drifts down, turn the adjustment screw (CA) on that side 1/4
turn counterclockwise. Repeat until the Fowler is firm with 50 pounds applied.
10. While holding the adjustment screws (CA), tighten the jam nut spacers (AF).