EasyManuals Logo
Home>Südwind>Fan>Ambientika ADVANCED

Südwind Ambientika ADVANCED User Manual

Default Icon
Go to English
111 pages
To Next Page IconTo Next Page
To Previous Page IconTo Previous Page
Page #93 background imageLoading...
Page #93 background image
94
4.0 INSTALLATION OF EXCHANGE MODEULE AND VENTILATION UNIT
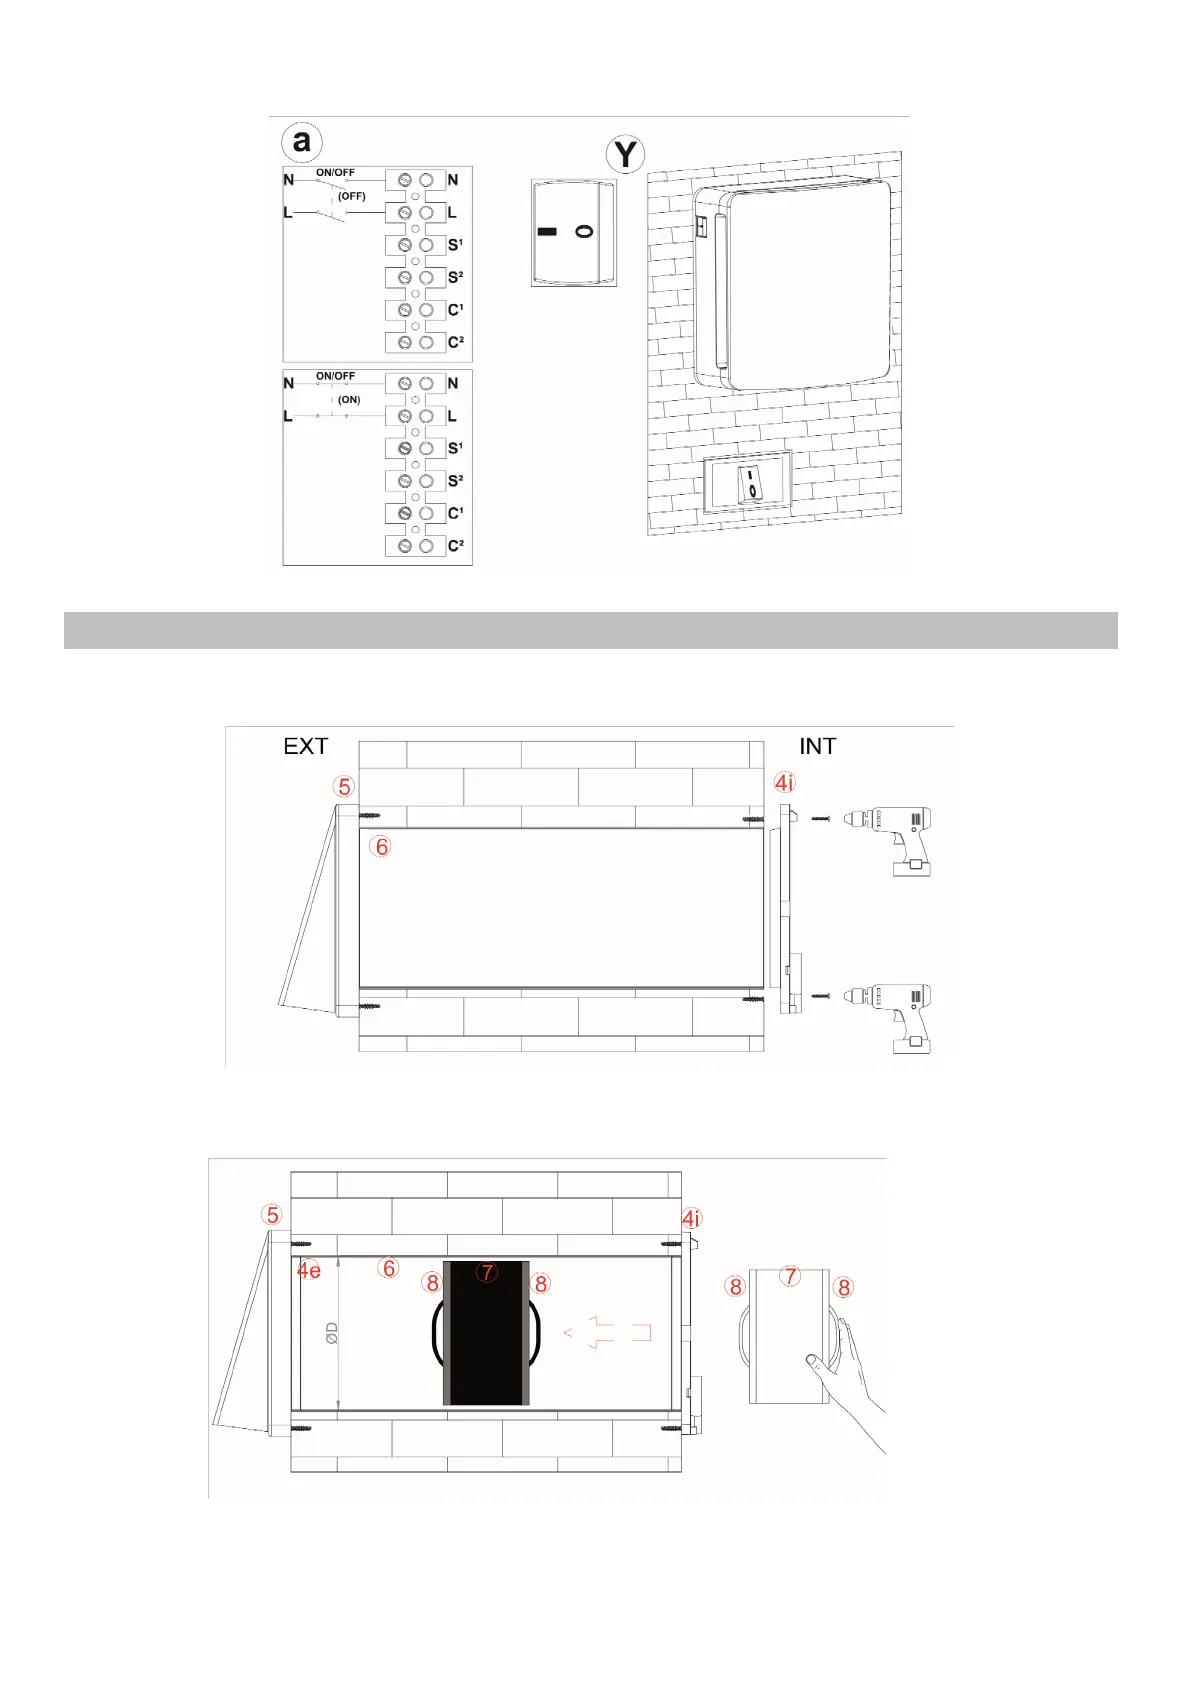
At the end of the electrical connection, fix the wires carefully in the fitted compartment, and screw
the particular wall mounting (4i) into the wall, with the 4 screws provided, as in the image below.
Once the particular mounting (4i) is screwed into the wall, insert the ceramic heat exchanger (7)
with the relative filters (8), positioning it in the middle of the recessed tube (6), as in the image
below:
Fix the main unit (3) - together with the shutter components (2) and the esthetic front cover(1),
already mounted upon it - snap-lock onto the specific wall mounting (4i), until it is attached with all

Table of Contents

Other manuals for Südwind Ambientika ADVANCED

Questions and Answers:

Question and Answer IconNeed help?

Do you have a question about the Südwind Ambientika ADVANCED and is the answer not in the manual?

Südwind Ambientika ADVANCED Specifications

General IconGeneral
BrandSüdwind
ModelAmbientika ADVANCED
CategoryFan
LanguageEnglish

Related product manuals