3
Aluminum
Housing
for the
EasyShade
Assembly
Set Screw
Surface
Round
Head
Screw
Figure 4
Bracket
Protruding
Recessed
of the
EasyShade
Assembly
INSTALLATION
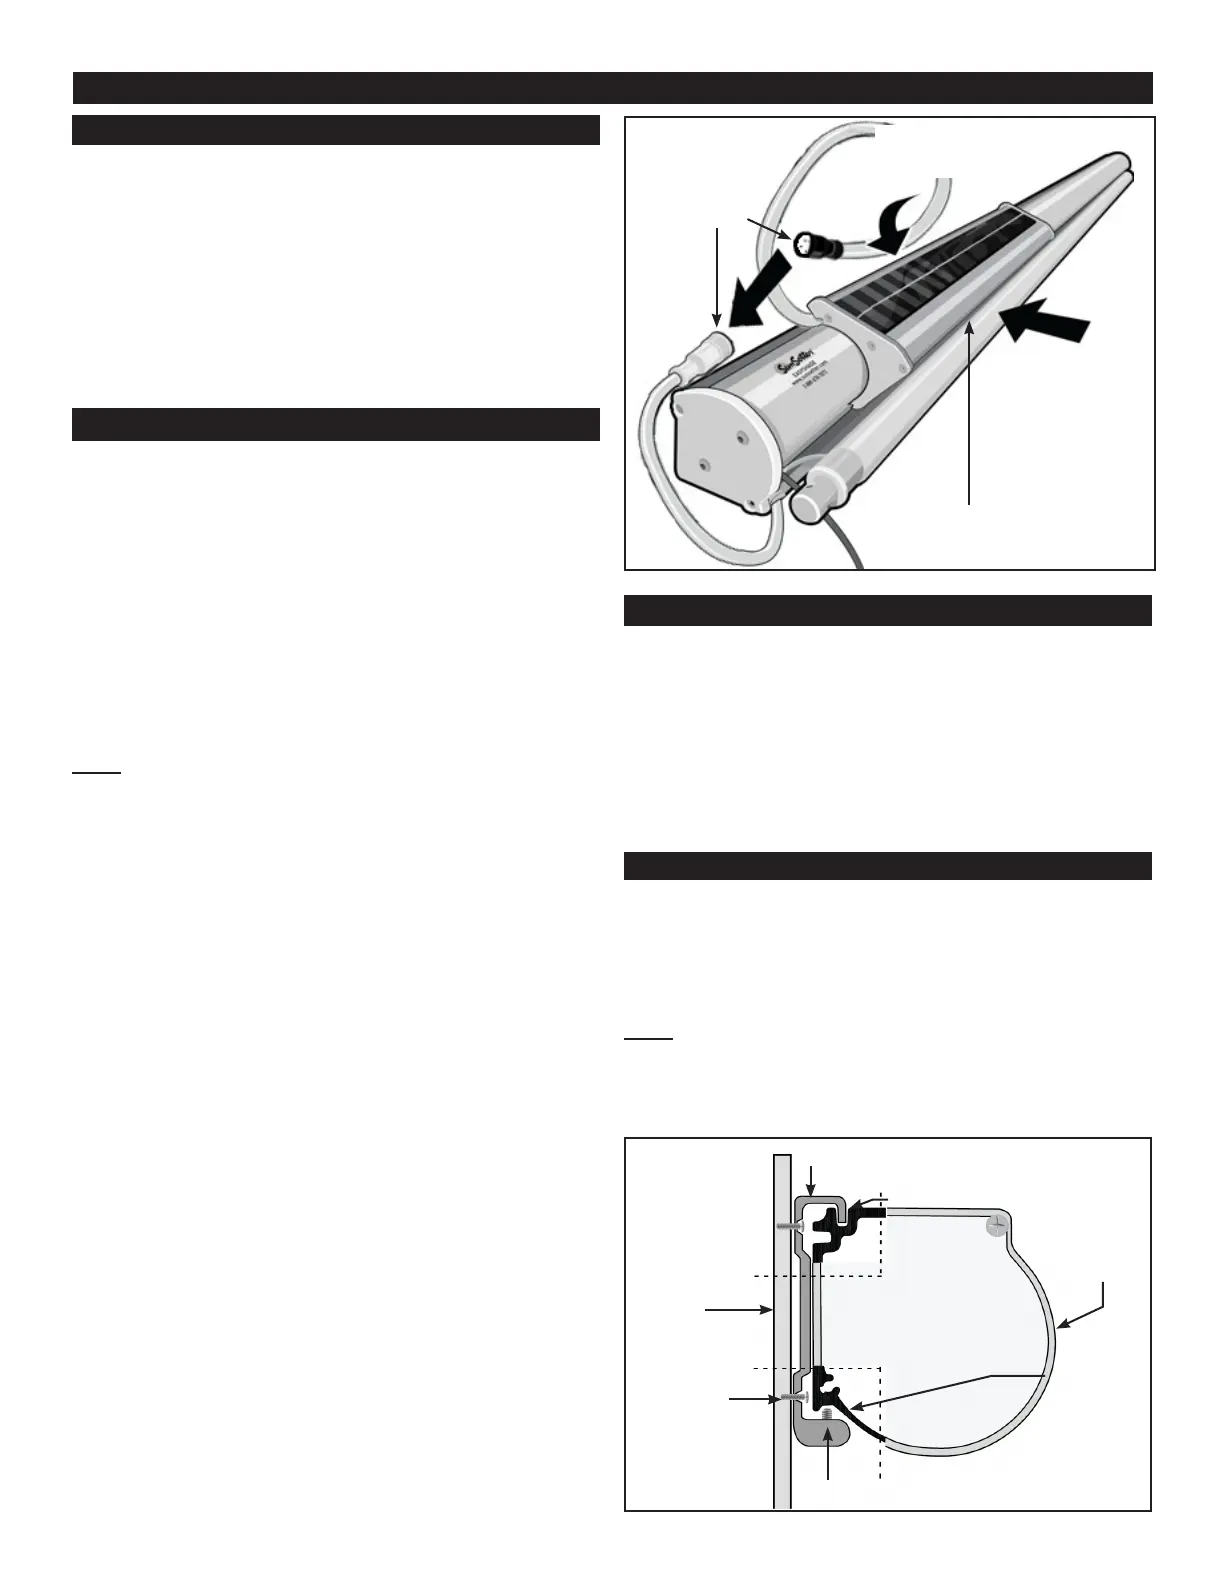
ATTACH SOLAR PANEL TO EASYSHADE HOUSING
Figure 3
1. Connect the Power Cord between the Motor and
Figure 3
2.
Note: When posioning the Solar Panel on the
Housing, route the Power Cable that is connected to
the Motor behind the housing. Move the Solar Panel
far enough away to remove slack in the Power Cable.
Total length of the combined Cable is about four
feet. For narrow EasyShades, excess Cable can be
tucked behind the Housing.
2a.
under the front of the Fabric Panel Opening of the
Figure 3
2b.
Figure 3
3.
MOUNT EASYSHADE HOUSING TO HOUSE
4
INSTALL MOUNTING BRACKET - VERTICAL
Figure 4
Note: Aluminum Housing and Cable Brackets need
to be mounted on the same Vercal Surface. If
mounted to siding, it may be necessary to shim the
Brackets to create a at mounng surface.
SOLAR PANEL AND BATTERY
If you are not installing right away, place the Solar
Figure 3
Power Cord
Panel under
Opening
in the
EasyShade
Housing
Allen screw
onto Housing