32
1100
Adjustment
⑨
⑩
①
⑧
②
⑦
⑥
①
⑧
①
⑤
③
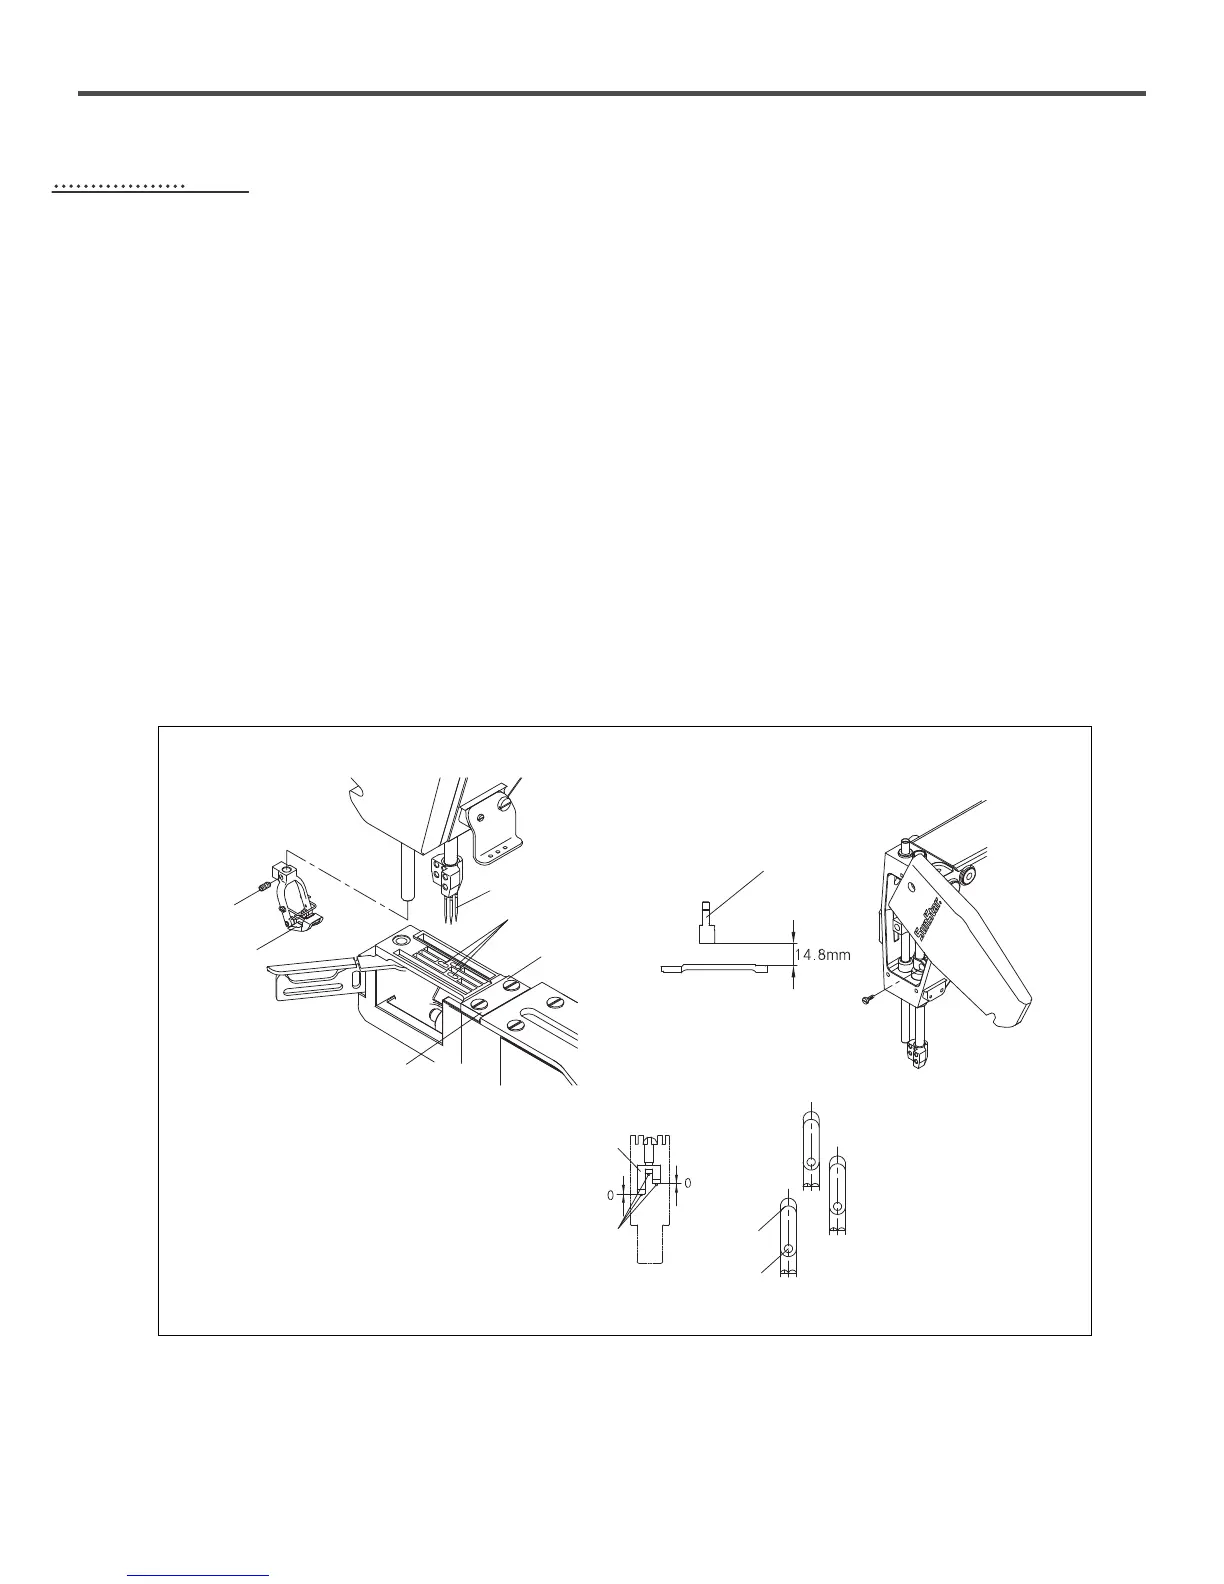
1) Adjustment of Needle Bar Height
Adjust the height of the needle bar ①.
Make sure that each needle ① is at the center of the needle hole ⑧ on the needle plate ②.
A. Remove the screw ⑨ and then remove the presser foot ⑩.
B. Turn the pulley until the needle bar is located at the lowest position.
C. Loosen the needle bar clamp screw ⑤ and adjust the distance between the bottom of the needle clamp ③ and the
needle plate ② at 14.8mm(For light materials:11.5mm).
※ With the needle clamp adjustment as set forth above, when the needle clamp ③ reaches the highest position,
the distance between the needles ① and the needle plate ② becomes 14mm(For light materials:9mm).
(applicable to heavy and super heavy materials).
D. Remove three screws ⑦ and then remove the needle plate ②.
E. Turn the pulley to place the needles ① and the needle guard ⑥ in parallel. Then adjust the slant of the needle
clamp ③ to remove the space between left, right needles ① and the needle guard ⑥.
Use the three screws ⑦ to assemble the needle ②. Check that the needles ① are at the center of the needle holes
⑧, and then fasten the needle bar clamp screw ⑤.
F. Use the screw ⑨ to assemble the presser foot ⑩.
 Loading...