16
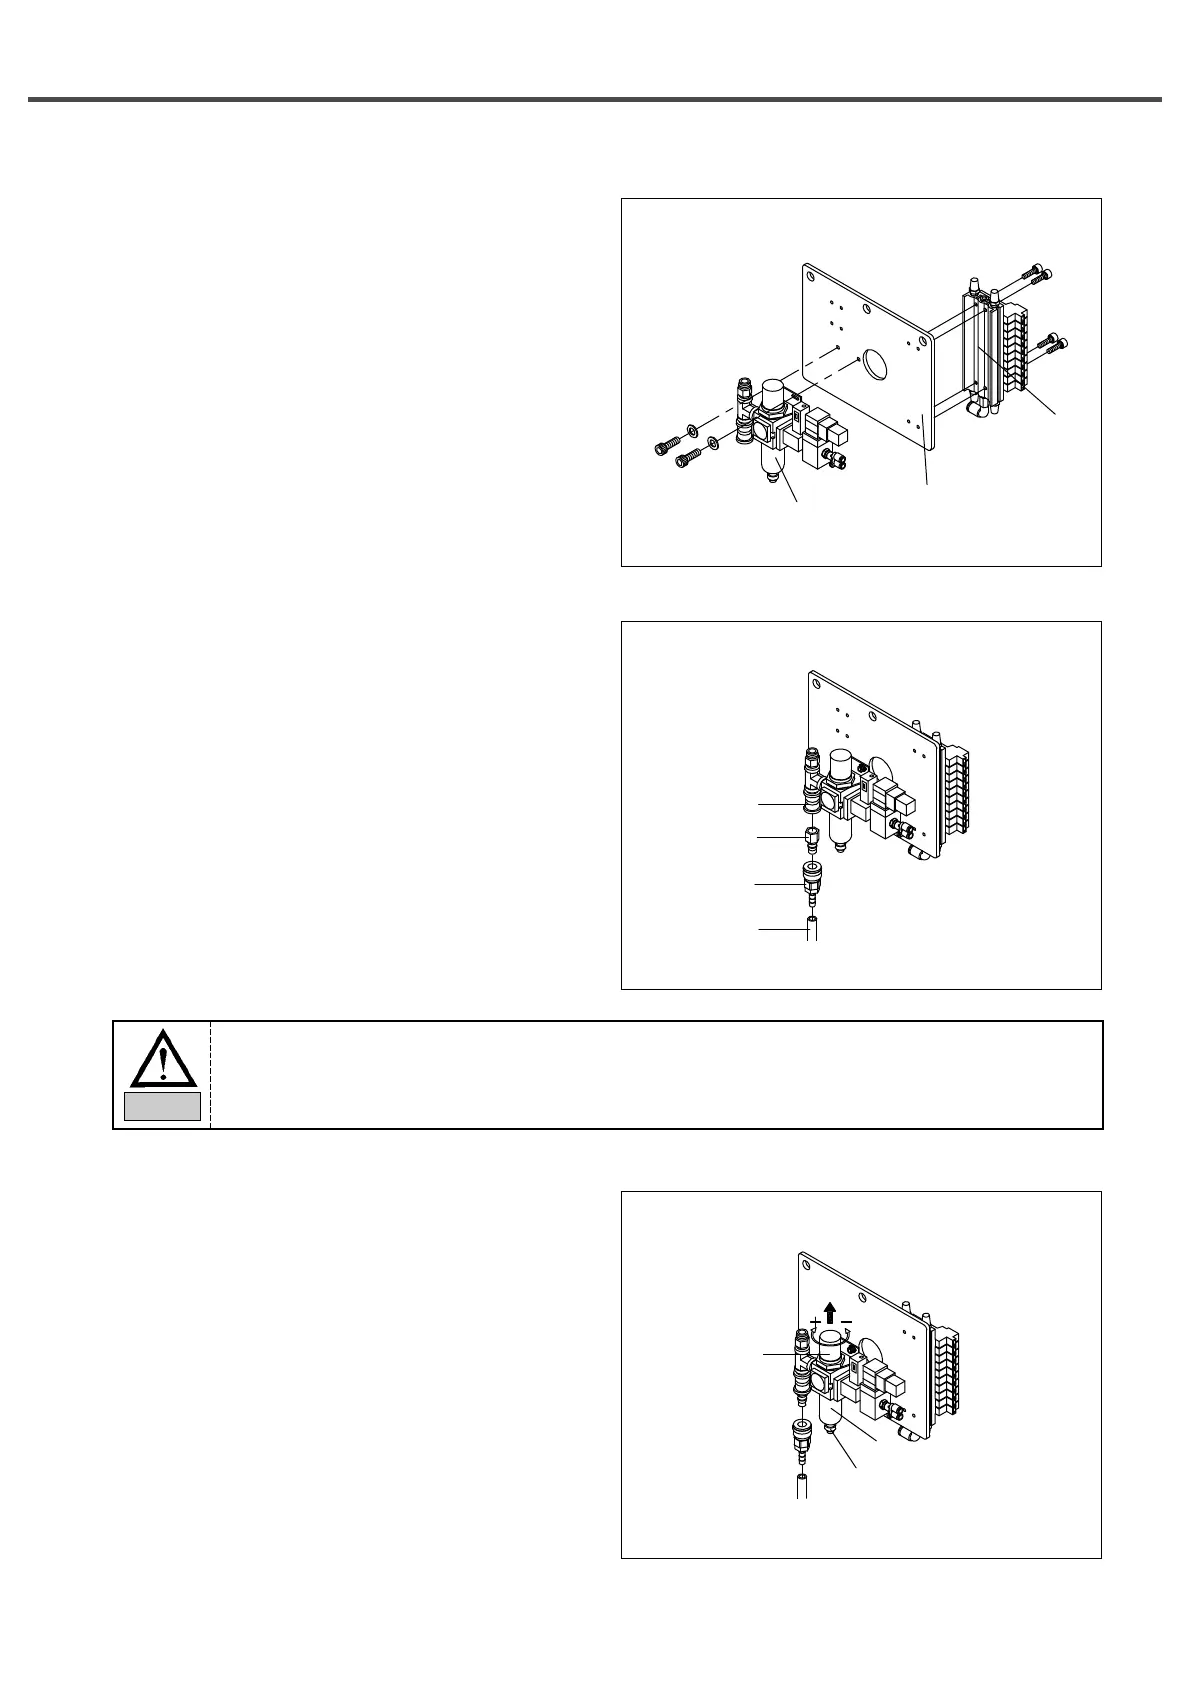
5.7) Pneumatic Device Installation
1) Fix the filter regulator ① to the manifold bracket at
the rear side of the body using bolts.
2) Fix the solenoid valve ② to the manifold bracket using
bolts.
3) Connect the air hoses on the machine side to each
solenoid valve.
4) Connect the cables linked to the control box to the
solenoid valves matching the number.
5.8) Air Hose Installation and Air Pressure
Adjustment
5.8.1) Air Hose Connection
1) Connect the quick joint socket ① to the air hose ②.
2) Connect the quick joint socket ① to the quick joint
plug ③.
3) Operate the finger valve ④ to drive in the air and
check if the pneumatic regulator scale points at
5.0~5.5Kgf/cm
2
.
5.8.2) Air Pressure Adjustment
1) The air pressure used is 5.0~5.5Kgf/cm
2
.
2) Pull up the regulator knob and spin it to change the
air pressure. Turn the knob in the positive (+) or
negative (-) directions to change the air pressure
within 5.0~5.5Kgf/cm
2
. After adjustment is
complete, place the knob ① back and firmly fix it.
3) After long-time use, water is gathered at the
regulator tank ②. Please empty the tank. If the
water sits at the tank for a long time, it may be
absorbed by the machine.
4) Press the drainage button ③ on a regular basis to
remove the water.
①
manifold bracket
②
④
③
①
②
①
③
②
Keep in mind that when the air is supplied, some parts on the machine or the load frame may
move.
Caution