31
7.11) Adjustment of Driving Belt Tension
7.11.1)
Specifications of Driving Belt Tension Adjuster
(Sound wave-type belt tension meter)
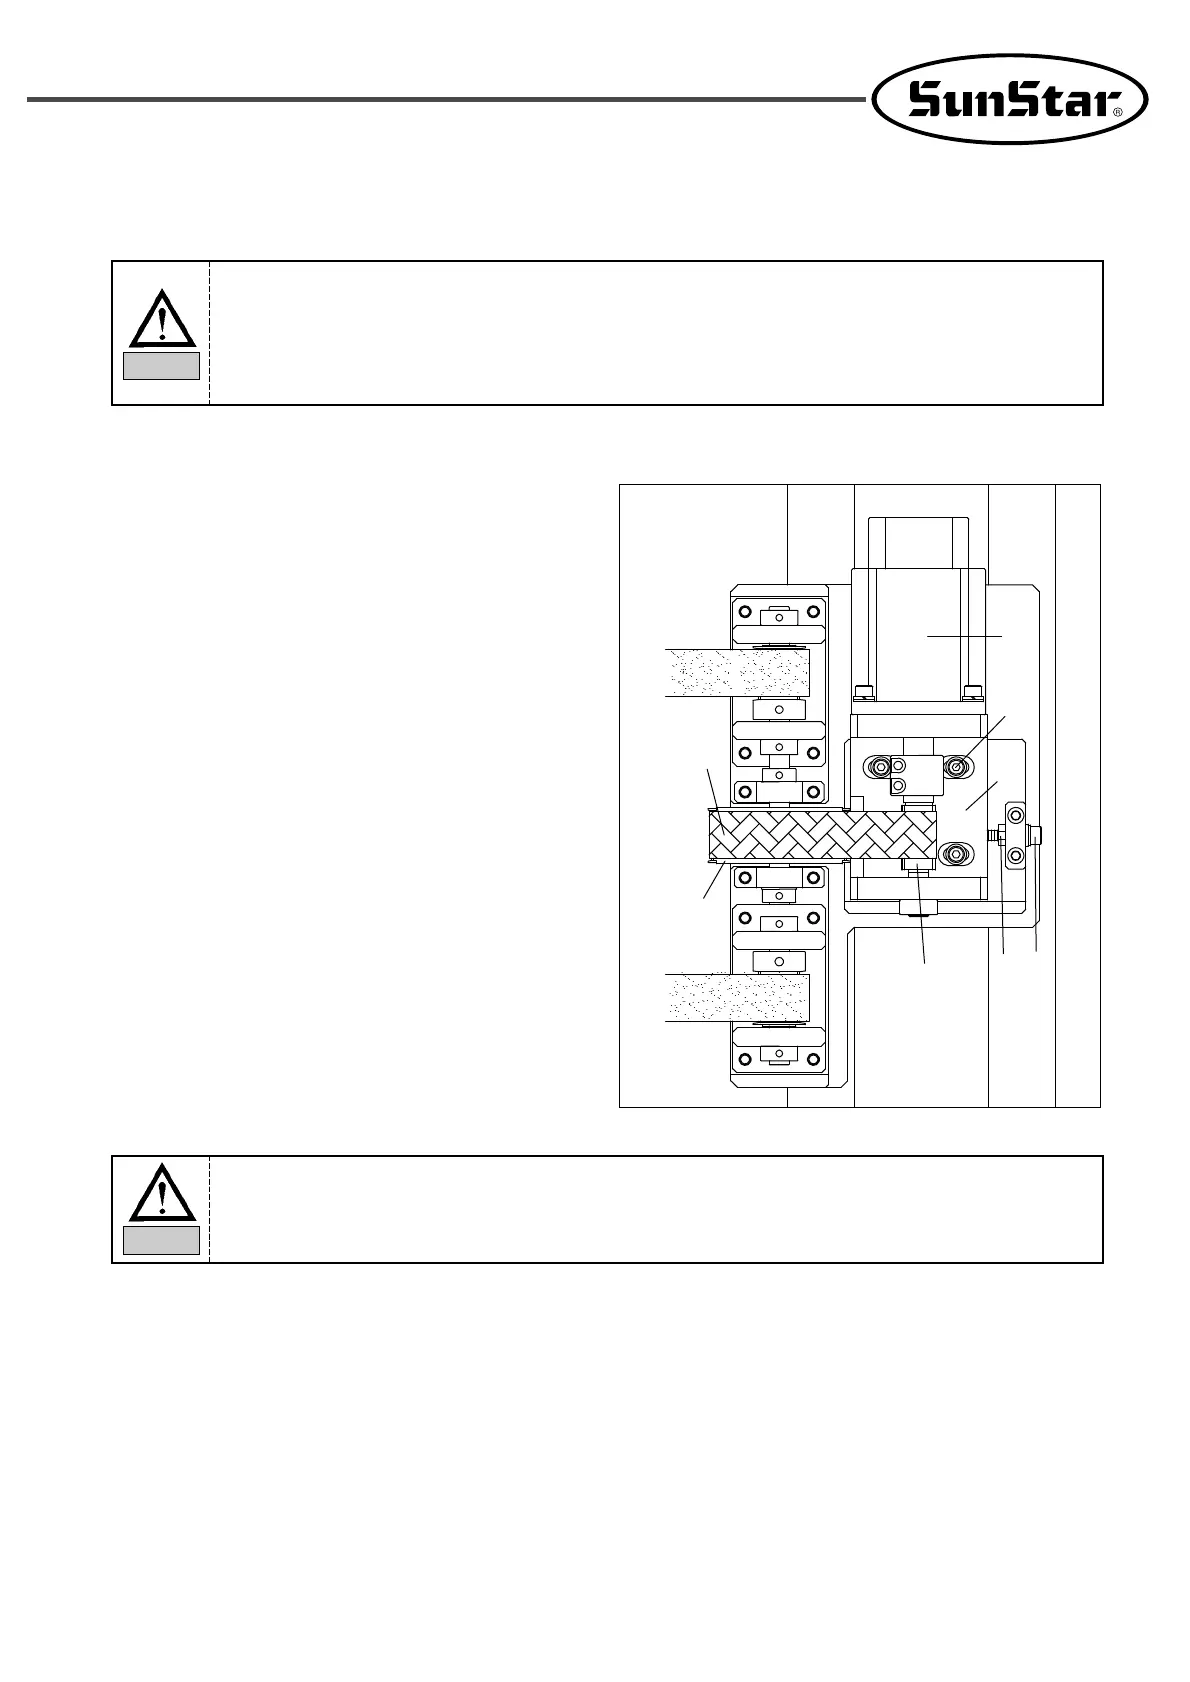
7.11.2) Adjustment of X-shaft Timing Belt Tension
1) Motor Driving Part Timing Belt
① Disassemble the X-Y cover and check the X-motor
driving part timing belt tension using the sound
wave-type belt tension meter.
② Set the X-motor driving part timing belt tension at
1.5~2kgf according to the sound wave-type belt
tension meter when the belt center Ⓐ of the driving
pulley ④ and the driven pulley ② has an impact
created by fingers or equivalent tool.
③ When the X-motor driving timing belt tension is
adjusted, the followings are the input data for the
sound wave-type belt tension meter.
Weight: 3.8g/m
Wide: 35mm/#R
Span: 104mm
④ When adjusting the tension of the X-motor driving
part timing belt, loosen the nut ⑤ assembled with
the tension adjusting bolt ⑥ and loosen the fixing
bolts ③ (3EA) which fix the X-motor bracket ⑦ to
the extent that the motor bracket ⑦ can move.
⑤ When the tension adjusting bolt ⑥ is turned clockwise, the X-motor bracket ⑦ and the X-driving pulley ④are
pulled to the bolt direction. This increases the tension of the timing belt Ⓐ, and vice versa.
⑥ When tension adjustment is complete, tightly fasten the nut ⑤ and the fixing bolt ⑥.
⑦ Fix the X-motor bracket ⑦with the fixing bolts ③ (3EA).
①
③
⑦
⑥
⑤
④
②
Ⓐ
1. When the tension adjustment of each driving belt is needed, properly trained SunStar
engineers or equivalent experts should conduct the tension adjustment. Otherwise, embroidery
quality and machine operation might be affected.
2. Before adjusting each driving belt
’’
s tension, turn off the power of the machine.
Caution
If the tension adjusting bolt
⑥⑥
is turned without loosening the fixing bolts
③③
, it may cause the
damage to the machine.
Caution