23
77
Maintenance
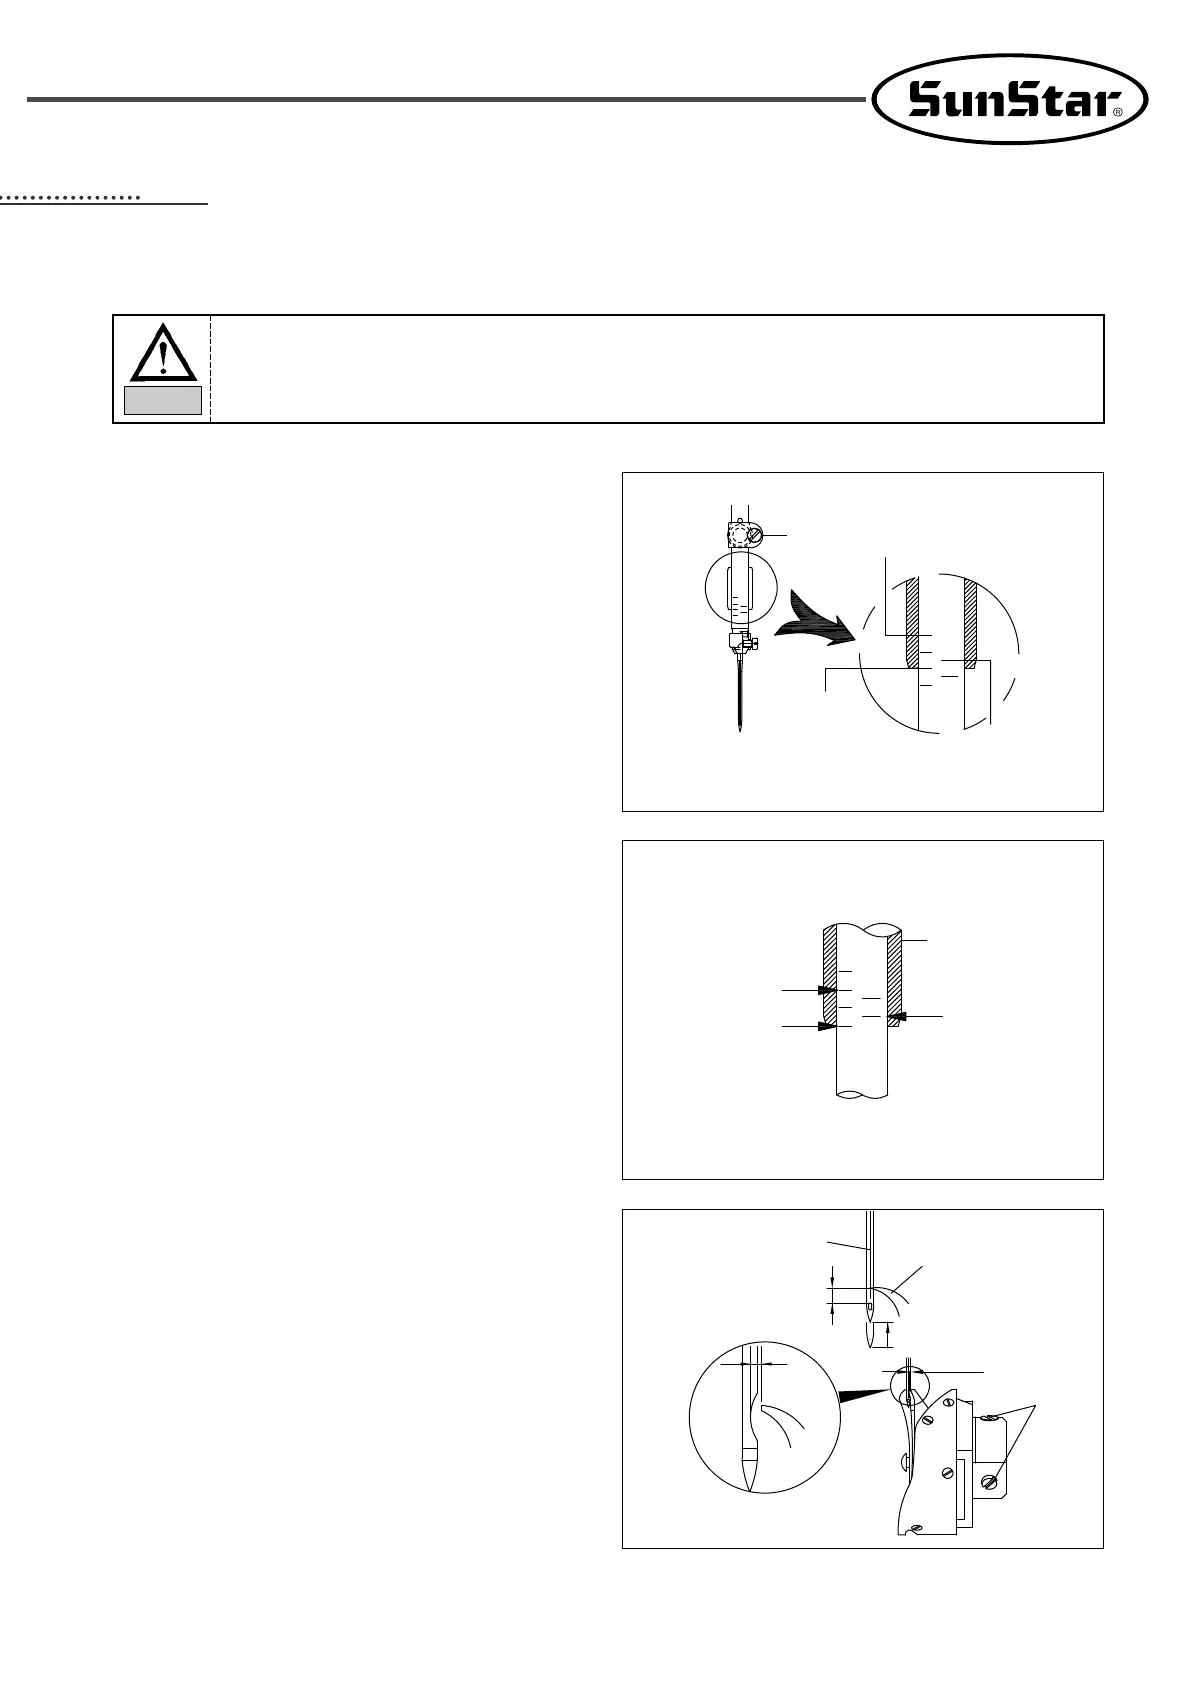
7.1) Needle Bar Height Adjustment
Loosen the needle bar holder screw at the lowest position
of the needle bar. As in the right figure, place the needle
bar bushing bottom at the up marked line appropriate for
the needle used and fasten the needle bar screw.
7.2) Adjustment of Needle and Hook
1) As in the right figure, when the needle bar ascends
from the lowest position, place the needle bar lower
bushing bottom at the down marked line appropriate
for the needle used.
2) Loosen the three hook fixing screws and set the hook’s
pointed part ③ at the center of the needle ④. The
distance between the hook’s pointed part ③ and the
needle should be 0.05~0.1mm.
3) When adjustment is complete, tightly fasten the three
fixing screws ②.
Tightening
screw
Needle bar lower
bushing
DP×17
#22 or above
OP×15
DP×17
#22 or above
DP×17
#21 or below
DP×17
#21 or below
DP×5
0.05∼0.1mm
0.05∼0.1mm
0∼0.5mm
③
④
②
1. The sewing machine is tooled at the best conditions when shipped out of factory. Do not
change the settings of the machine except trained engineers and use authentic SunStar parts
only for part replacement.
2. Power must be turned off before conducting maintenance activities.
Caution