25
ⓔ Turn the position link stopper screw to place the position link stopper ④ close to the hinge screw for presser foot
driving link fixing ③.
ⓕ Tightly fasten the fork link screw ① and check any clearance of the presser foot adjusting arm in the vertical
direction. Check the tightening status of screws and adjust the presser foot stroke.
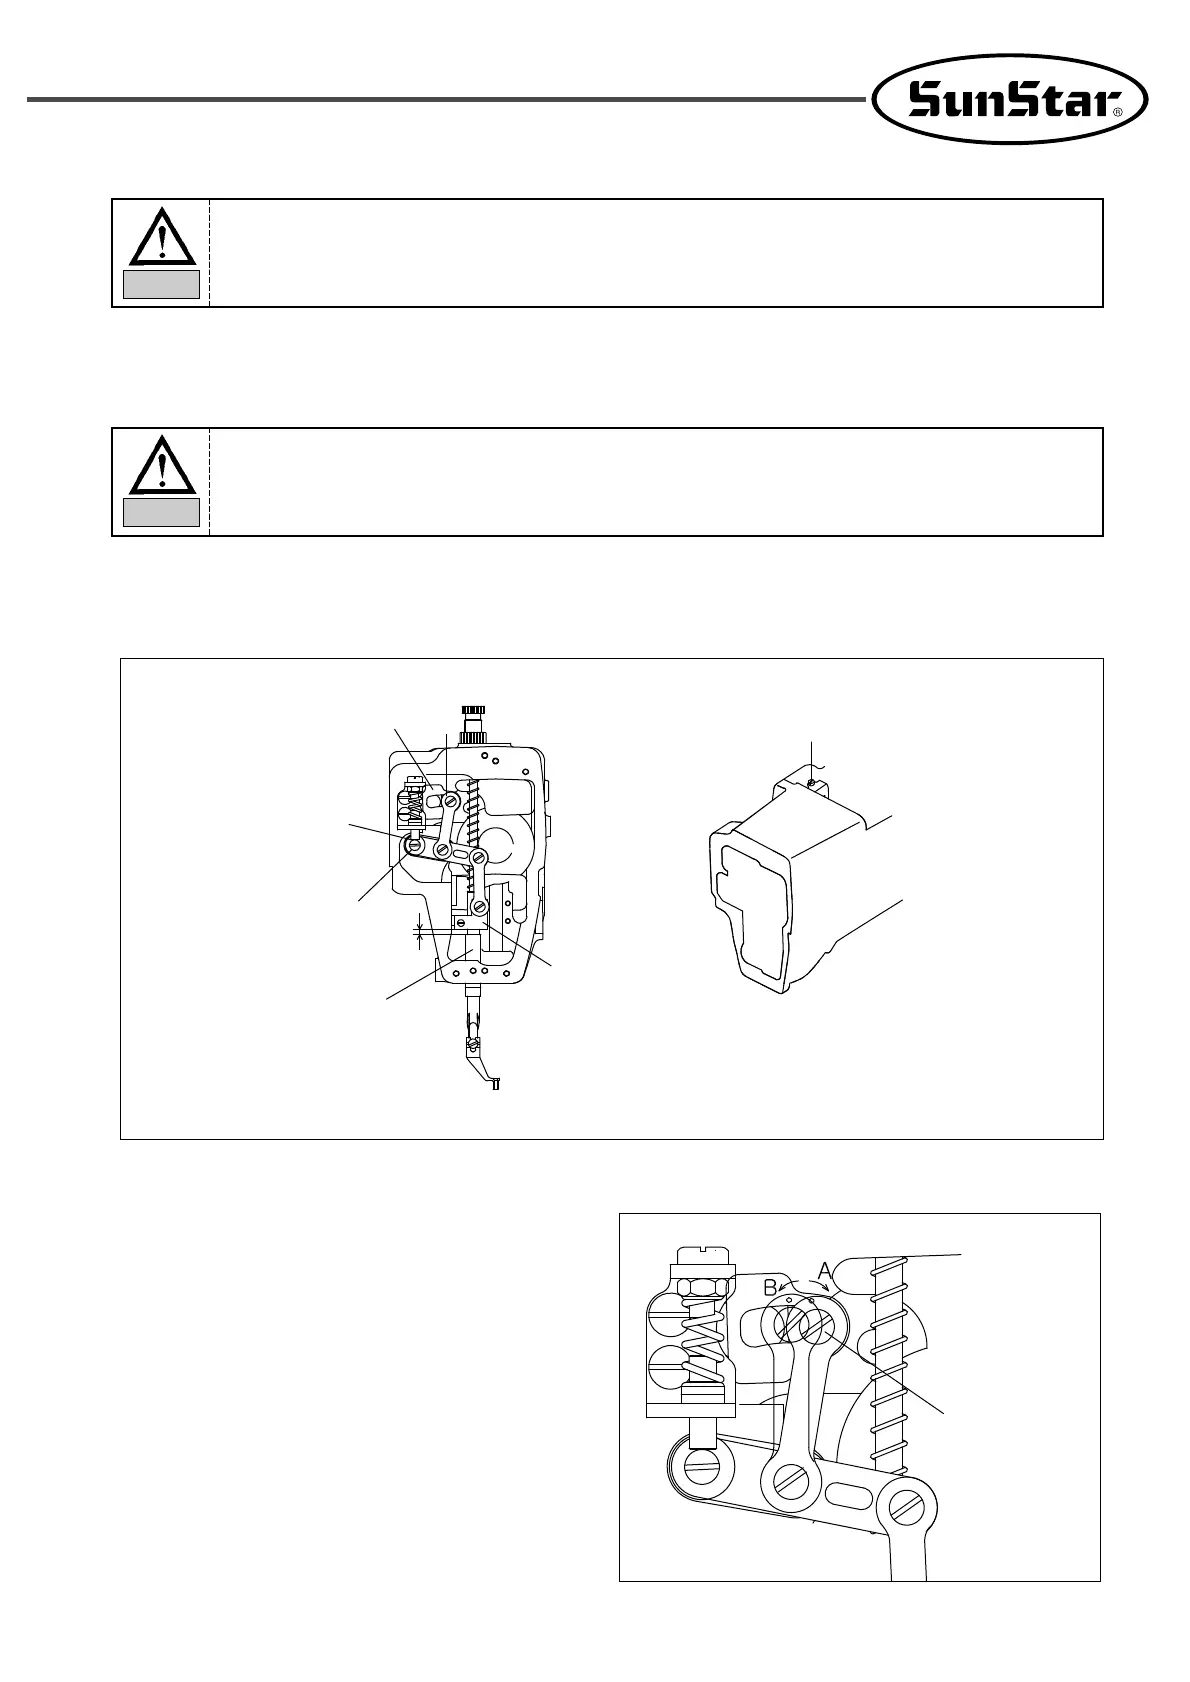
4) Presser Foot Stroke Adjustment (Presser foot up/down
movement adjustment)
Loosen the hinge screw for the presser foot adjusting
arm and move it in the A direction. This increases the
stroke of the presser foot. If it is moved in the B
direction, this decreases the stroke of the presser foot
(The default value is 4mm).
①
④
②
③
Presser bar holder
Hinge screw for
the presser foot
adjusting arm
Presser bar bushing
4mm
Presser foot adjusting arm
If there is no space between the presser bar holder and the presser bar bushing, interference and
noises occur during machine operation. If screws are not tightly fastened after adjustment,
damage might result during operation.
Caution
If the hinge screw for presser foot driving link fixing
③③
does not closely contact the end of the
position link stopper
④④
, vibration and noises may occur during operation.
Caution