16
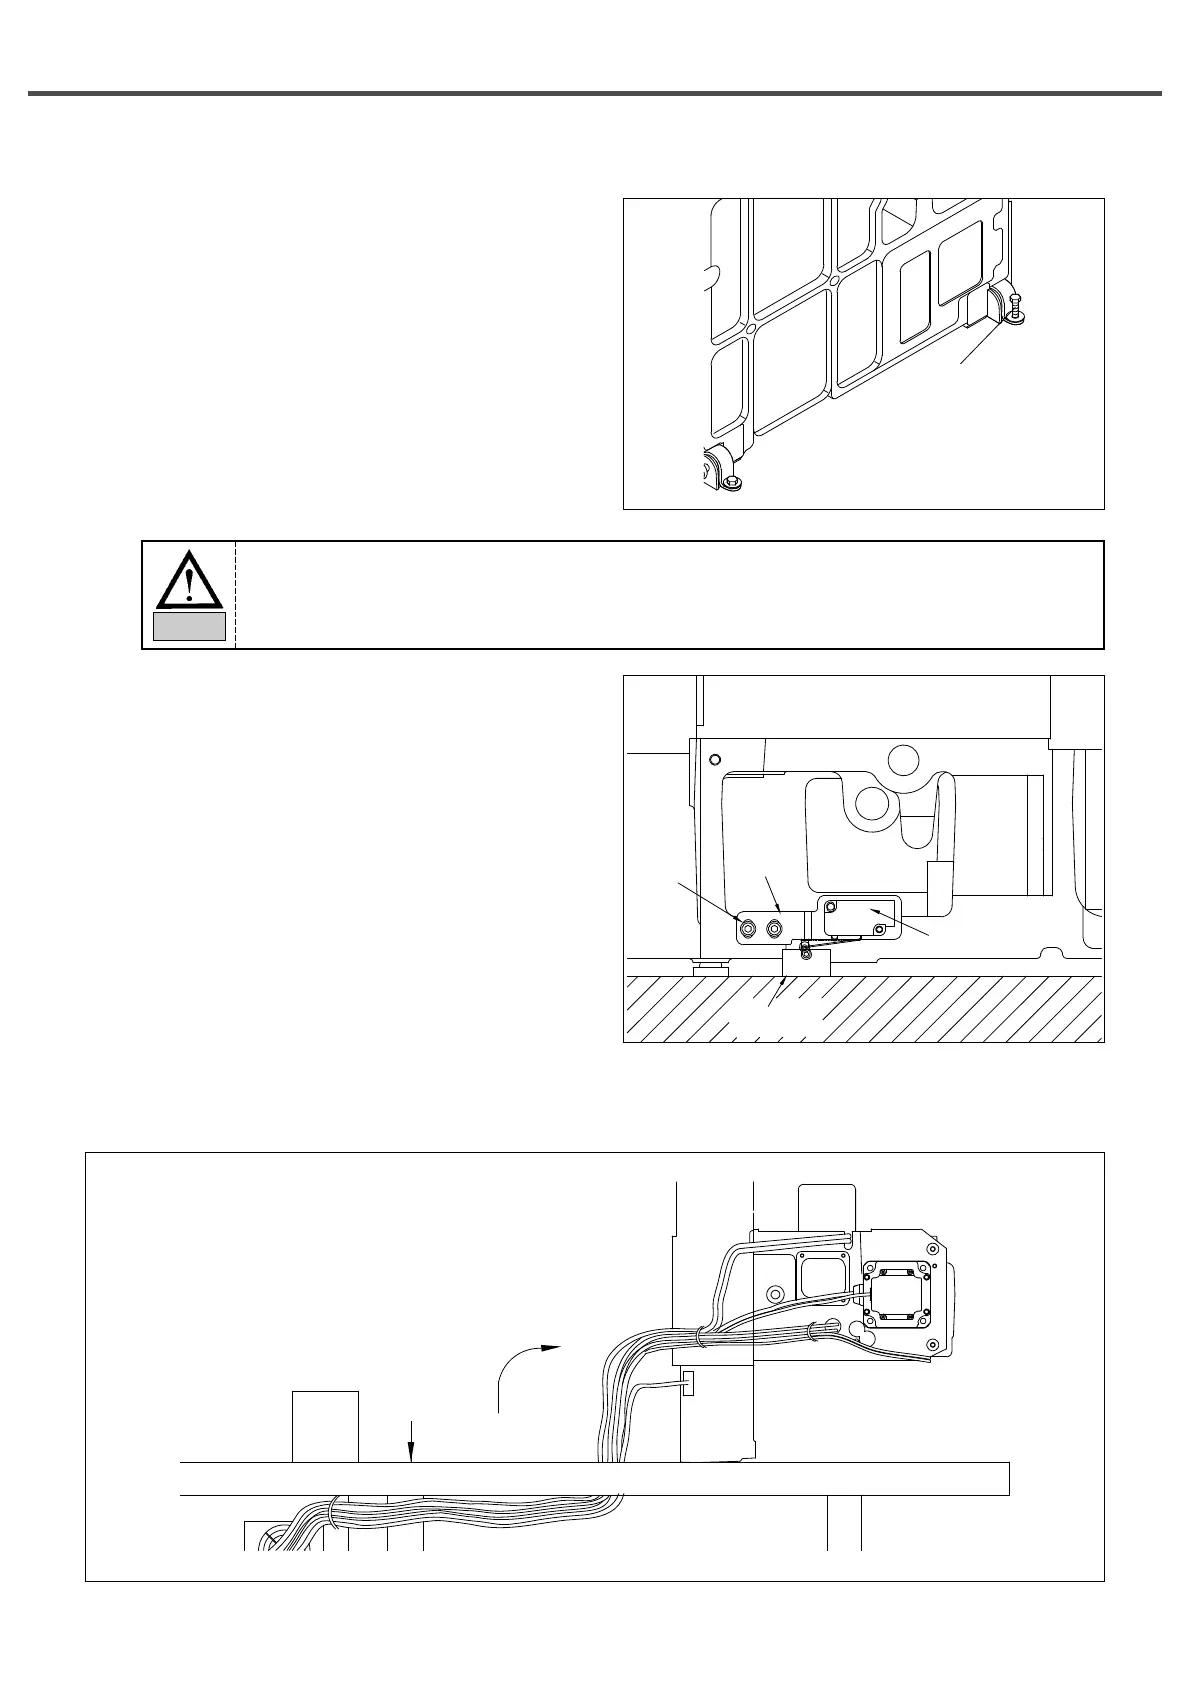
4) Since the machine has not been fully assembled,
take caution to lean the assembled machine on the
floor, and insert and fasten the bolt into the hinge
to completely fix the machine to the table.
Fixing Bolt
5) Install the safety switch and safety switch bracket on
the sewing machine, and then adjust the bracket
location of the safety switch to make sure that the
attached safety switch can properly operate.
To prevent safety accidents, at least two persons shall be assigned to machine installation or machine
delivery.
Caution
Safety Switch
Bracket
Safety Switch
Supporting Rubber
Tightening
Screw
Safety Switch
Table
6) Complete the cable connection between the machine and the control box, and fix the cables under the table as in
the figure (Set the length of the cables when fixing in consideration of the machine’s erection).