29
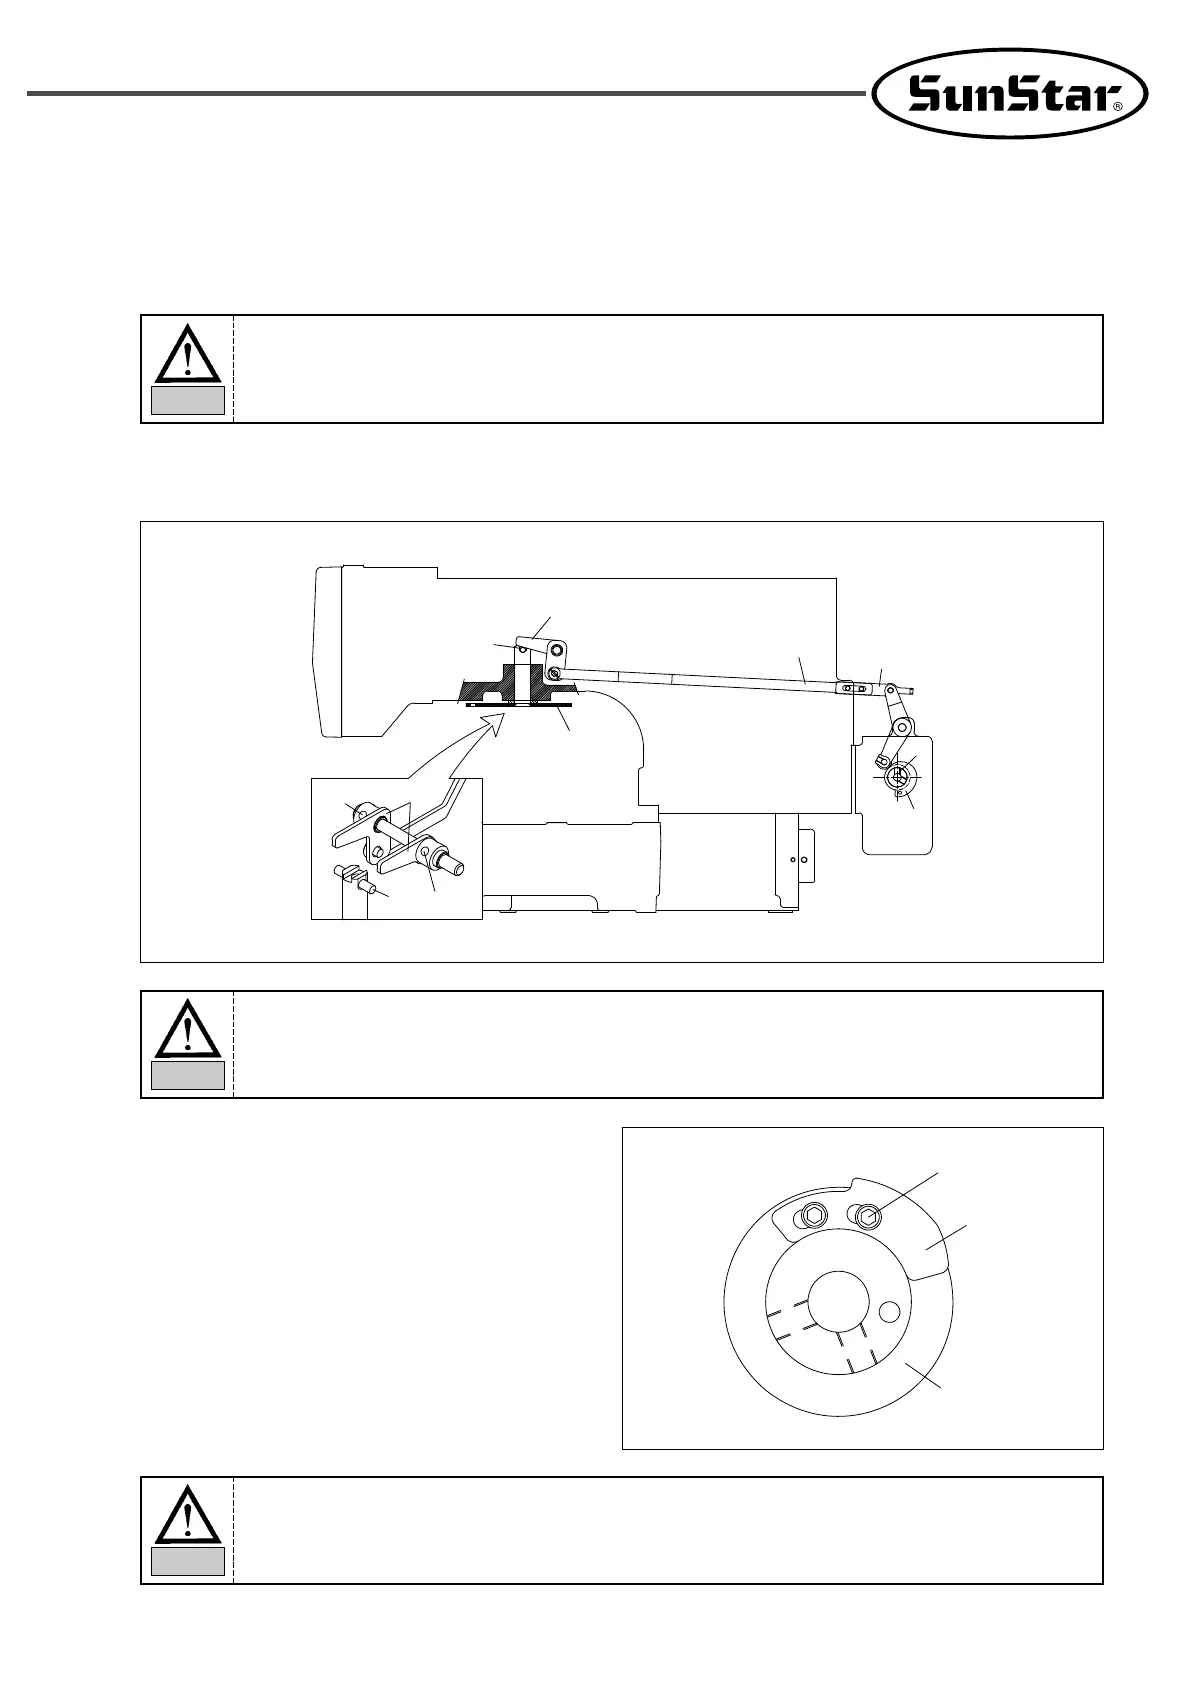
6.7) Adjusting the Parts for the Presser Plate
1) Make the two arms tightly contact the arm foundation to enable the presser plate arms to press the presser plate
shaft pin ② with equal pressure, and then fasten the tightening screws ⑧.
2) When the presser plate ① is at the highest position, and when the presser plate shaft pin ② and the presser plate
arm ③ are closely contacted, fix the presser plate connection link A ④ and B ⑤.
The screws may be damaged when the left and right presser plate arms are not set in the same
angle.
Caution
6.8) Adjusting the Parts for Thread Release
6.8.1) How to Set the Thread Release Notch
Place the notch so that the right side of the slot of the
thread release notch touches circumference of the
notch screw, and then fix with a screw.
The remaining amount of thread may not be enough or not be regular and the thread may be
unfastened from the needle if the notch is not set in the right position.
Caution
Then, adjust the position of the presser plate cam ⑥ by set the tightening screw ⑦ perpendicularly.
Caution
③
④
⑤
⑦
⑥
②
①
⑧
③
⑧
②
Tightening Screw
Notch
Thread Trimming
Cam