31
6.9) Adjusting Parts for the Wiper
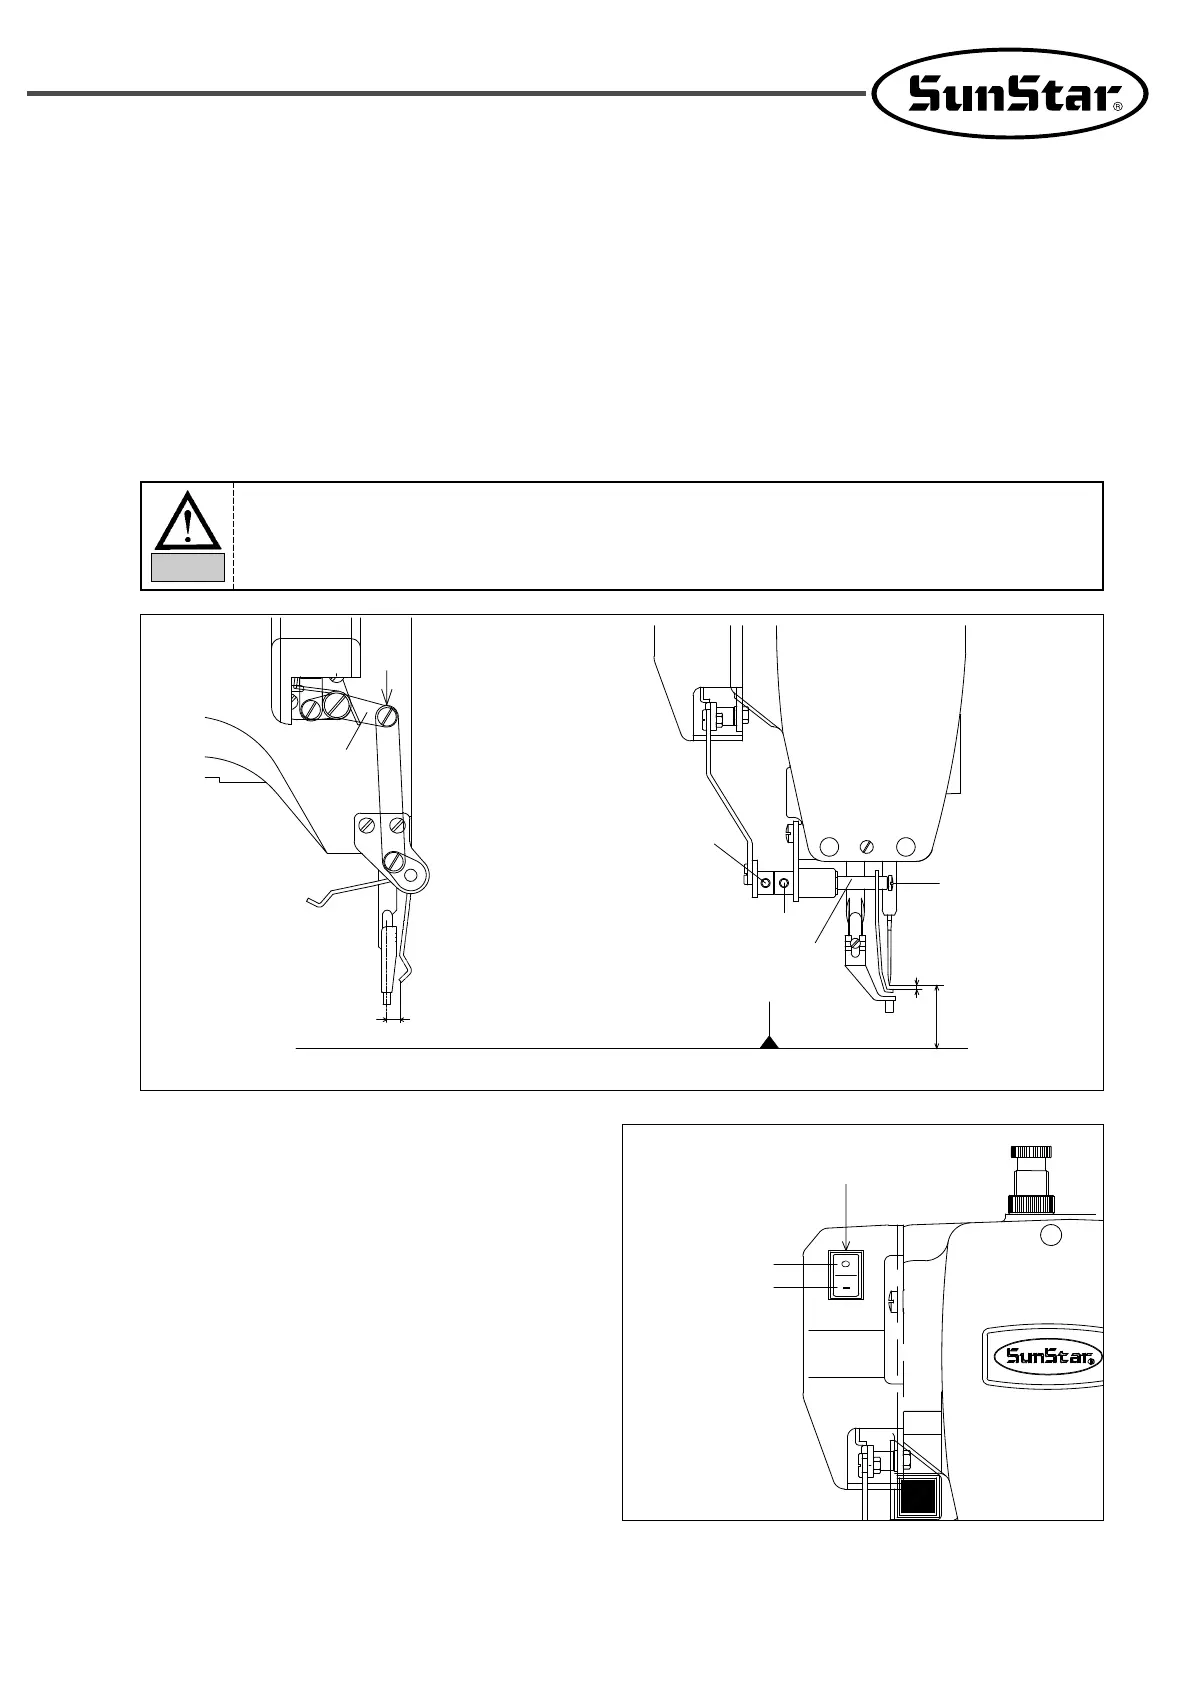
6.9.1) Adjusting the Wiper Position
1) Unfasten the wiper rotary shaft collar screw and the wiper crank screw when the needle tip is 19.5mm above
the needle plate
2) Press the wiper rocking link, then adjust the wiper shaft so the wiper and the needle is about 10mm apart from
each other.
3) Tighten the wiper rotary shaft collar screw and the wiper crank screw.
4) Unfasten the wiper screw and adjust the wiper so that the end of the wiper is about 1mm apart from the needle
end. Then, tighten the screw back on firmly.
If the wiper is not placed in the right position, the wiper may collide with the presser foot or needle
during the operation, and the wiper may not move properly.
Caution
Push
Wiper
Oscillator
Link
10mm
Tightening Screw for
Wiper Crank
Tightening Screw for Wiper
Spinning Shaft Collar
Wiper Shaft
Tightening
Screw for Wiper
Needle Plate
1mm
19.5mm
6.9.2) Wiper On/Off Switch
If you want to use the wiper, press the Wiper On/Off
Switch Ⓐ —, if you don’t, press the Wiper
Operating Switch Ⓐ
O
.
Wiper Off
Wiper On
Wiper On/Off Switch Ⓐ