C-2
C7P67 User’s Manual
Part 2: BIOS Reprogramming (Re-Flashing)
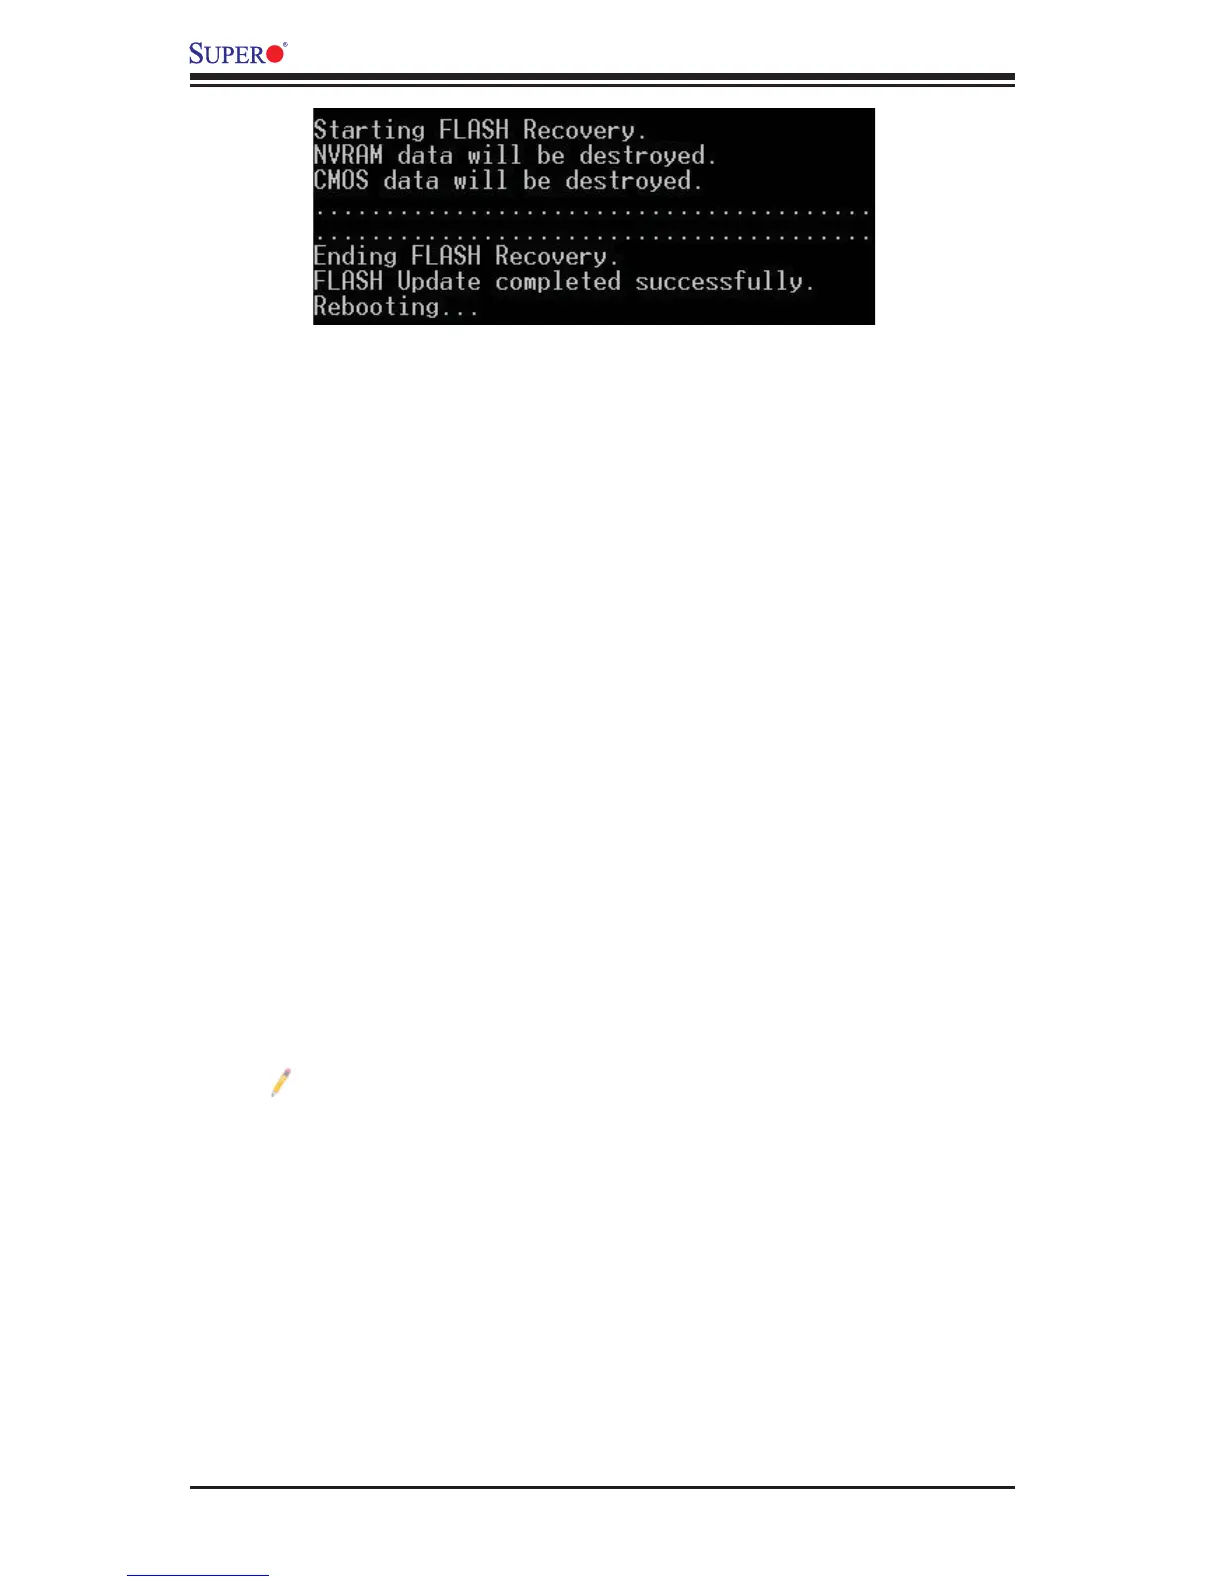
After completing the Boot Sector Recovery Process, you will need to reprogram
(“re-fl ash”) the proper BIOS binary fi le again into the BIOS ROM in order to have
the correct BIOS fi le loaded by the system. For details on how to fl ash/re-fl ash a
BIOS, please check our website for “Update your BIOS”, or see the section 3-3
(FAQ) of this manual. DO NOT INTERRUPT THIS PROCESS!
When completed, the system will reboot automatically, and you will see a checksum
error again.
Press “F1” to go to setup. Press “F9” to load the defaults and then press “F10” to
save and exit.
C-2 BIOS Recovery from an IDE/SATA_ATAPI Disc Drive
This process is identical to the Boot Sector Recovery Process from a USB 1.
Device/Drive (as above), except that the BIOS image fi le (“super.rom”) is
loaded from an IDE/ATAPI CD/DVD/ROM/RW disc drive attached to the sys-
tem. Note that loading from an IDE/SATA hard disk drive is NOT supported.
Using a different system, download and copy the correct BIOS binary image 2.
into a writable CD/DVD disc's Root "\" Directory. Rename the fi le to "super.
rom" so that the system can recognize and read the BIOS binary fi le.
Note: Record/Burn the CD/DVD-R/RW disc using the ISO 9600 standard
format. Refer to your CD/DVD application documentation for instructions.
Insert the newly created disc into the IDE/SATA ATAPI CD/DVD ROM/RW 3.
drive of the system that has the corrupted BIOS, and power the system down.
Follow the step-by-step instructions under Part 1 - Recovery Process from a 4.
USB Device/Drive (above) starting from Step 3 and continue on to Part 2 -
BIOS Reprogramming (Re-Flashing).
If your system still does not boot up after performing the above procedure, there
may be other issues with your motherboard. Please contact your customer service
representative for further assistance.