Rear Brakes: 4C-7
• Apply grease to the anchor pin and brake camshaft
sliding surface slightly.
WARNING
!
Be careful not to apply too much grease to
the brake camshaft and pin. If grease gets on
the lining, brake slippage will result.
: Grease 99000–25010 (SUZUKI SUPER
GREASE A or equivalent)
• Install the brake shoes and springs to the brake panel.
NOTE
When reinstalling the removed brake shoes,
install them in their original position (leading
or trailing).
NOTE
Make sure that brake shoe spring’s end faces
the brake panel as shown.
• Install the brake drum (8).
• Install the new O-rings (9) to the brake drum (8).
CAUTION
!
Replace the O-rings (9) with new ones.
• Apply grease to the spline on the rear axle.
: Grease 99000–25010 (SUZUKI SUPER
GREASE A or equivalent)
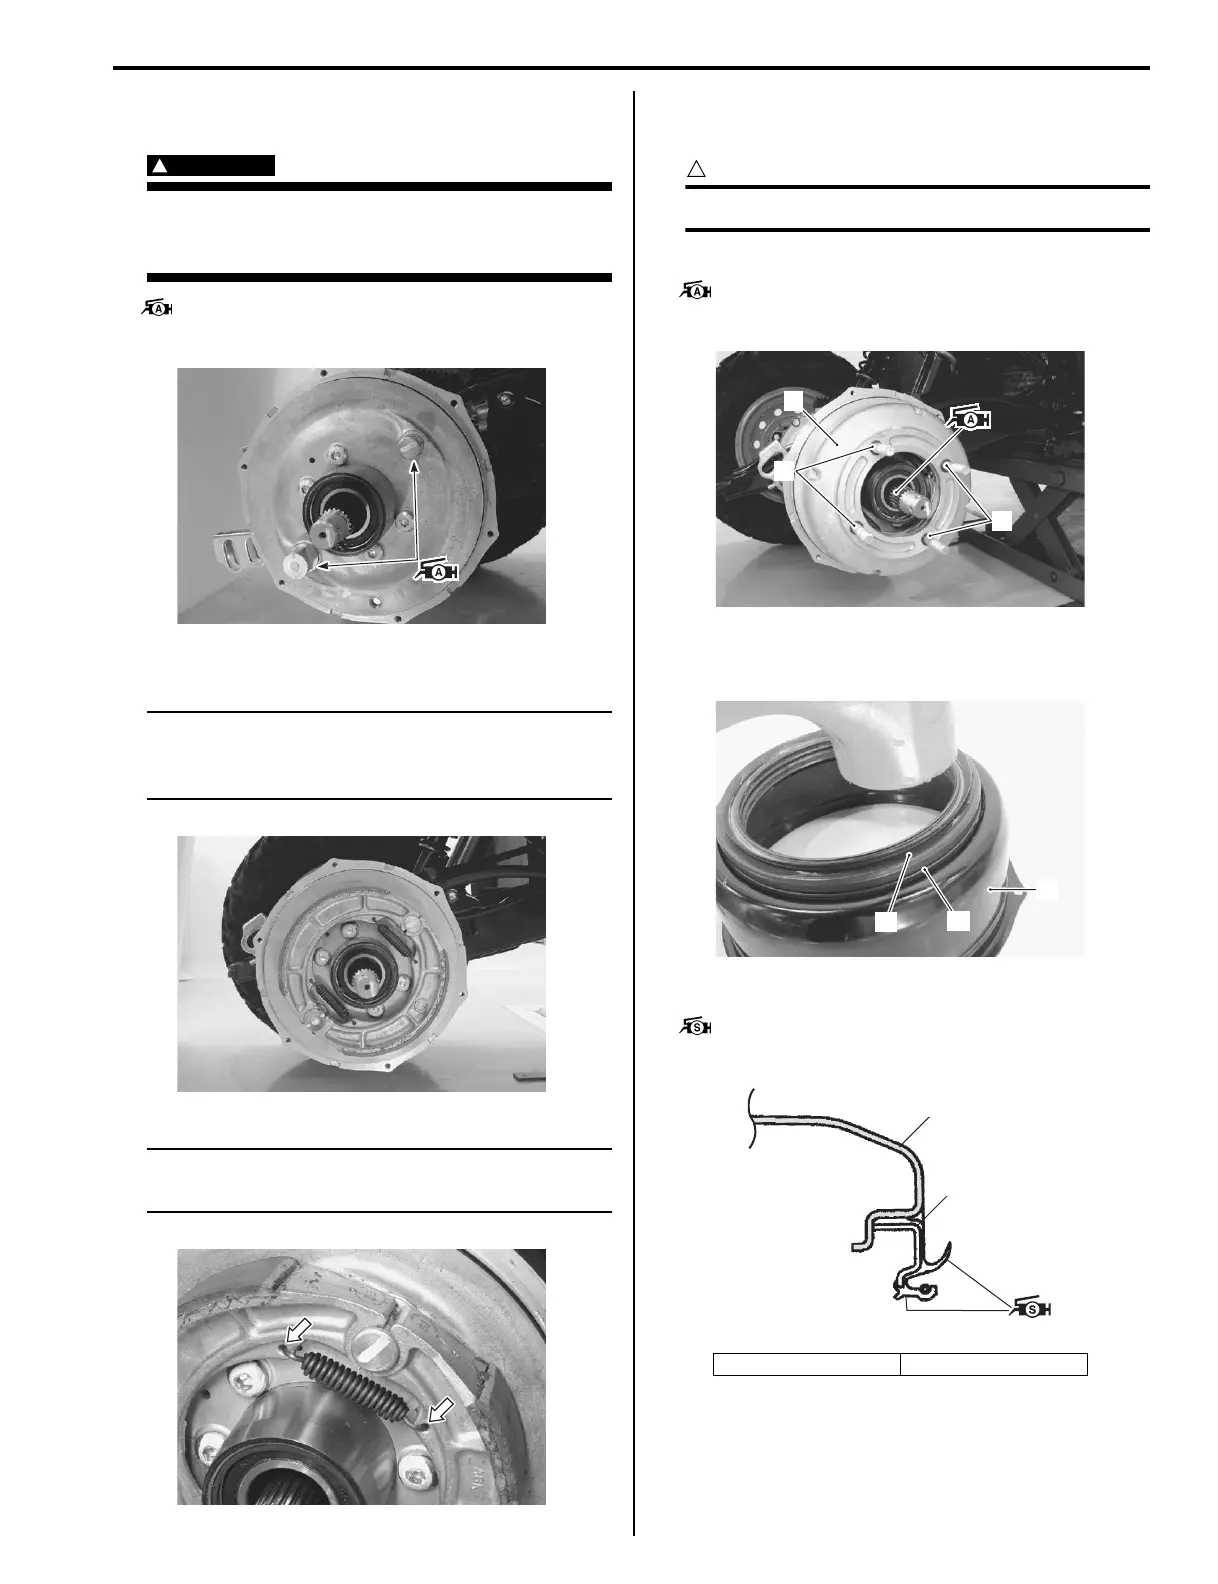
• Install the new dust seal (10) to the drum cover (11) by
using the removed dust seal (12).
• Apply grease to the dust seal lips.
: Grease 99000–25100 (SUZUKI SILICONE
GREASE or equivalent)
I827H1430020-01
I827H1430021-01
I827H1430022-01
10. Dust seal 11. Drum cover
9
9
8
I827H1430023-01
10
11
12
I827H1430024-01
11
10
I827H1430026-01
 Loading...


