4. FUEL SYSTEM
4-9
Assembly
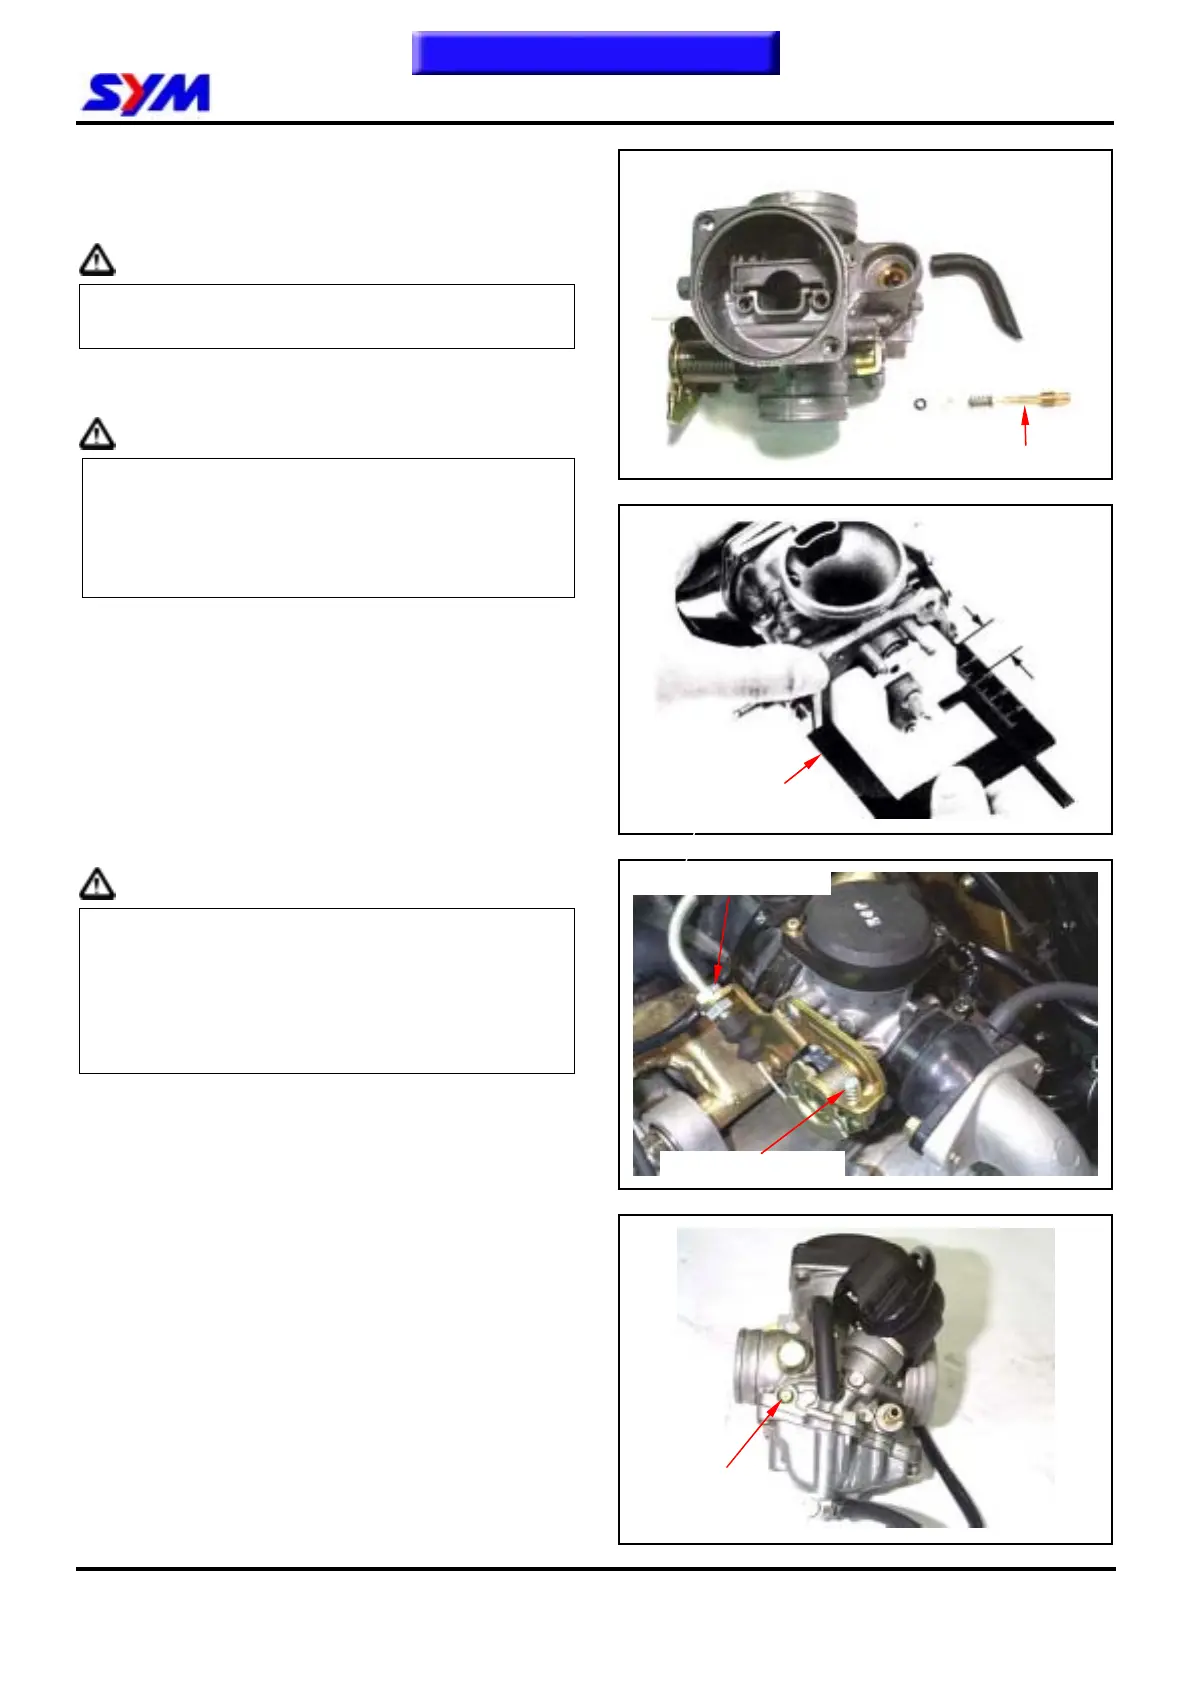
Install main jet, fuel needle jet holder, fuel needle
jet slow jet and pilot screw.
Caution
Set the pilot screw in according to number of turns
noted before it was removed.
Install the float valve, float, and float pin.
Checking fuel level
Caution
y Check again to ensure float valve, float for
proper installation.
y To ensure correct measurement, position the
float meter in such a way so that float chamber
face is vertical to the main jet.
Fuel level: 20.5 mm
Installation of carburetor
Install carburetor in the reverse order of removal.
Following adjustments must be made after
installation.
˙Throttle cable adjustment.
˙Idle adjustment
Adjustment of pilot screw
Caution
y Pilot screw was set at factory, so no
adjustment is needed. Note the number of
turns it takes to screw it all the way in for ease
of installation.
y The main stand must be used to support the
motorcycle to perform the adjustments.
Use a tachometer when adjusting engine RPM.
Screw in adjustment screw gently, then back up to
standard turns.
Standard turns:2±1/2(1 1/2~2 1/2) turns
Warm up engine, adjust the stopper screw of
throttle valve to standard RPM.
Idle speed rpm: 1600 ± 100 rpm
Connect the hose of exhaust analyzer to exhaust
front end. Press test key on the analyzer.
Adjust the pilot screw and read CO reading on the
analyzer
CO standard value: 1.0~1.5 %
Accelerate in gradual increments, make sure rpm
and CO value are in standard value after engine
running in stable. If rpm and CO value fluctuated,
repeat the procedures described above for
adjusting to standard value.
Pilot screw
Pilot screw
Float gauge
Idle adjustment screw
Throttle cable adjust nut
To this chapter contents