How to Replace Hard Disk Backplane for 8 bay/5 bay DiskStation
Page 34 of 39
Date: 2014/4/11
Issued by: Hardware Development Group, Synology
®
Inc.
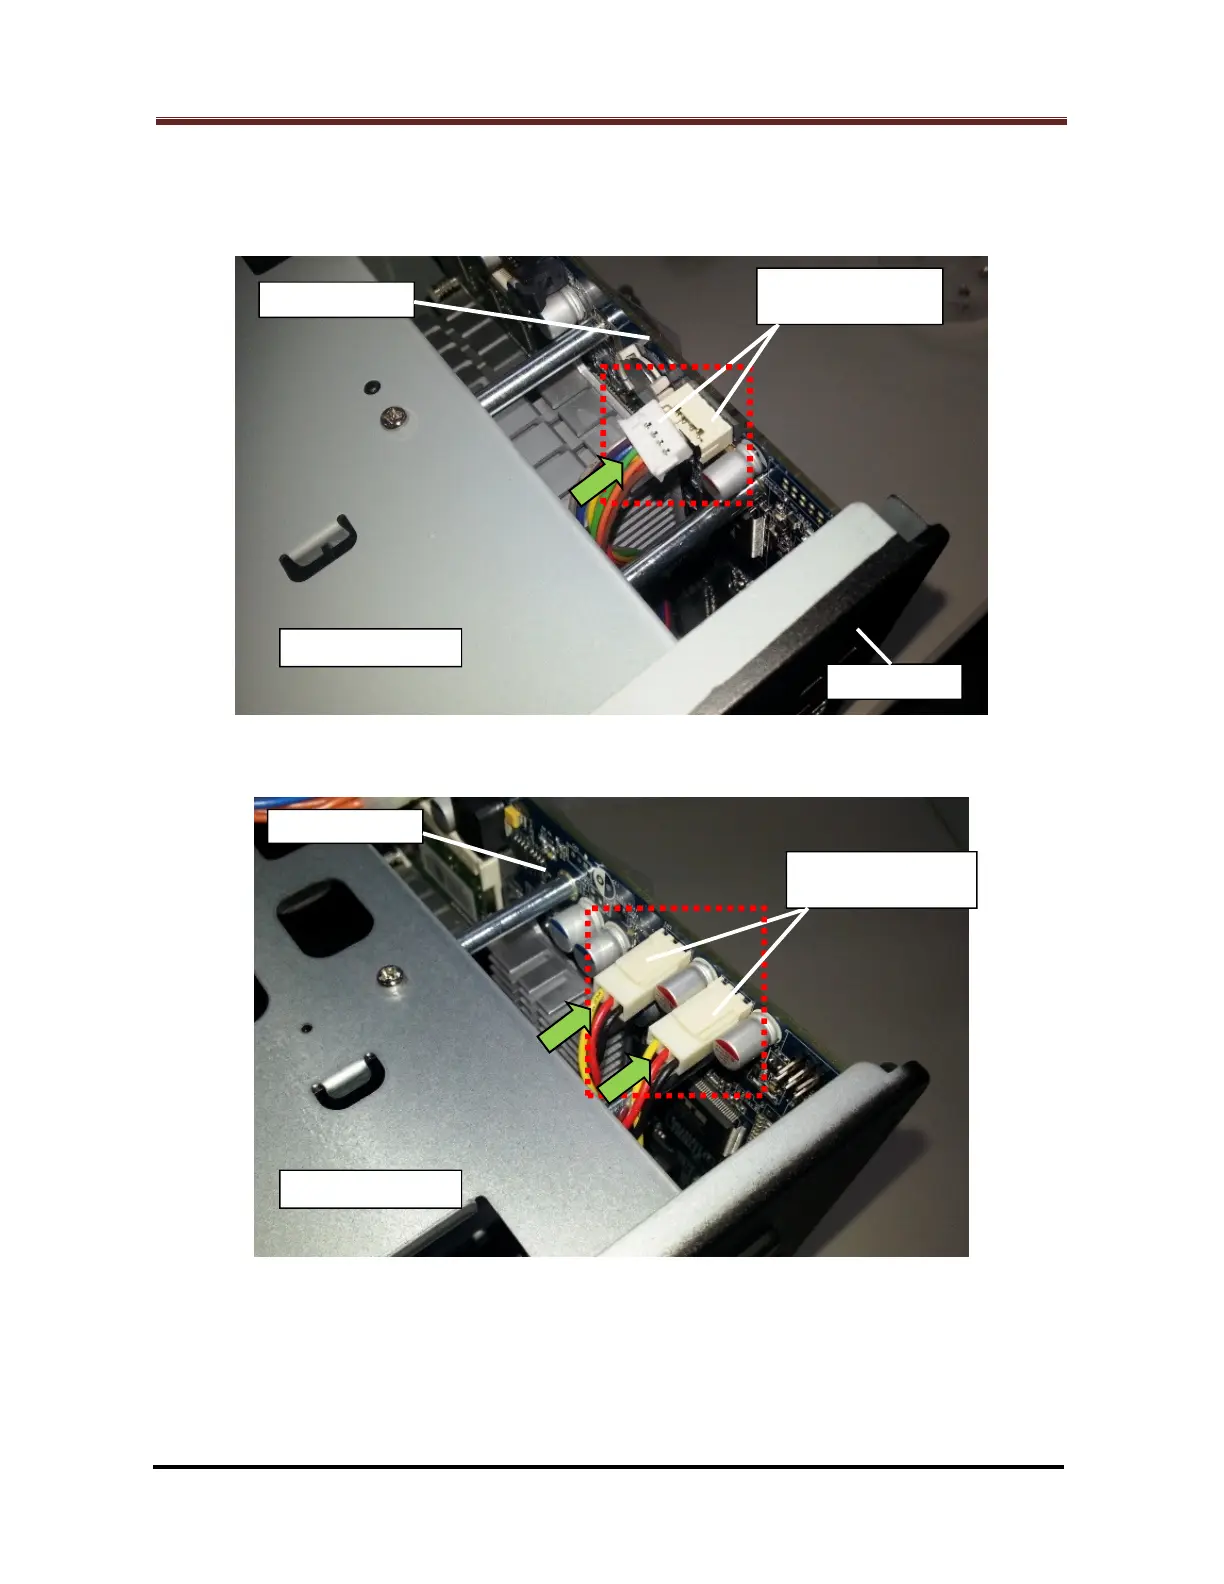
2.2.11 Plug back the eSATA board cable connector(s) (Marked by the red rectangle) to
the original location(s) on the motherboard. (Fig. 58 for DS1813+, DS1513+,
DX513 and Fig. 59 for DS1812+, DS1512+, DS1511+, DX513 and DX510):
Fig. 58 – For DS1813+, DS1513+, DX513
Fig. 59 – For DS1812+ (*), DS1512+ (*), DS1511+, DX513, DX510
Note: Fig. 60 and Fig. 61 show how the eSATA board cables are connected with the
eSATA board. (Fig. 60 for DS1812+, Fig. 61 for DS1512+) Follow the way when
plugging back the eSATA board cable connectors.