17
4. Select “CH Swap ”and press Enter, then press 3/4/5/6
to select your desired position and press Enter to confim.The
previous channel will be moved to the new position.
Note: If you want to receive or not receive the channel,
press 5/6 to select “Erase CH ” and then press
Enter, “Enabled ”or “Disabled ”appears.
5. Select “Exit ”and press3 to return to “ Channel ”screen.
Fine Tune Setting
1. Select “Fine Tune ”.
2. Press Enter or4, the fine tune screen appears.
3. Use 3/4 to move the cursor and fine tune the selected
channel to get a more wonderful vision.
4. Press6 to to select “Done ”and press Enter to confirm.
Note :
If it is not necessary, select “Cancel” and then press Enter.
Channel Setup ( continued )
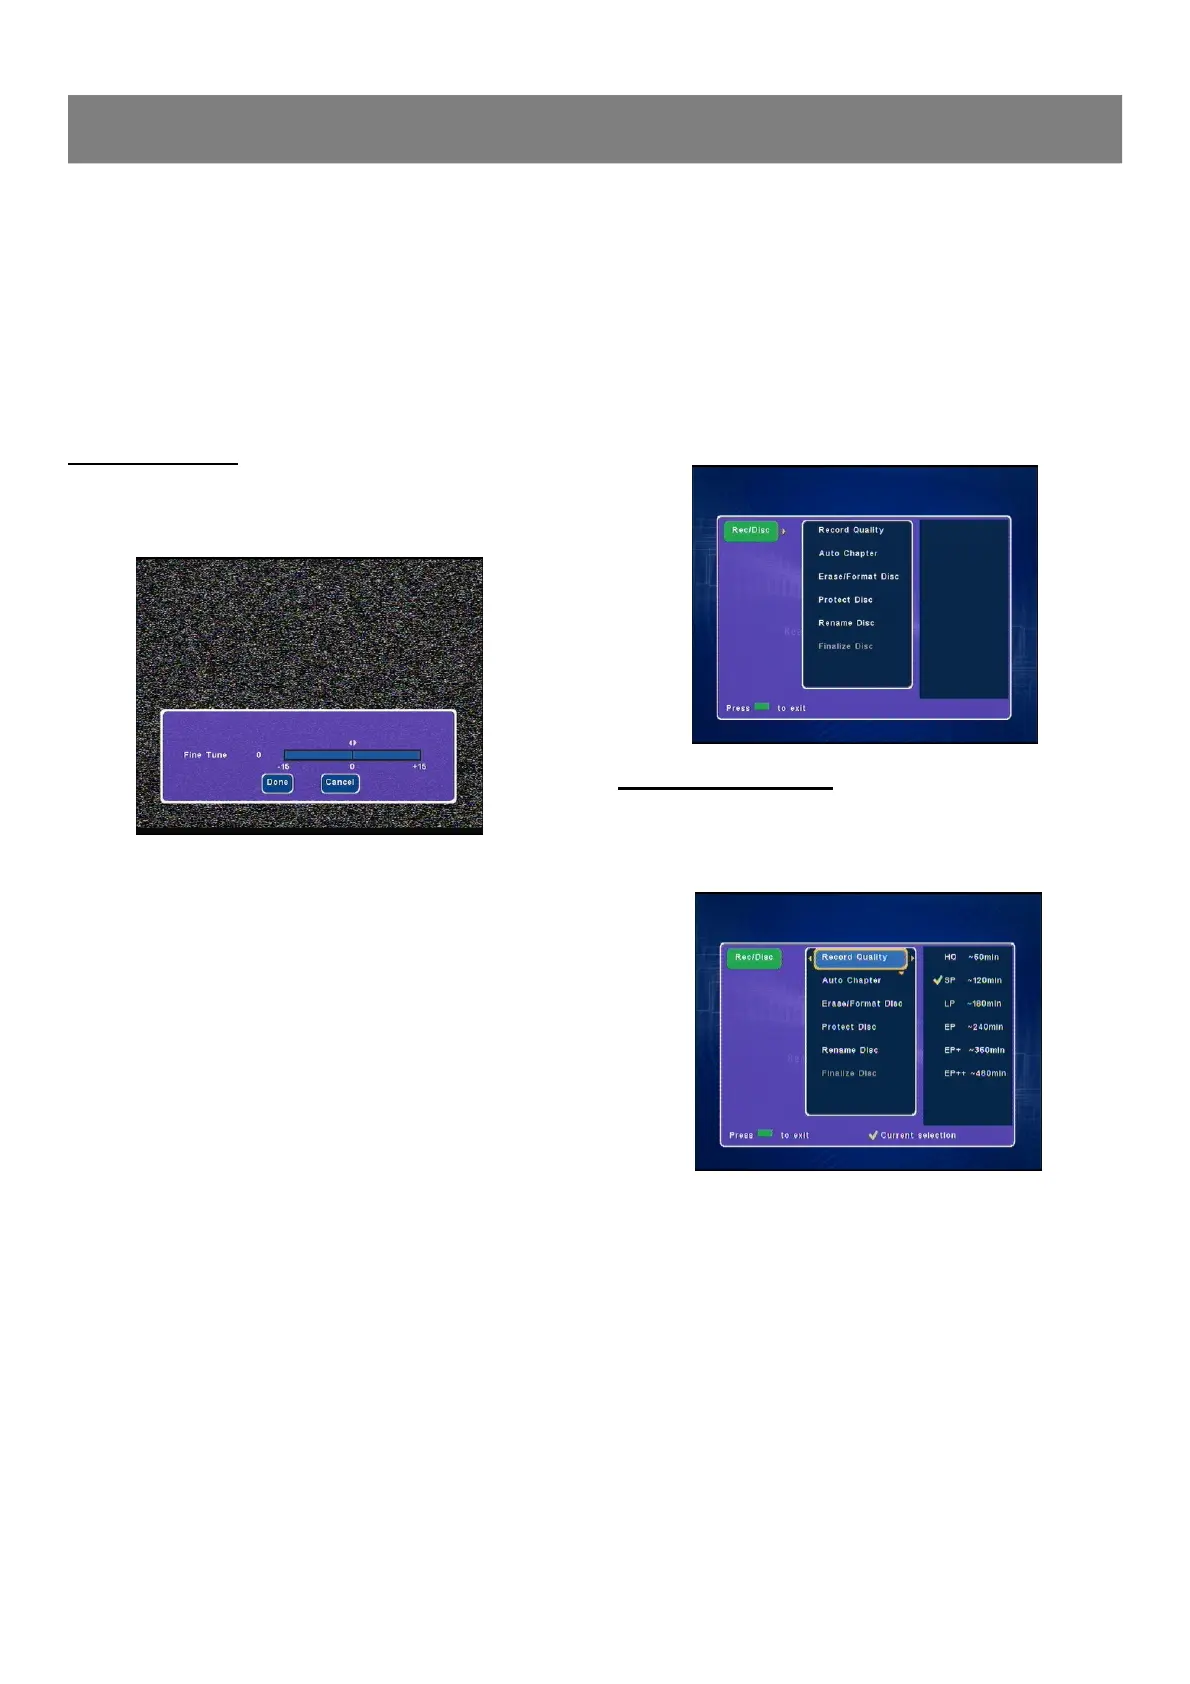
1-3 Record/Disc Setup
The Record/Disc Setting OSD will vary when a disc is not inserted, a
DVD+/-R,or a DVD+/-RW disc.
(Rec/Disc ---> Record Quality, Auto Chapter, Erase/Format
Disc, Protect Disc, Rename Disc & Finalize Disc)
1. Press Record/Disc , “Rec/Disc ”screen appears on the TV
screen.
2. Press Enter or4, “Record Quality ”is highlighted.
3. Press 5/6 repeatedly to select the item.
Record Quality Setting
1. Select “Record Quality ”.
2. Press Enter or4 to select the sub menu, then press 5/6 to
select the desired quality.
Recording Quality Record time (minutes)
HQ (High Quality): 60
SP (Standard mode) : 120
LP (Long Play): 180
EP (Extended Play): 240
EP+ (Extended Play Plus): 360
EP+ +(Extended Play Plus): 480
Notes :
n The record times are an estimate and actual times may differ.
n EP+ + is not available for DVD-R/RW.