21
3. Press Enter,“
” appears.
4. Press 3to return to “Angle Mark ”.
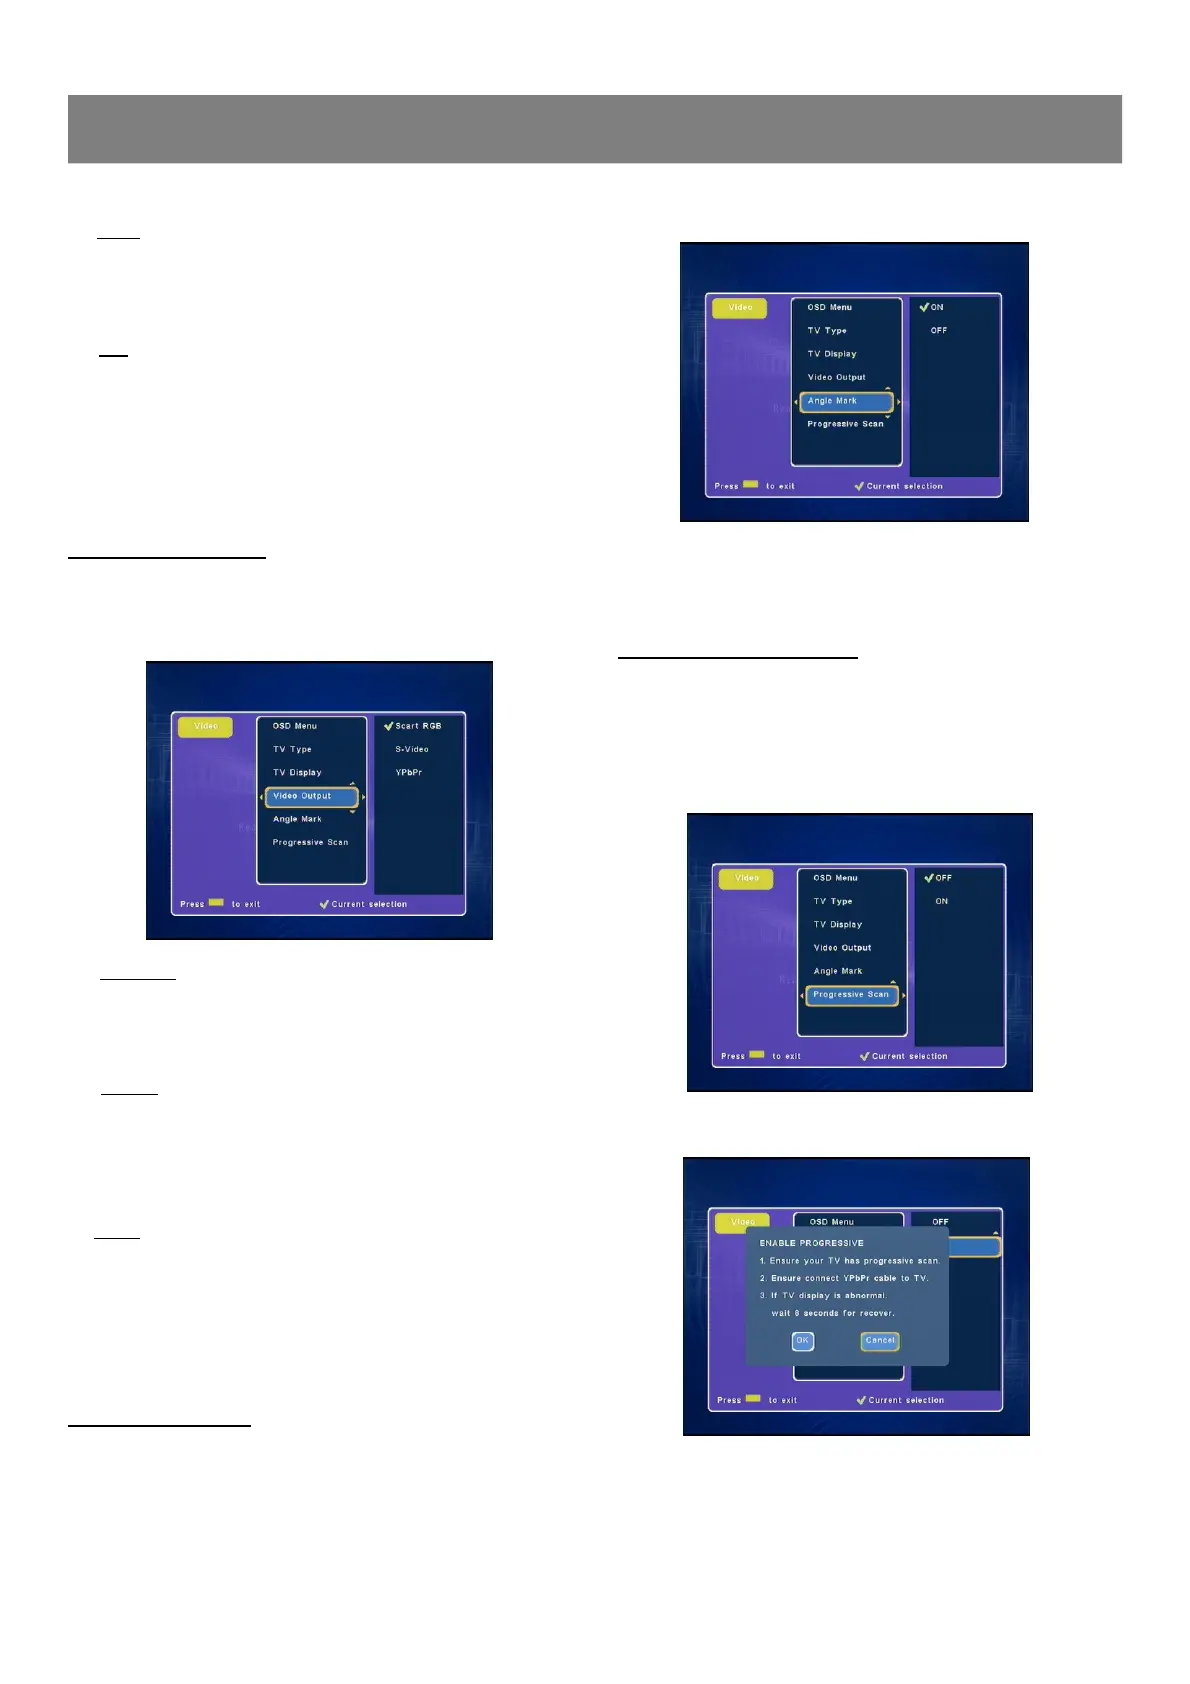
Progressive Scan Setting
Connect your TV set and the recorder with a YPbPr cable if your
TV set has YPbPr input jacks before you start this setting.
1. Set the TV Video Output to YPbPr.
2. Select “Progressive Scan ”.
3. Press Enter or4 to select “ON ”.
4. Select “OK ”to confirm, then the machine will automatically
return to the “Progressive Scan ” screen.
Video Output Setting
1. Select “Video Output ”.
2. Press Enter or4to select the sub menu, then press 5/6 to
select “Scart RGB ”, “S-Video ”or “YPbPr ”.
★ Scart RGB
Select “Scart RGB ”when you have connected the Scart Out
of this recorder to TV via Scart cable. This will provide a better
viewing result.
★ S-Video
Select S-Video when you have connected S-Video Out jacks of
this recorder to S-Video In jacks of your TV .
Select S-Video Only if your TV does not provide Progressive
nor component jacks.
★ YPbPr
Select YPbPr when you have connected YPbPr Out jacks of
this recorder to YPbPr In jacks of your TV .
3. Press Enter, “
” appears.
4. Press 3to return to “Video Output ”.
5. To exit, press Video.
Angle Mark Setting
1. Select“Angle Mark ”.
2. Press Enter or4to select the sub menu, then press 5/6 to
select “ON ”or “OFF ”.
1-4 Video Setup (continued)
★ NTSC
Select this if the connected TV set is NTSC system.
It will change the video signal of a PAL video disc and
output to NTSC system.
★ PAL
Select this if the connected TV set is PAL system.
It will change the video signal of an NTSC disc and
output to PAL format.
3. Press Enter, “
” appears, the TV display is set.
4. Press 3to return to “TV Display ”.