6-12
OPERATING PROCEDURES
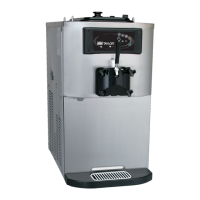
Model C708 - WAWA
Operating Procedures
6
There are three phases of the Heat cycle: heating,
holding and cooling. Each phase has a time limit. If any
one of the three phases fail to reach the proper
temperatures within the time limit, the cycle will
automatically abort and return to the Standby mode.
A failure message will appear on the LCD to inform the
operator that the machine did not successfully complete
the Heat Treatment cycle. The product may not be safe
to serve. The freezer will be locked out (soft lock) of the
Auto mode. The operator will be given the option of
selecting the Heat key
, which will begin a new Heat
cycle, or pressing the WASH key , which will place the
freezer into the Off mode to allow a brush-clean of the
machine.
Note: Once the Heating cycle has started, it cannot be
interrupted. The Heating cycle will take a maximum of
4 hours to complete with a full hopper.
WARNING! DO NOT attempt to draw product or
disassemble the machine during the Heat Treatment
cycle (if equipped). The product is hot and under extreme
pressure. Severe burns from hot product may result if this
instruction is not followed.
When the Heating cycle is complete, the control will
return to the Standby mode. The Standby key
will be
illuminated.
Daily Opening Procedures
Before performing the opening procedures, check the
display panel for error messages. Normally, the display is
blank unless an operational fault has occurred. If a fault
has been detected, investigate the cause and follow the
instructions on the display before proceeding with the
opening procedures. (See Failure Messages on
page 5-12).
Setup - Complete the Following
Make sure your hands are clean and sanitized before
performing the next steps.
1. Prepare a small amount of cleaning/sanitizing
solution with an active chlorine concentrate of
100 PPM to 200 PPM (parts per million).
Important! Use warm water and follow the
manufacturer's specifications.
2. Return to the freezer with a small amount of
sanitizing solution. Dip the door-spout brush into the
sanitizing solution and brush-clean the door spout
and bottom of the draw valve. (
See Figure 6-41.)
Figure 6-41
Note: To ensure sanitary conditions are maintained,
brush-clean each item for 60 seconds, repeatedly dipping
the brush in sanitizing solution.
3. Using a clean, sanitized towel, wipe down the freezer
door, front panel, the area around the bottom of the
freezer door, and any other areas that show a buildup
of moisture or food substance. Install the front drip
tray and splash shield.