5.2Main Menu
5.2.1. Display
5.2.1.1 Live mode
Go to <Main menu
Picture 5-3.
Explanation:
::
:
1、
The modifications will be available after clicking [APPLY] button on the bottom of the sub
windows and being prompted to save and then clicking
If you want to cancel the modification, click [
3、 When clicking [DEFAULT
] button, all system default values will be
System default value indicates the value pre
5.2.1.2 Output mode
Go to [Main menuDisplay
Output] to enter into the output set interface shown as Picture 5
Live> option and enter into the <Display>
The modifications will be available after clicking [APPLY] button on the bottom of the sub
windows and being prompted to save and then clicking
If you want to cancel the modification, click [
] button to exit the menu.
] button, all system default values will be
System default value indicates the value pre
Output] to enter into the output set interface shown as Picture 5
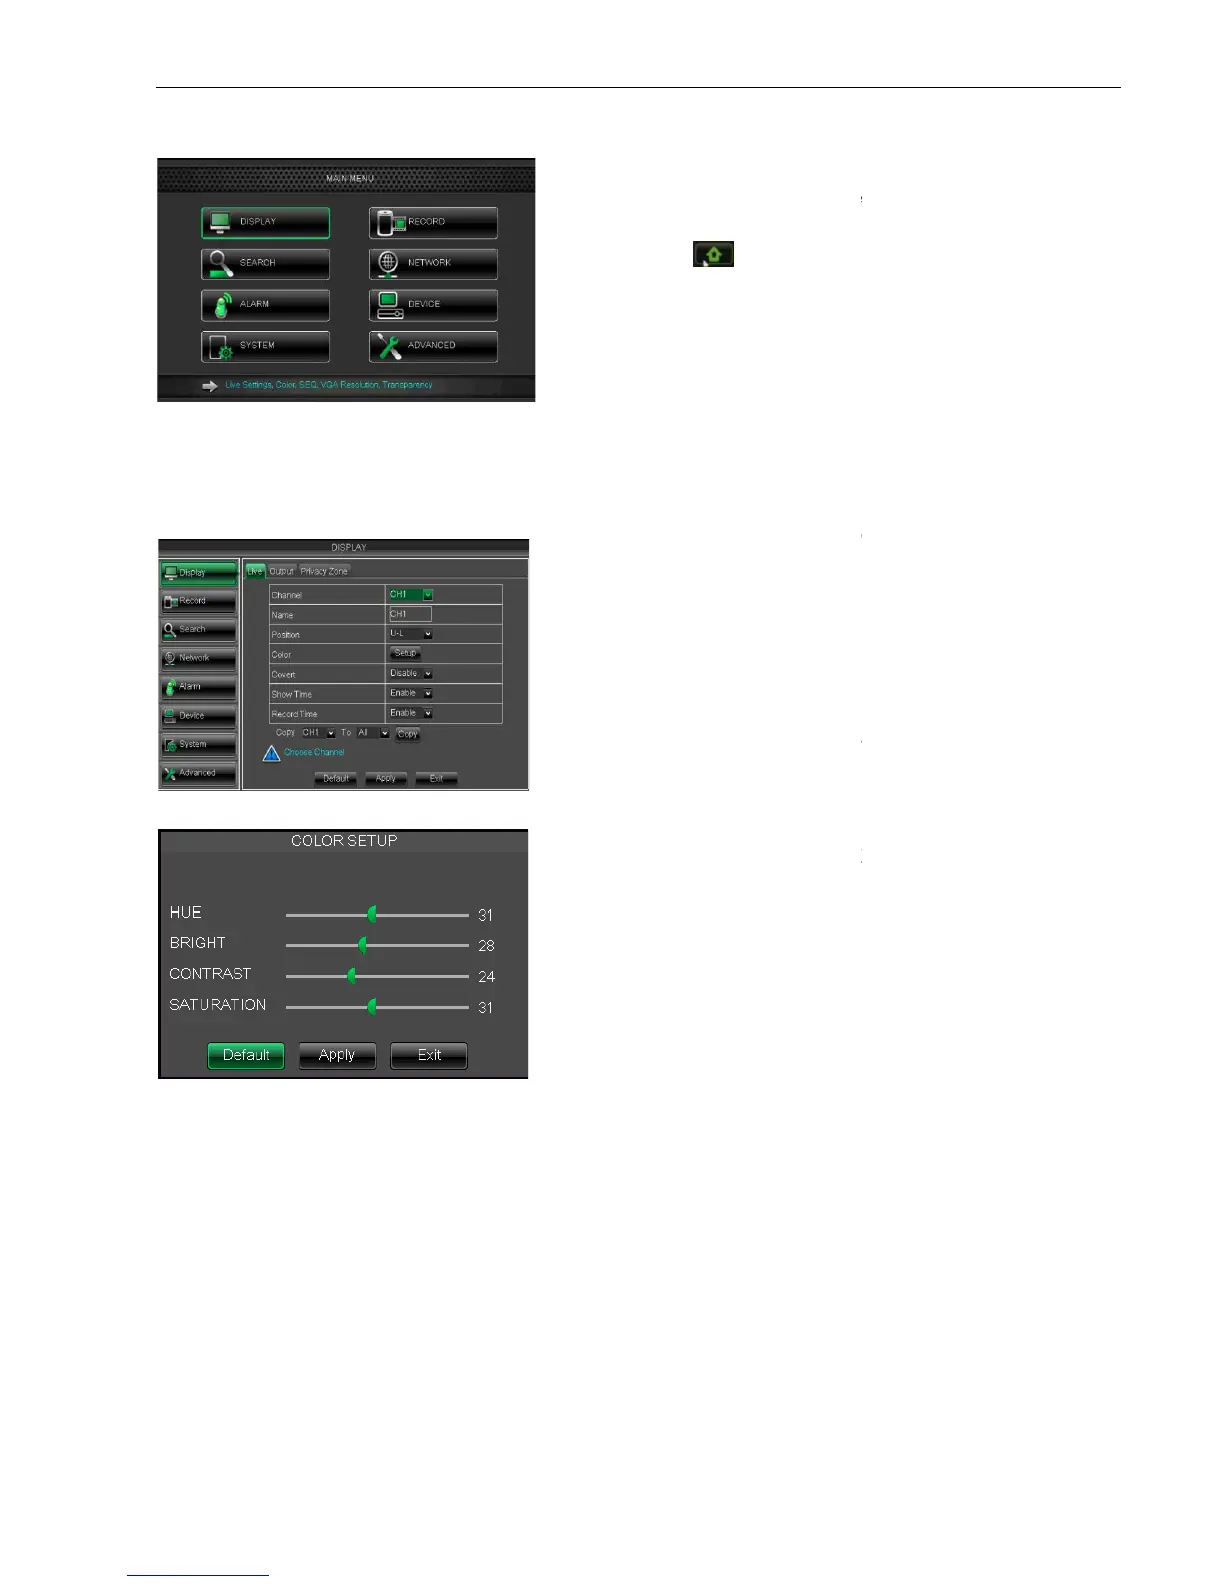
On <Live> mode, click [Menu] button on the
front panel or Remote controller to enter into Main
menu interface shown as Picture 5
] icon to enter the main menu
In Main Menu mode, you can control
device management settings, such as
Advanced setting etc.
Channel:
allow you setup the channel you
allow you setup the channel name, and system
support up to eight characters or four
allow you setup the display position of each
Click [Setup] option to enter into the [Color setup]
interface shown as Picture 5-
allow you enable [Live] surveillance screen
allow you enable system time appear in the
<Live> screen.
Record time: When set to “
record system time into the recordhistory.
Copy: allow you copy all data
is the Color Menu where you can
adjust image brightness, saturation, contrast and hue
parameters of each channel.
User Manual
Live> option and enter into the <Display>
setting interface shown as
The modifications will be available after clicking [APPLY] button on the bottom of the sub
] button to exit the menu.
Output] to enter into the output set interface shown as Picture 5
On <Live> mode, click [Menu] button on the
front panel or Remote controller to enter into Main
menu interface shown as Picture 5
] icon to enter the main menu
In Main Menu mode, you can control
device management settings, such as
allow you setup the channel you
allow you setup the channel name, and system
support up to eight characters or four
allow you setup the display position of each
Click [Setup] option to enter into the [Color setup]
allow you enable [Live] surveillance screen
allow you enable system time appear in the
record system time into the recordhistory.
is the Color Menu where you can
adjust image brightness, saturation, contrast and hue