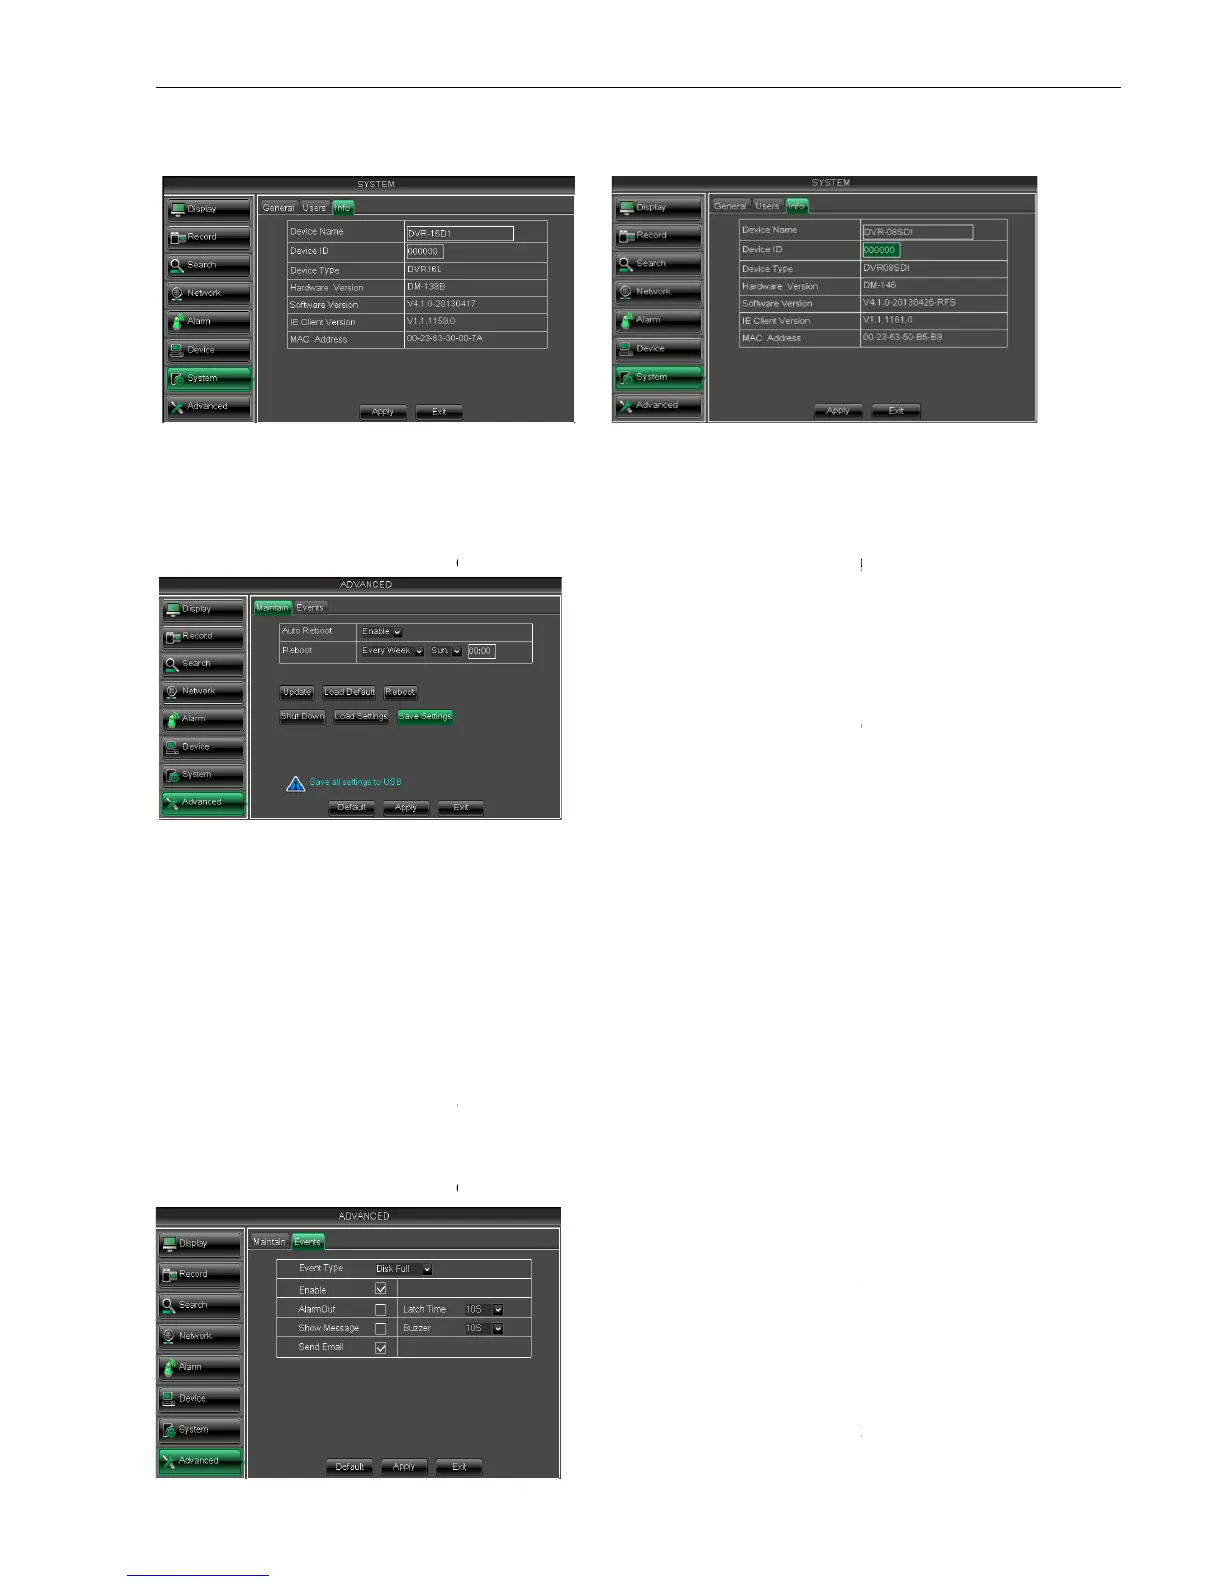
5.2.7.3 Information
Click [Main MenuSystem
Info] and then enter into the interface shown as Picture 5
5.2.8 Advanced
5.2.8.1 Maintain
Click [Main menu
If [Load Default] is selected, you can initialize the system to the ex
Click [Reboot] button to manually restart DVR system.
Click the [Shutdown] button to shutdown the device.
Load the parameters in the U flash disk to device; after loading successfully, system will
auto restart.
Save Setting:
Save the parameters of device to a flash disk.
the USB memory or break the power during the update;
When the update is done, system will be automatically restarted;
Please manually recovery ex
It will be available only when DVR return back to Preview mode and no
5.2.8.2 Event
Click [Main menu
Picture 5-55-1
Picture 5-58
Info] and then enter into the interface shown as Picture 5
Maintain] to enter into the maintain interface shown as Picture 5
If [Load Default] is selected, you can initialize the system to the ex
Click [Reboot] button to manually restart DVR system.
Click the [Shutdown] button to shutdown the device.
Load the parameters in the U flash disk to device; after loading successfully, system will
Save the parameters of device to a flash disk.
the USB memory or break the power during the update;
When the update is done, system will be automatically restarted;
Please manually recovery ex
-factory default after system rebooting;
It will be available only when DVR return back to Preview mode and no
Event] to enter into the <Event> interface shown as Picture 5
Device ID, Device type, Device S/N, MAC
address, IE version, Software version, Panel
ou can enable the auto maintain
function regularly as per user’s need.
After decompressing update file package, copy
the file named “dvrupgrade” to root directory of
Insert the U flash disk into USB port
support the three abnormal types:
Disk No Space, Disk Error and Video Loss.
select [Enable] or [Disable]
you can set how long the buzzer will
sound when external sensor alarm is
detected(10s,20,40s,60s);
You can set show message on the
screen when sensor alarm is detected.
Info] and then enter into the interface shown as Picture 5
Maintain] to enter into the maintain interface shown as Picture 5
If [Load Default] is selected, you can initialize the system to the ex
Load the parameters in the U flash disk to device; after loading successfully, system will
Event] to enter into the <Event> interface shown as Picture 5
Device ID, Device type, Device S/N, MAC
address, IE version, Software version, Panel
ou can enable the auto maintain
function regularly as per user’s need.
After decompressing update file package, copy
the file named “dvrupgrade” to root directory of
Insert the U flash disk into USB port
support the three abnormal types:
Disk No Space, Disk Error and Video Loss.
select [Enable] or [Disable]
you can set how long the buzzer will
sound when external sensor alarm is
You can set show message on the
screen when sensor alarm is detected.