Getting Started
370B User Manual 1-11
The stationary and intermediate sections for both sides are shipped as a matched
set and should not be separated. The package includes matched sets for both
sides and mounting hardware. To identify the assemblies, note that the automatic
latch and intermediate section latch stop holes are located near the top when the
matched sets are properly mated to the chassis sections.
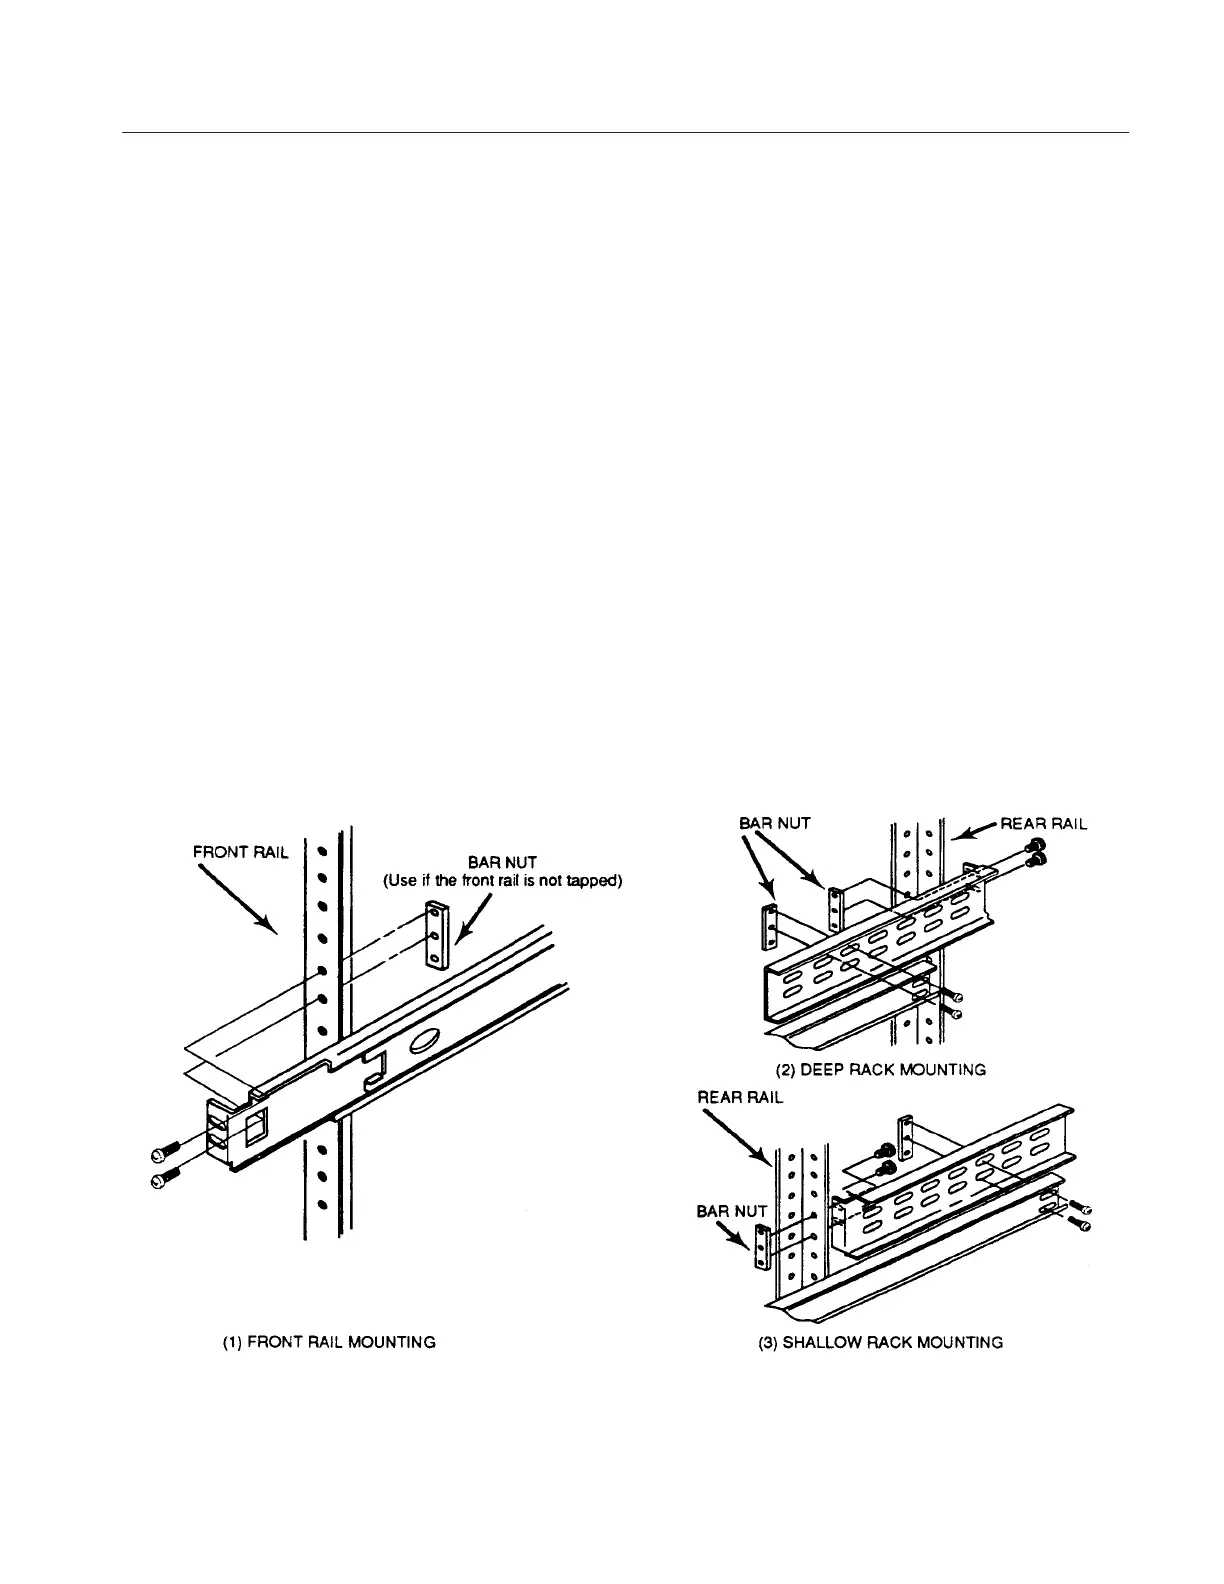
To mount the instrument in a rack, perform the following:
1. Select the appropriate holes in the rack rail, using Figure 1–3 as a guide.
2. Mount the stationary–track sections to the front rack rails with truss head
screws (and bar nuts, if necessary).
3. Mount the stationary–track sections to the rear rails, using one of the
methods depicted in Figure 1–6Extend the instrument out of the rack by
pulling the rackmount latch releases on the front panel (see Figure I –2) out
to disengage the spring latches. Then, pull the instrument out. Note that the
rear mounting bracket can be installed to fit either deep or shallow cabinet
racks.
4. After mounting the instrument in the slide–out tracks, adjust for proper
width by loosening the front and rear screws and allowing the slides to seek
the proper width. Center the instrument, then tighten the screws.
Figure 1-6: Mounting Stationary rackmount Sections