User Manual CXE85X
59300464 Rev.005
9.12.2013 13(44)
Establishing connection
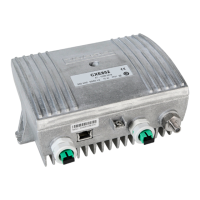
Ethernet port
The Ethernet port of CXE85x supports both 10 and 100 Mbps half and full
duplex standard Ethernet connection. The port has a Auto-MDI/MDI-X feature,
thus the connection between CXE85x's RJ-45 port and a PC or Ethernet switch
can be made with either straight or crossed cable.
There are two LEDs in the RJ-45 connector:
− Green led: Link OK, blinking means activity
− Yellow led: Speed 100 Mbps
DHCP / AutoIP
CXE85x can be configured to obtain its IP address automatically with its built-in
DHCP client. Another possibility is to manually set the IP settings.
The DHCP client makes it possible to install the unit without a PC, without
making any communication settings. Only plugging in the Ethernet cable,
checking that the green link led lights up and writing down the MAC address is
needed. The MAC address is visible on the sticker next to CXE85x's Ethernet
port and can later be used to identify the unit and assign it correct IP address
via the DHCP server configuration.
The DHCP client with AutoIP feature is enabled by default and has essentially
the same functionality than in e.g. Windows PC. First the DHCP client tries to
connect to a DHCP server to obtain an IP address, netmask and gateway
settings. If CXE85x is not able to find a DHCP server within ~1 minute, it uses
the AutoIP feature: sets netmask to 255.255.0.0 and finds the first free IP
address in the AutoIP address space, usually 169.254.1.1.
A Windows XP / Vista / 7 / 8 PC in a typical configuration (DHCP enabled) uses
the same AutoIP range it if cannot find a DHCP server. Thus the initial
configuration of a CXE85x is simple: established communication link by simply
connecting the PC and CXE85x together with a straight or crossed Ethernet
cable.
Depending on the PC settings, it may require up to minute or two for the DHCP
client to fail and go to AutoIP mode. Some systems may in certain situations
even require that the Local Area Connection is briefly disabled and enabled
again via Control Panel.
Initial connection to CXE85x can be naturally established also by manually
configuring the PC's IP address settings so that it belongs to the AutoIP subnet,
i.e. IP 169.254.x.y and netmask 255.255.0.0.
Note that the AutoIP subnet is not routable, thus it requires a direct cable
connection between PC and CXE85x.