5 First steps
27
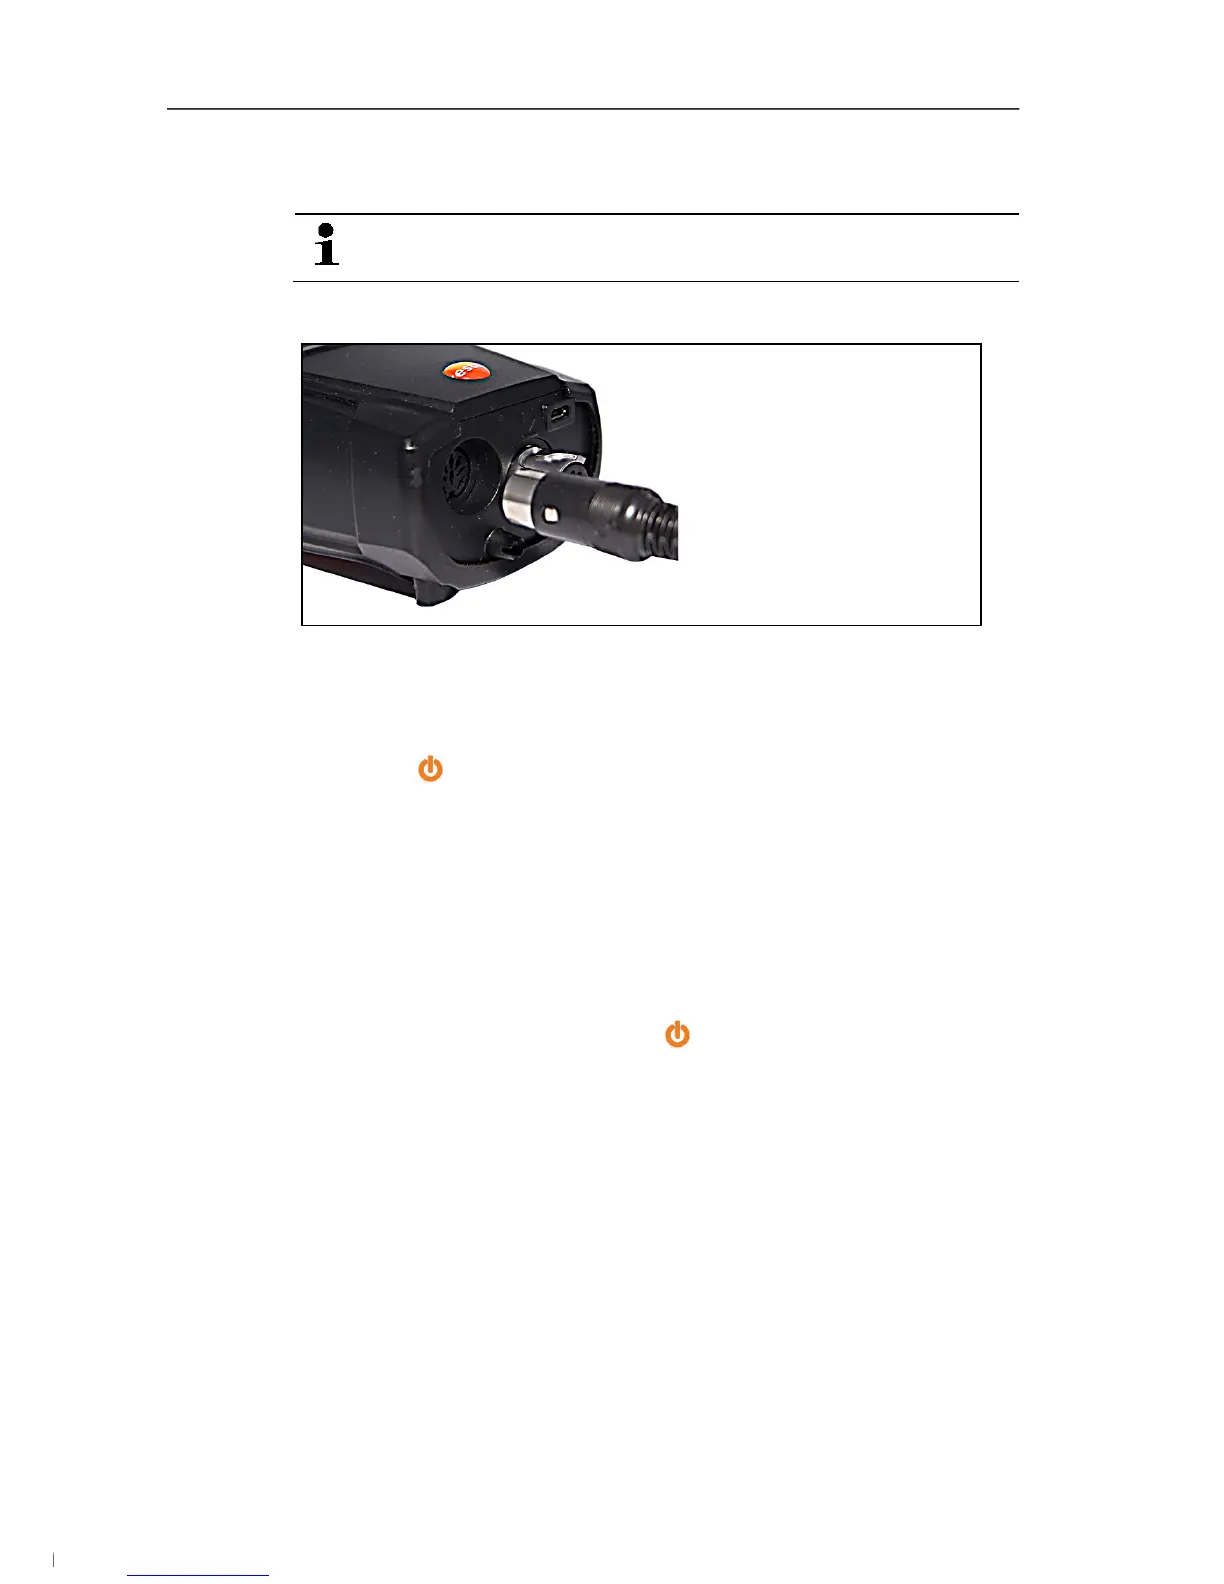
> Insert the connector plug into the flue gas socket and lock by
slightly turning it clockwise (bayonet lock).
There must be no more than one extension lead (0554
1201) between measuring instrument and flue gas probe.
Connecting other sensors
> Insert the connector plug of the probe into the probe socket.
5.2.3. Switching on
> Press [ ].
- The start screen is displayed (duration: approx 15 s).
- During commissioning, when the instrument is switched on, the
Country version menu is displayed.
Set the country version:
1. Select the country version: [▲], [▼] → [OK].
2. Confirm confirmation request: Yes → [OK]
- The testo 320 switches off.
3. Restart instrument: Press [ ].
- If the voltage supply was interrupted for a longer period: The
Date/time menu opens.
- The gas sensors are zeroed.
- There is an instrument error: The Error diagnosis is displayed.
- The Measurement options menu is displayed.
5.2.4. Calling up the function
1. Select function: [▲], [▼].
- The selected function appears in a frame.
2. Confirm selection: [OK].
- The selected function is opened.
1.888.610.7664 info@Testo-Direct.com
www.Testo-Direct.com