41 42
How to Flash Firmware
How to Slice 3D Object for SD Print
To install firmware on your printer, you’ll need to download the following:
In this chapter, we’re going to use Marlin for demonstration.
Configuration downloaded from our Facebook page, customer
service, or software download page are pre-configured, you can use
it without any modification. We’re not going to go into details how to
configure from scratch.
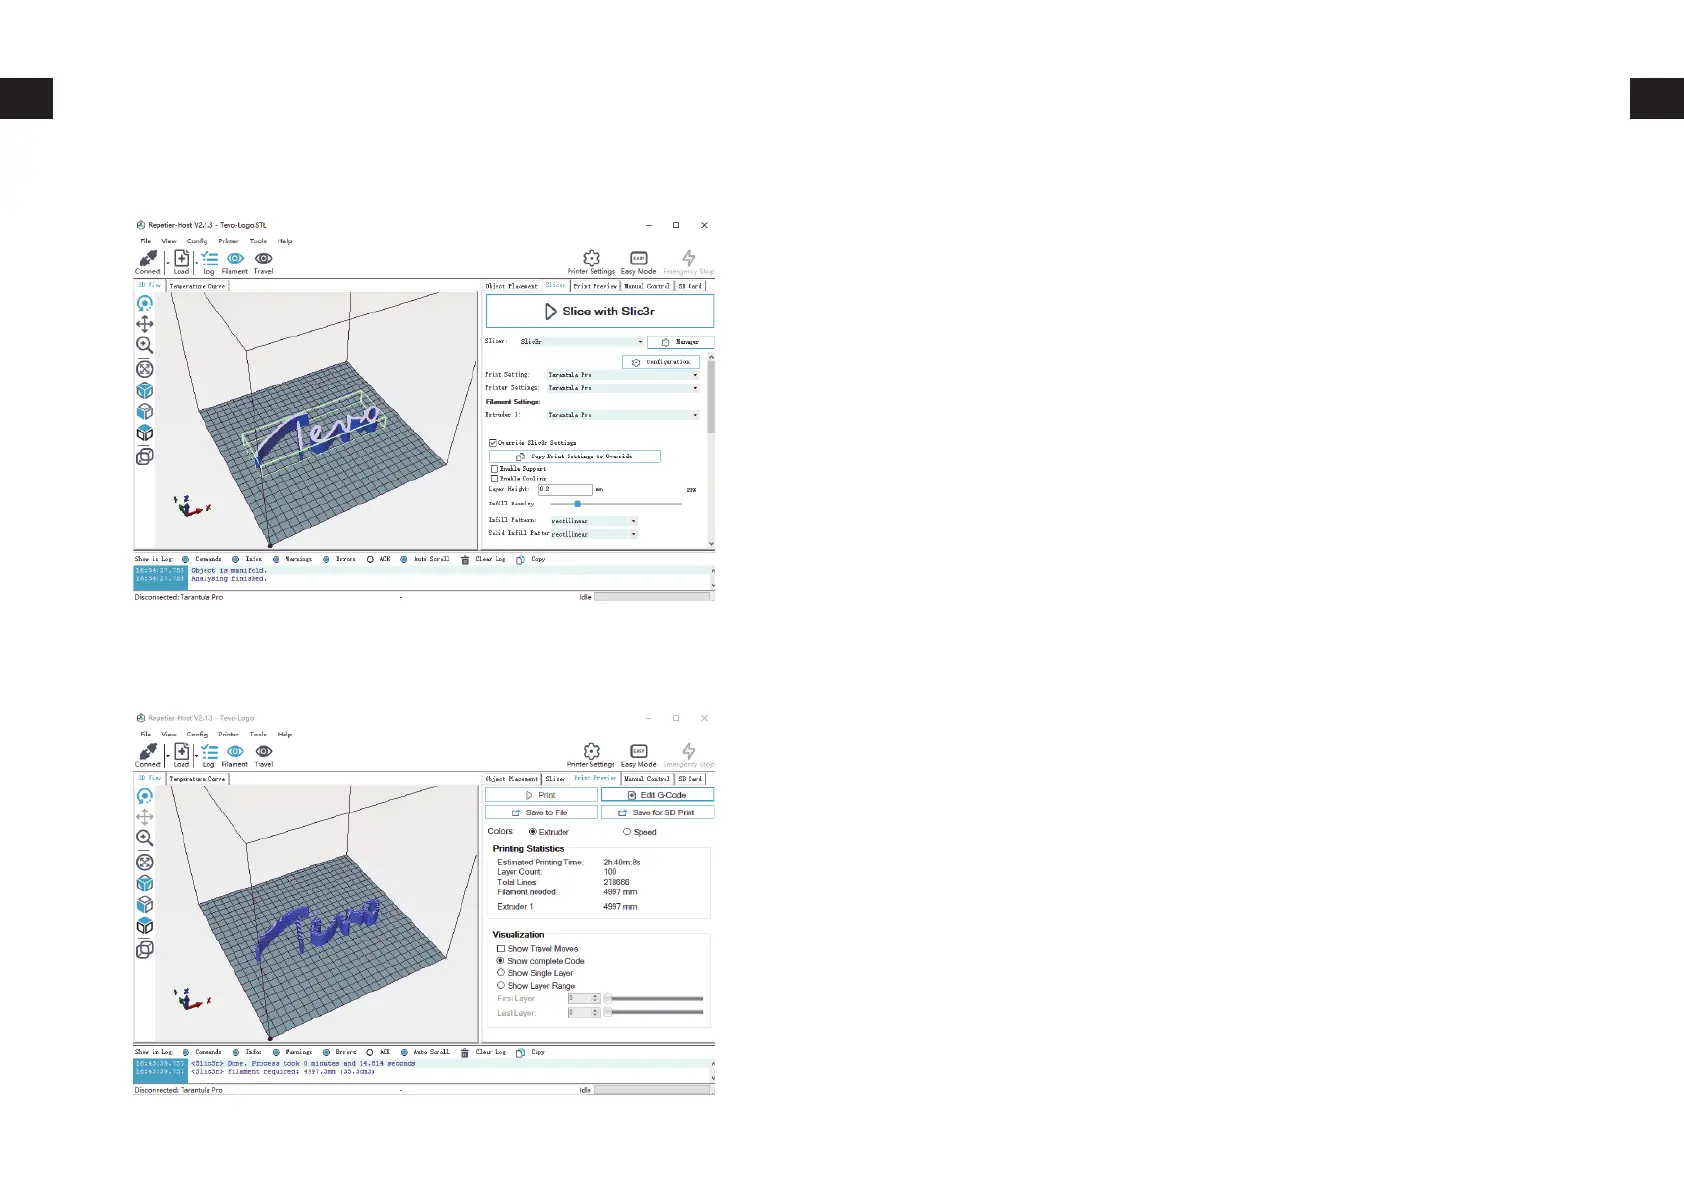
To start the process, do the following steps:
Choose the config saved in previous step. Then click on Slice with
Slic3r.
After slicing, click on Save for SD Print to save the G-code file to the
SD card with file name of your choice. Then you can insert the card
to your printer and choose Print from SD to start printing.
Arduino IDE (http://www.arduino.cc)
Firmware Source Code (You can get it from many sources, e.g.
our Facebook Page Files section, our Customer Service, Soft-
ware Download page on http://www.tevo.cn, or from Marlin
directly.)
1.
2.
1.
2.
3.
4.
5.
6.
7.
Connect your printer to your computer with USB cable supplied.
Double-click Flash.ino (or Marlin.ino) file to open it in Arduino
IDE.
Select Arduino/Genuino Mega or Mega 2560 from Tools ->
Boards menu.
Select the serial (USB) port that your board is connected to in
Tools -> Serial Port menu.
Click on Verify/Compile button at the top of the window to
make sure there are no configuration errors. (If failed to compile,
please make sure you are using Arduino IDE 1.8.5 or up.)
After it compile successfully, click on Upload button.
Waiting for Arduino IDE to show Done uploading.