www.ti.com
Connecting to the Advanced Remote Control
1. Press SW2 to start scanning for the remote. (A blinking red LED indicates scanning.)
2. Press any key on remote to start advertising.
3. Verify a green LED, which indicates a successful connection.
3.2.2 Connecting Devices Already Bonded
If an HID dongle and an advanced remote previously paired and stored bonding data, then the HID dongle
will continuously scan for this specific advanced remote. When in this continuous scanning mode, the HID
dongle will blink the green LED once per second.
An HID dongle only stores pairing information for one remote, so other remotes will be unable to connect
to the HID dongle until the bonding info is cleared.
3.2.3 Disconnecting
Pressing SW2 on the dongle disconnects it from the advanced remote control and returns to scanning,
while retaining long-term bonding information.
Because the advanced remote and the USB dongle are bonded and notifications are enabled on the
remote, activating the advanced remote control causes it to start advertising, reconnect, and immediately
transmit the button presses recorded while disconnected.
3.2.4 Removing Long Term Bond-Data
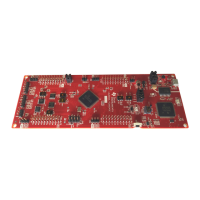
Pressing SW1 (see Figure 3-2) while not connected erases the USB dongle's record of the long-term
bonding data stored for the advanced remote in the flash memory of the USB dongle.
This action does not affect the data stored on the advanced remote. See Chapter 5 for information on
erasing this data.
3.2.5 LED States
Table 3-1. LED States
LED Action HID Dongle State
Solid Red Idle
Blinking Red Scanning for any BLE advanced remote
Solid Green Connected
Blinking Green Scanning for previously bonded remote
3.2.6 Button Actions
Table 3-2. Button Actions
Button State Action
SW1 Idle Erase bonding info
SW2 Idle Start scanning
SW2 Connected Disconnect
11
SWRU343A–April 2013–Revised June 2015 Using the CC2540 USB Dongle
Submit Documentation Feedback
Copyright © 2013–2015, Texas Instruments Incorporated