10
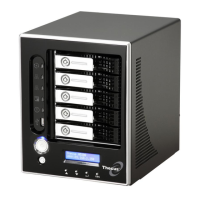
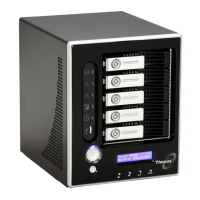
Front Panel
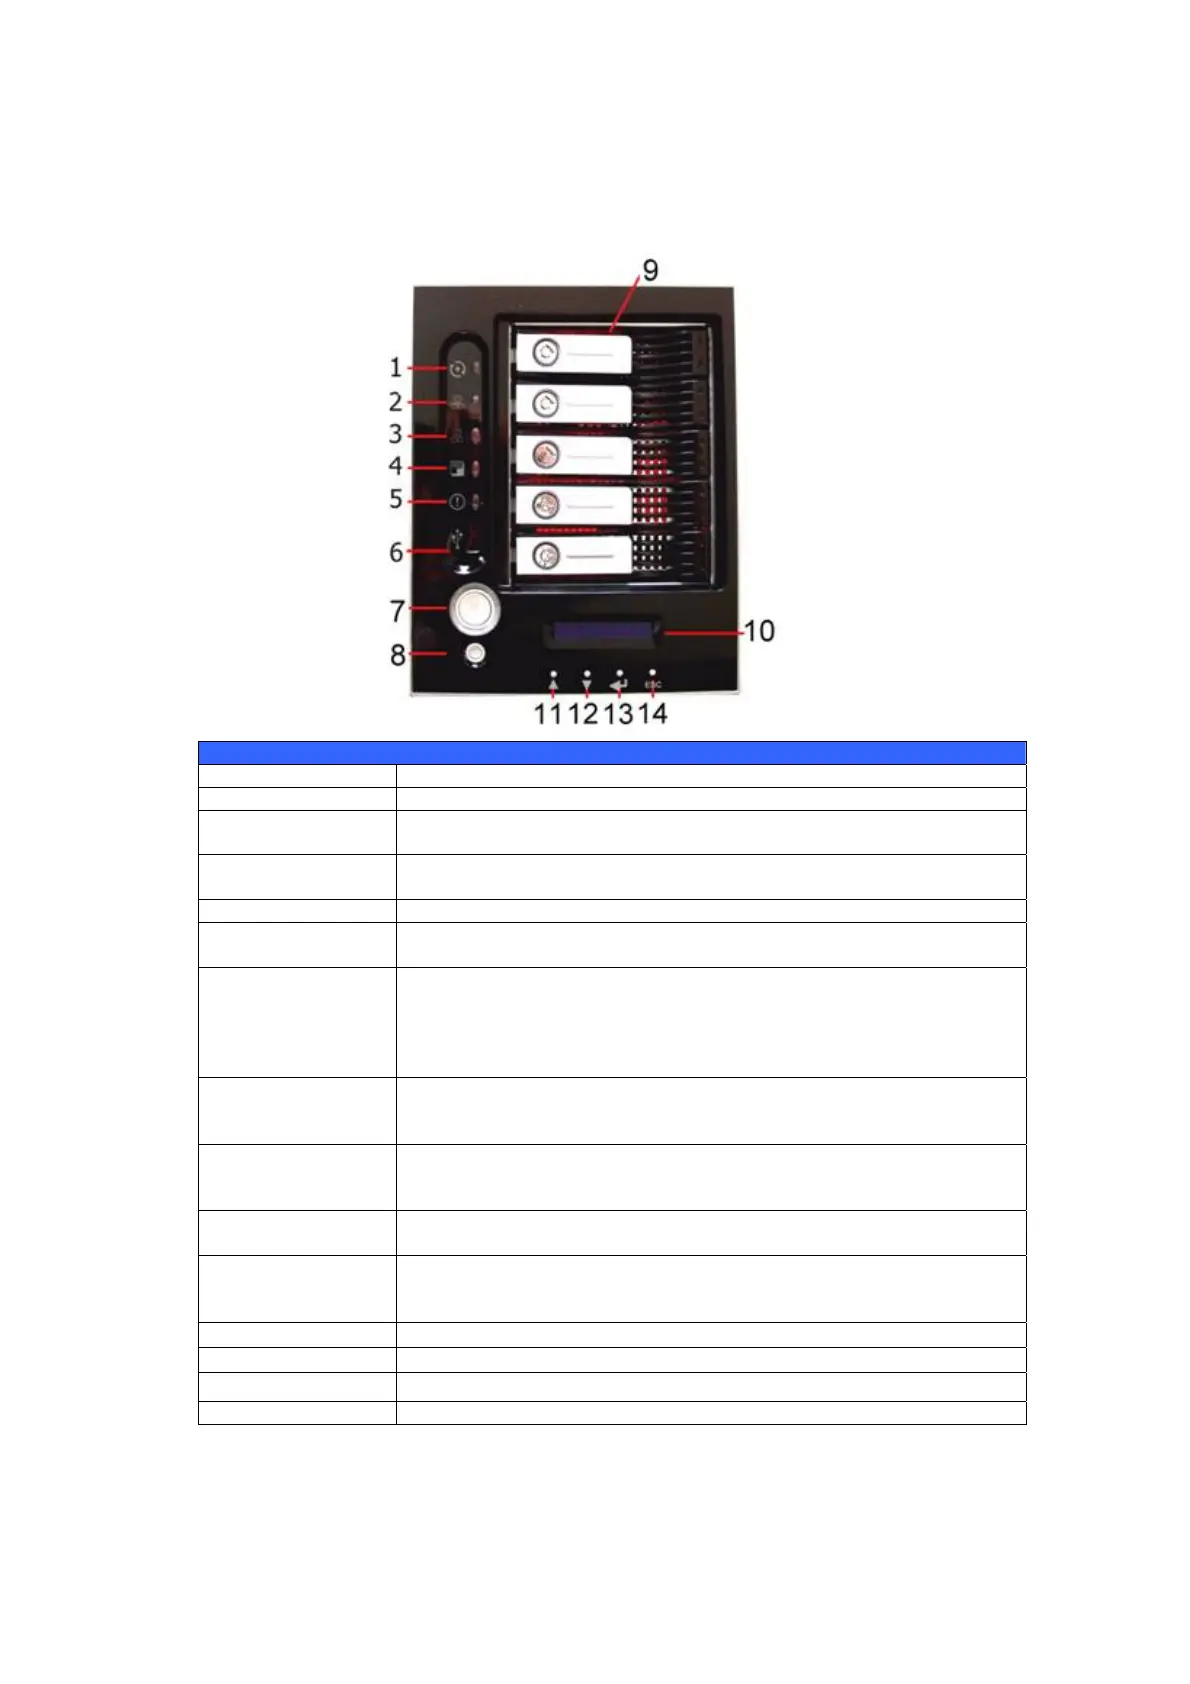
The Thecus N5200PRO’s front panel has the device’s controls, indicators, and
hard disk trays:
Front Panel
Item Description
DOM LED • Solid orange: system is being upgraded
WAN LED
• Solid green: network link
• Blinking green: network activity
LAN LED
• Solid green: network link
• Blinking green: network activity
USB Copy LED • Solid blue: files are being copied from a USB storage device
Busy LED • Blinking orange: system startup or system maintenance; data
currently inaccessible
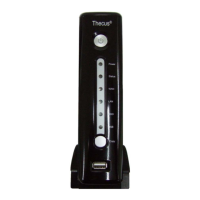
USB Port
• USB 2.0 port for compatible USB devices, such as digital
cameras, USB disks, USB printers, and USB wireless dongles*
Note: For supported USB wireless dongles, please contact
support@thecus.com
Power Button • Power on/off N5200PRO
• Solid blue: Device is powered on
• Blinking blue: eSATA hard disk is connected and active
Reset Button
• Resets the N5200PRO
• Press for five seconds during boot process to reset IP address
and admin password
HDD Trays • Five 3.5” SATA HDD trays
• Locks are provided for added security
LCD Display • Displays current system status and warning messages
• Displays hostname, WAN/LAN IP address, RAID status, and
current time
Up Button ▲
• Push to scroll up when using the LCD display
Down Button ▼
• Push to scroll down when using the LCD display
Enter Button ↵
• Push to confirm information entered into the LCD display
Escape Button ESC • Push to leave the current LCD menu