Manual 0-2450 23 CUSTOMER/OPERATOR
5.03 REPLACING CONSUMABLE TORCH PARTS
Disconnect primary power to the system before disassembling
the torch, leads, or power supply.
DO NOT TOUCH internal torch parts while the AC indicator on
the front panel of the power supply is lit.
The tip, gas distributor, and electrode are held in place by the
shield cup. Position the torch with the shield cup facing upward
to prevent these parts from falling out when the cup is removed.
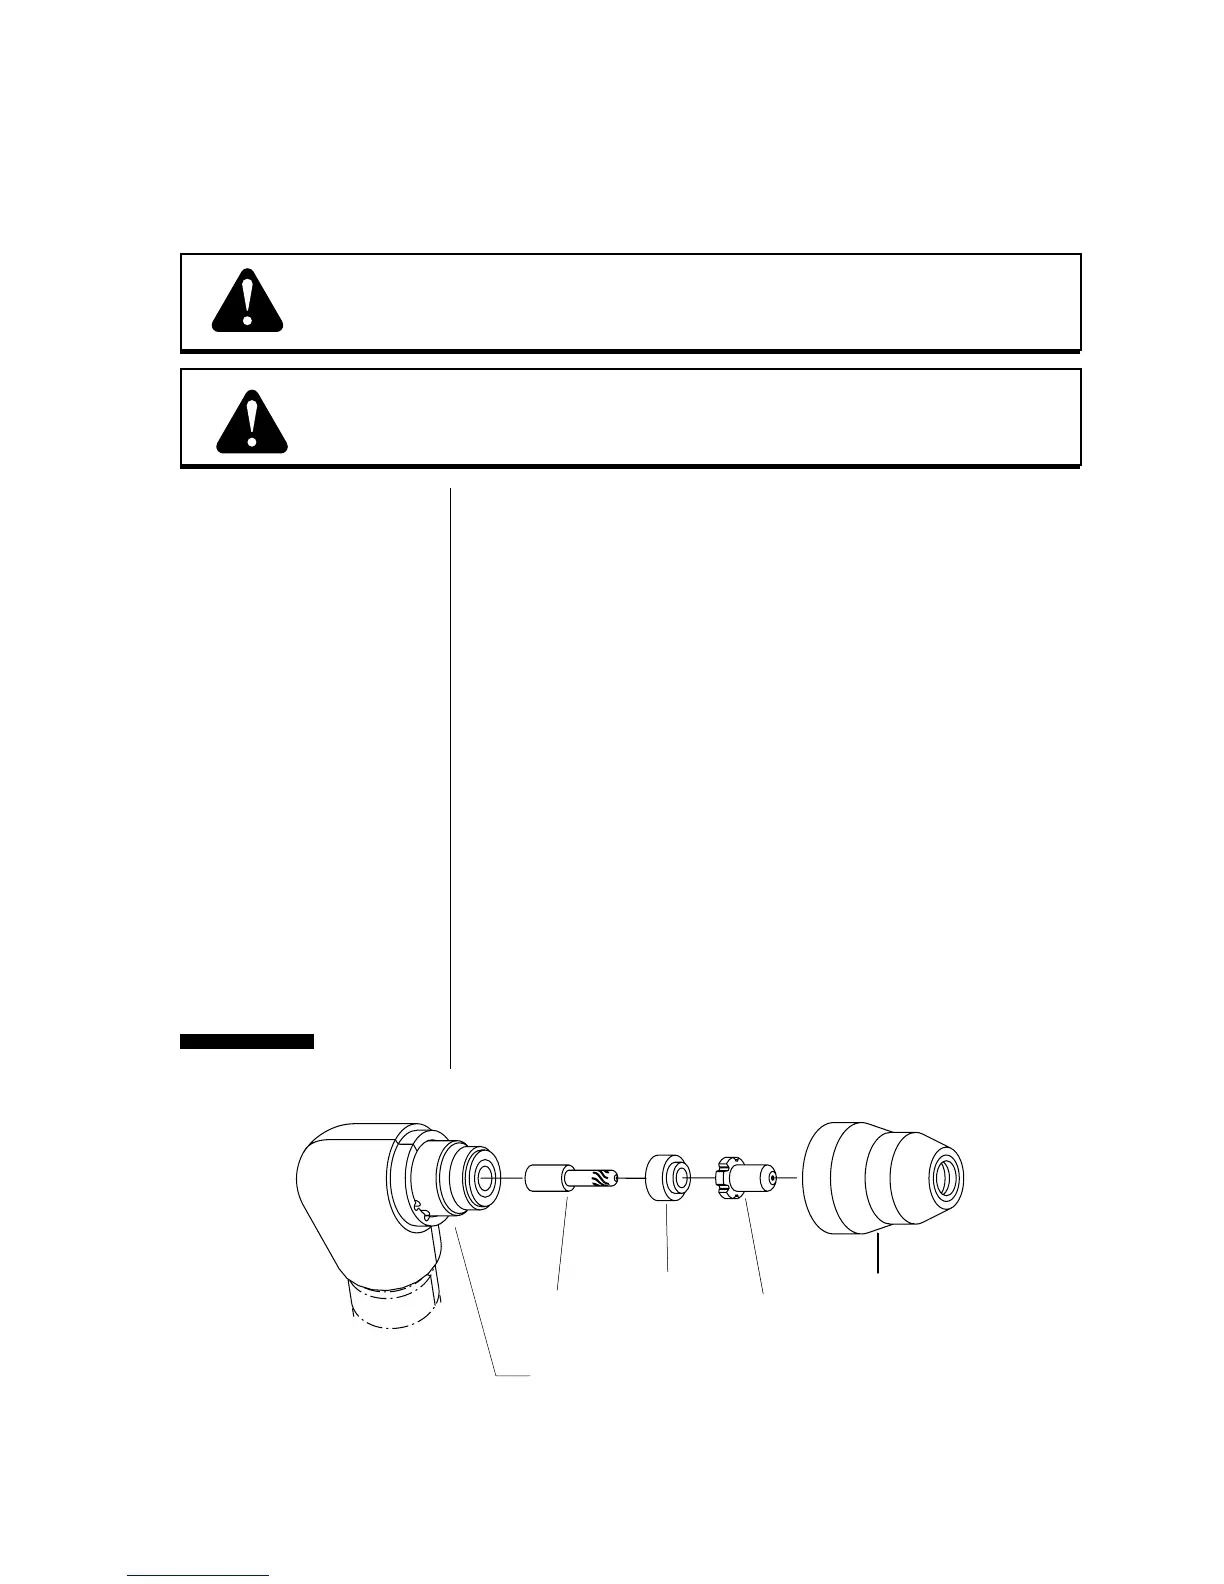
Refer to Figure 5-A and:
1. Unscrew and remove the shield cup from the torch. Inspect
the cup for damage. Wipe it clean or replace if damaged.
2. Remove the tip. Check for excessive wear (indicated by an
elongated or oversized orifice). Clean and replace the tip if
necessary.
3. Remove the gas distributor and check for excessive wear,
plugged gas holes, or discoloration. Replace if necessary.
4. Remove the electrode. The face of the electrode should not be
recessed more than 0.10 inch (2.5 mm). If it is worn beyond
this point it must be replaced.
5. Reinstall the parts and shield cup on the torch as shown.
Hand tighten the shield cup until it is seated on the torch
head. If resistance is felt when installing the cup, check the
threads before proceeding with installation.
Improper assembly or use of non standard torch parts can cause
the torch head to short and may overheat or damage the torch.
WARNING
WARNING
NOTE
CAUTION
Figure 5-A Torch Consumable Parts
Torch Head Assembly
Standard
Shield Cup
Gas
Distributor TipElectrode
A-00780